


You don’t need a five-figure landscaping budget to fall in love with your backyard. Some of the most charming, functional outdoor spaces are built from reclaimed wood, secondhand furniture, and a little creative problem-solving. Thoughtful design isn’t about how much you spend — it’s about how intentionally you use what you have, and a yard shaped by resourcefulness often ends up with more personality than one furnished straight from a showroom catalog.
This guide gathers fifteen distinct backyard concepts, each built around affordable, accessible materials: pallet wood, repurposed containers, pea gravel, reclaimed brick, and thrifted furniture. Every idea here proves that a modest budget and a bit of DIY effort can produce a backyard that feels warm, textured, and genuinely lived-in — whether your priority is a cozy seating nook, a productive garden, or simply a shaded spot to relax after work.
Whatever your yard’s size or your skill level with a hammer, there’s a concept below you can adapt. Read on for fifteen budget-friendly backyard transformations, each paired with practical tips to help you bring it to life.
1. DIY Pallet Wood Seating Area with Fire Pit
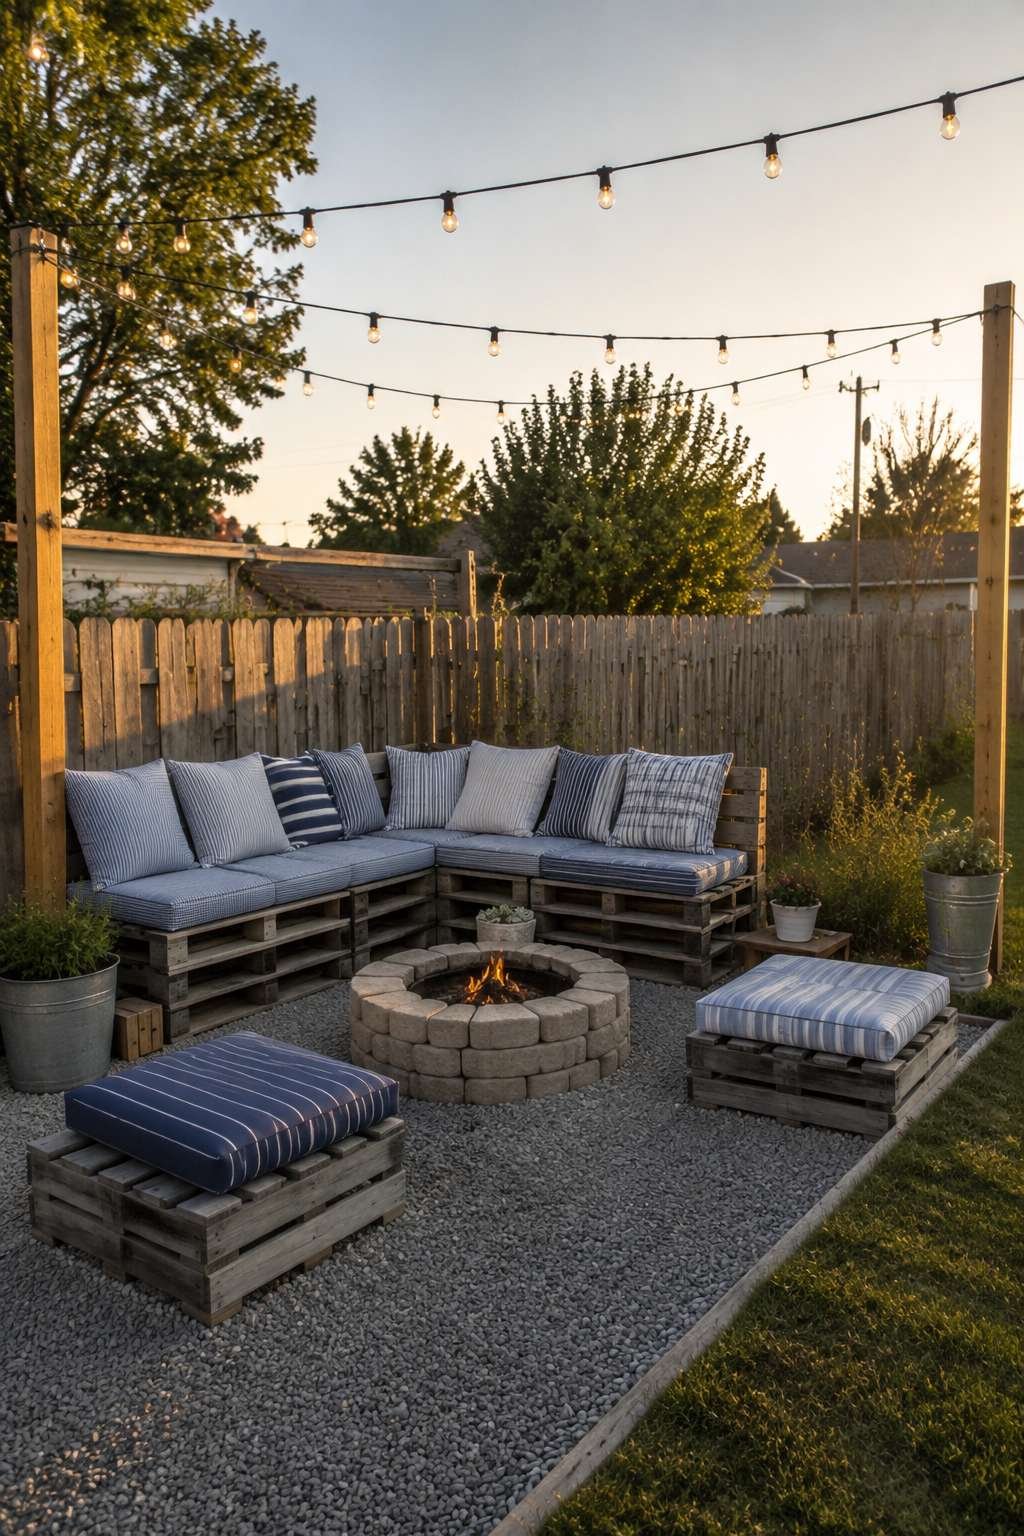
There’s a rustic honesty to a seating area built from reclaimed pallet wood, especially when it’s finished with a weathered grey stain that lets the natural grain show through. This design arranges simple pallet benches around a modest fire pit made from stacked concrete pavers, creating a low-cost gathering spot that still feels intentional and inviting. The stacked pavers require no mortar or special tools, making this one of the most approachable DIY projects on this list.
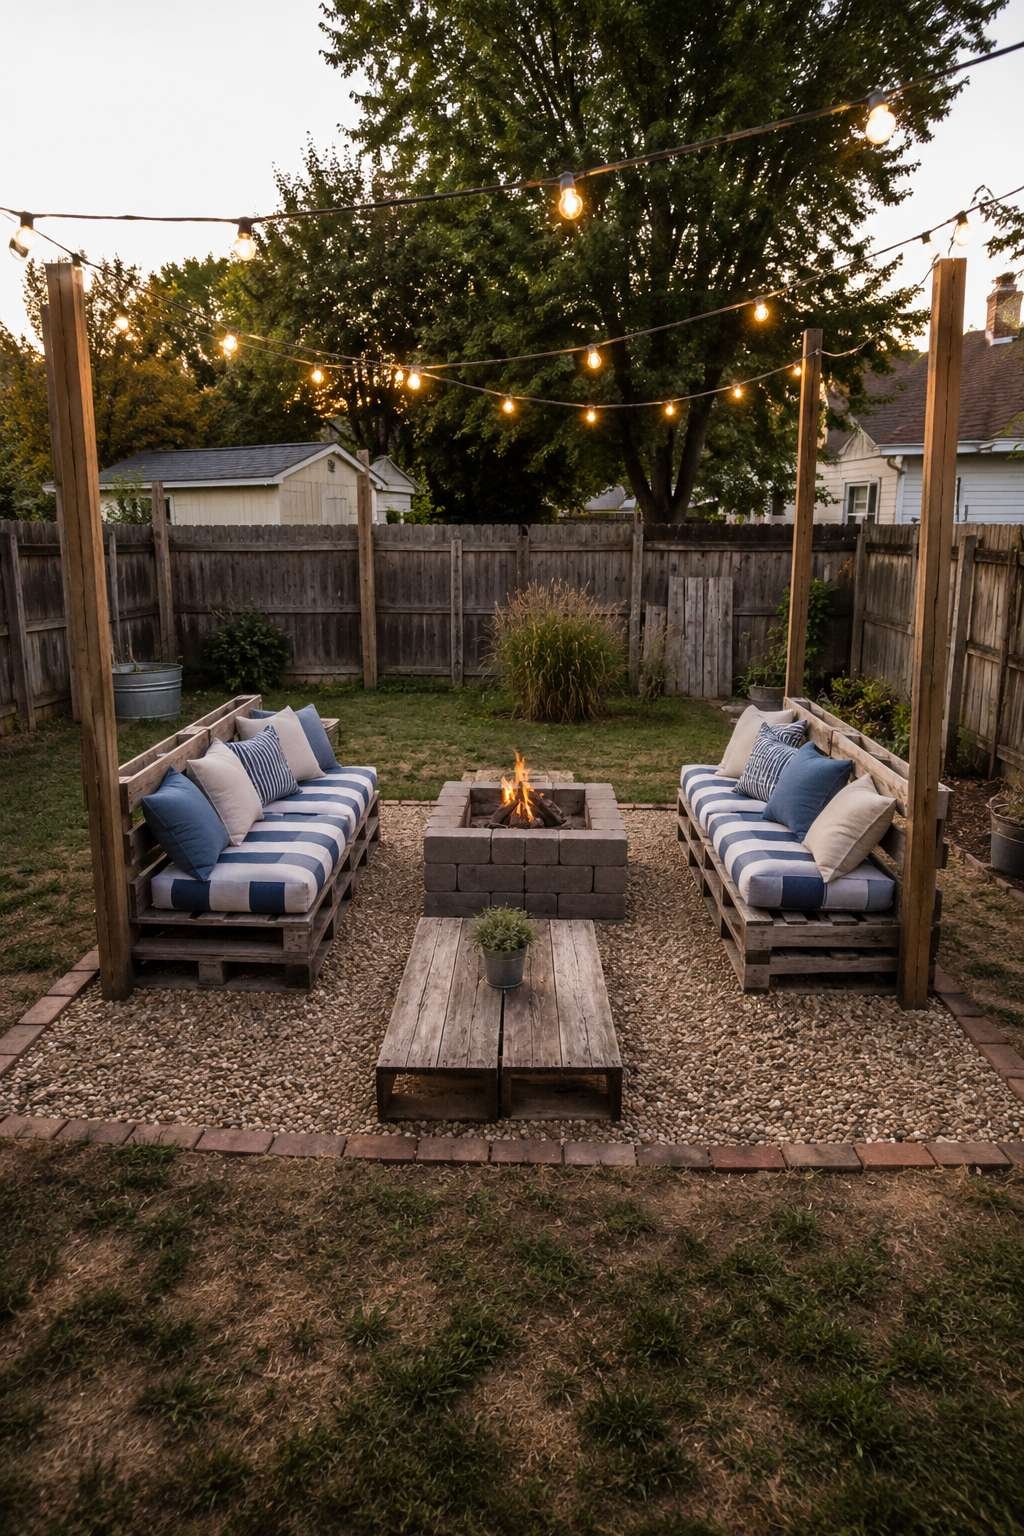
Comfort comes from mismatched outdoor cushions in faded blue and white stripes, a look that embraces imperfection rather than hiding it. Overhead, string lights zigzag between two simple wooden posts, instantly extending the space’s usability into the evening hours without the expense of permanent electrical work. As golden hour sunlight rakes across the modest lawn, it casts long shadows that give even a small, budget-built seating area a sense of warmth and depth.
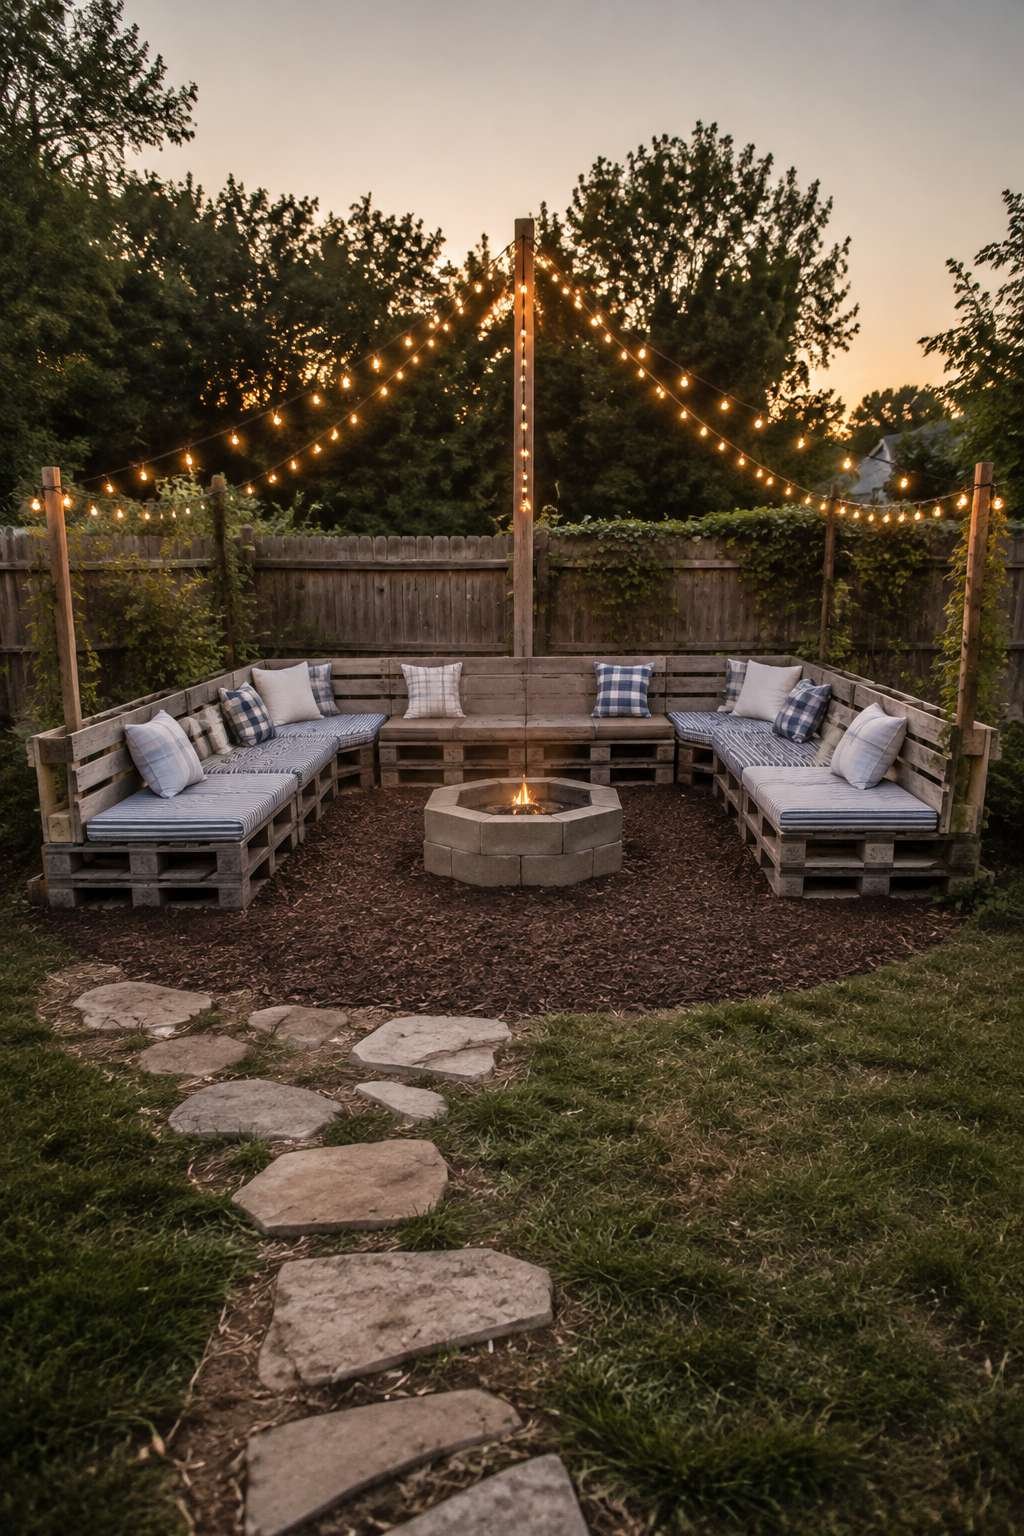
What makes this design so accessible is its reliance on materials many people already have on hand or can source for free — pallets are frequently available from local businesses, and paver stones cost only a few dollars each. The mismatched cushion approach also means you can build the seating area gradually, adding pieces as you find them secondhand or on sale.
Key Design Tips:
- Sand and seal pallet wood before staining to prevent splinters
- Stack pavers in a simple ring, leaving gaps for airflow beneath the fire
- Mix cushion patterns intentionally rather than trying to match them
- Hang string lights on a timer for effortless evening ambiance
- Keep the fire pit at least ten feet from any wood structure or fence
2. Container Garden from Repurposed Crates and Buckets
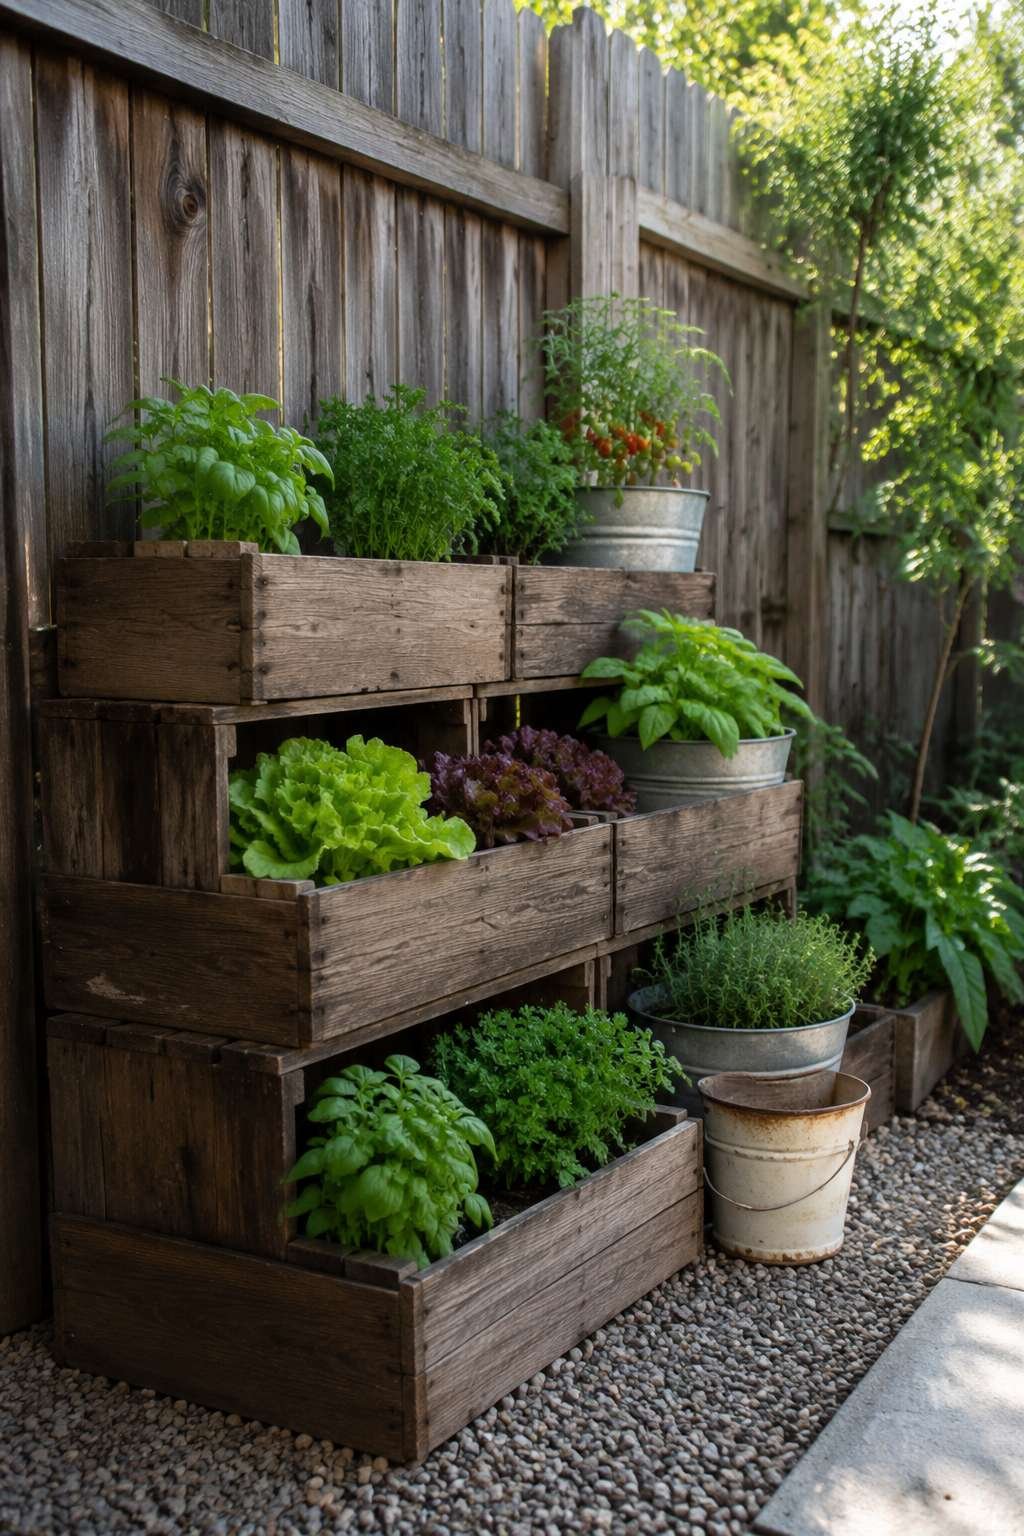
Few backyard upgrades deliver as much charm per dollar as a container garden built from repurposed wooden crates and old metal buckets. Arranged in tiered rows against a plain wood fence, this design turns what might otherwise be a forgotten corner into a productive, visually rich growing space. The crates can often be sourced free from grocery stores or breweries, while buckets are easy to find secondhand or repurpose from household use.
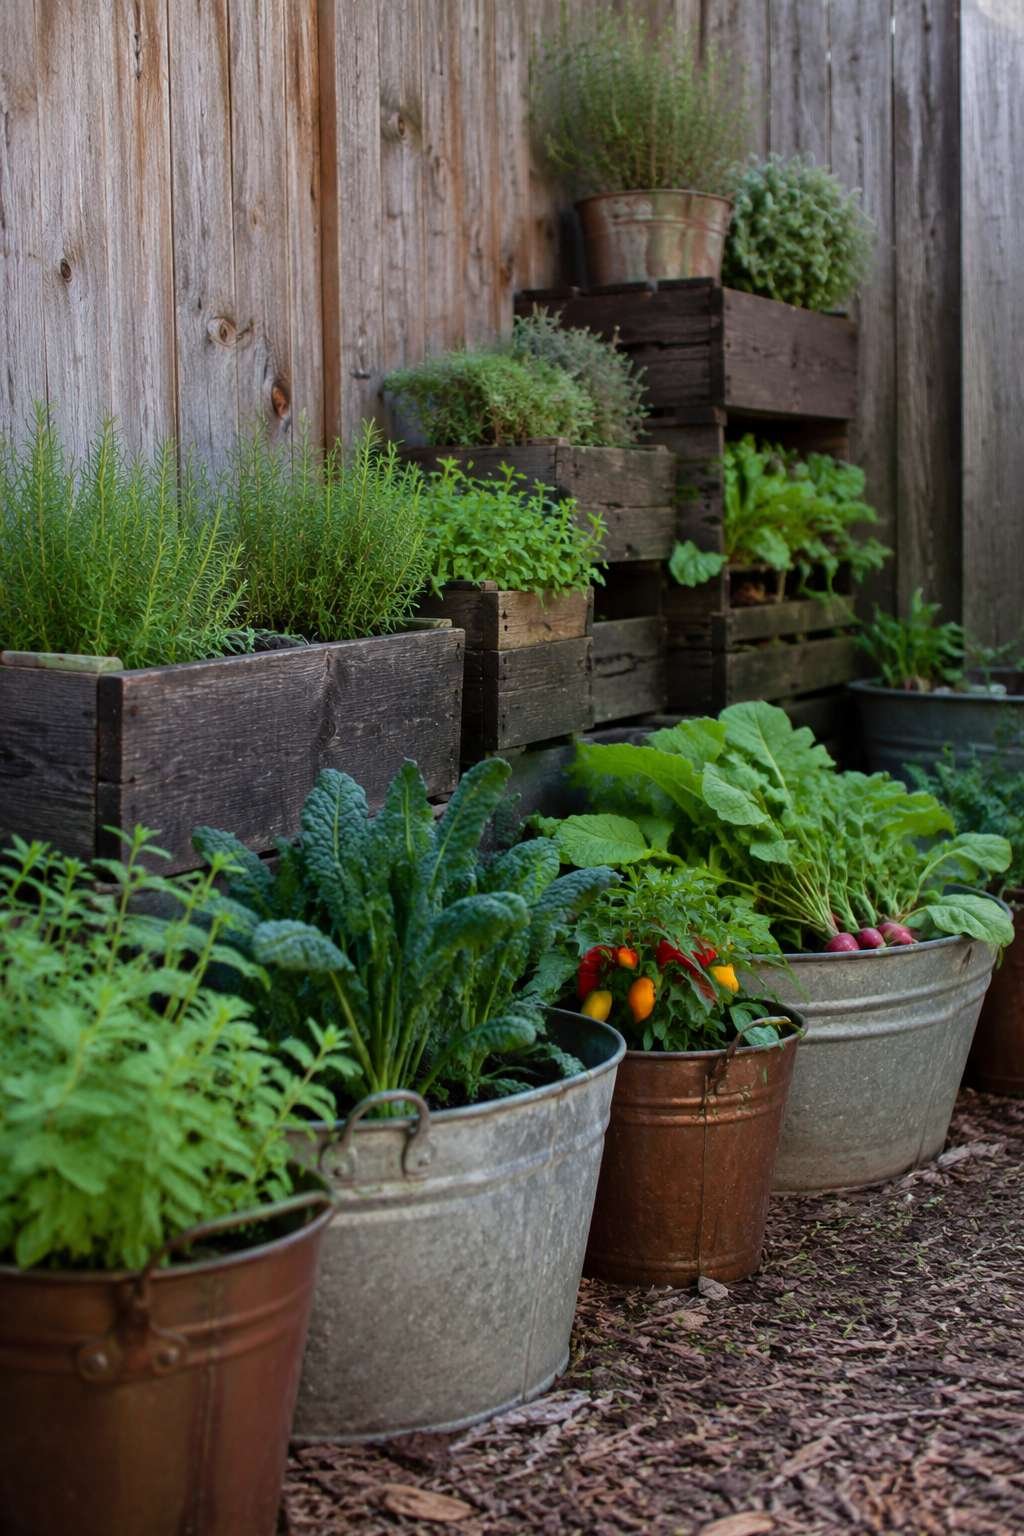
Soft morning light is especially flattering to this setup, highlighting the natural wood grain of the crates alongside the slight rust patina developing on the metal buckets — a detail that adds authentic character rather than looking like a flaw. Herbs and small vegetables thrive in this tiered arrangement, since the varying container heights allow each plant to receive adequate light without shading its neighbors. The plain wood fence backdrop keeps the visual focus entirely on the greenery and containers themselves.
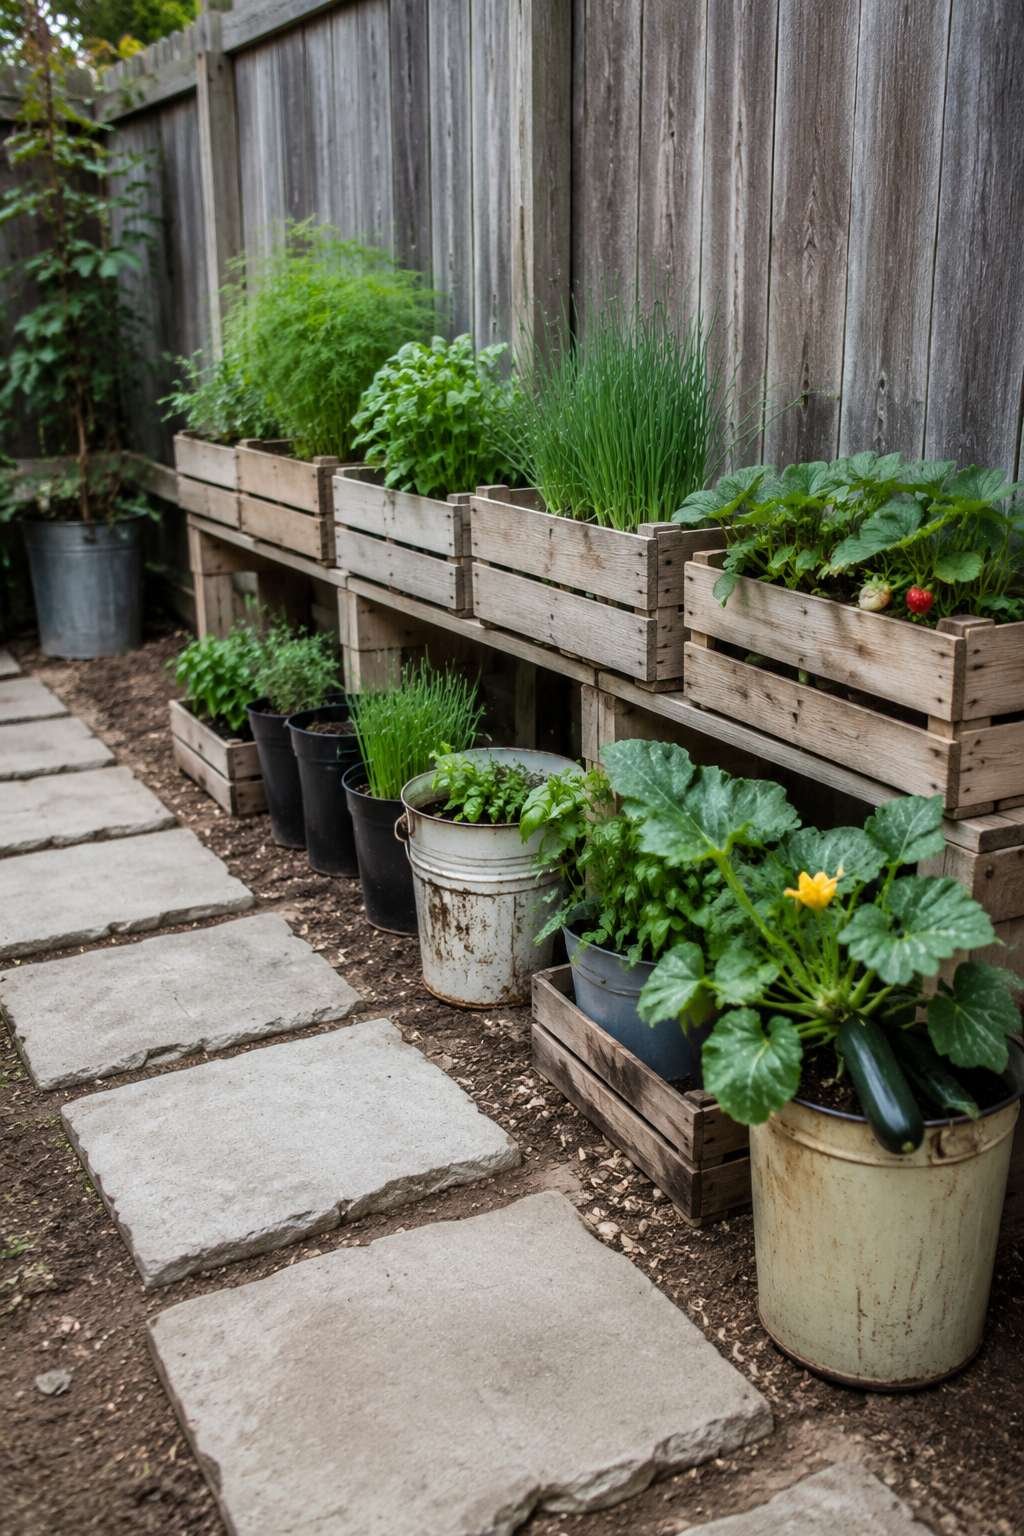
This concept is ideal for renters or anyone hesitant to commit to permanent garden beds, since the entire setup can be moved, expanded, or removed without leaving a trace. It’s also a wonderful way to grow food in a small footprint, making it especially practical for suburban lots or yards with limited soil-friendly ground space.
Key Design Tips:
- Drill drainage holes in metal buckets before planting
- Arrange containers in tiers so shorter plants aren’t shaded out
- Line crates with landscape fabric to extend their usable lifespan
- Group herbs and vegetables by watering needs for easier care
- Let buckets develop natural rust patina rather than painting over it
3. Budget Gravel Patio with Reclaimed Brick Edging
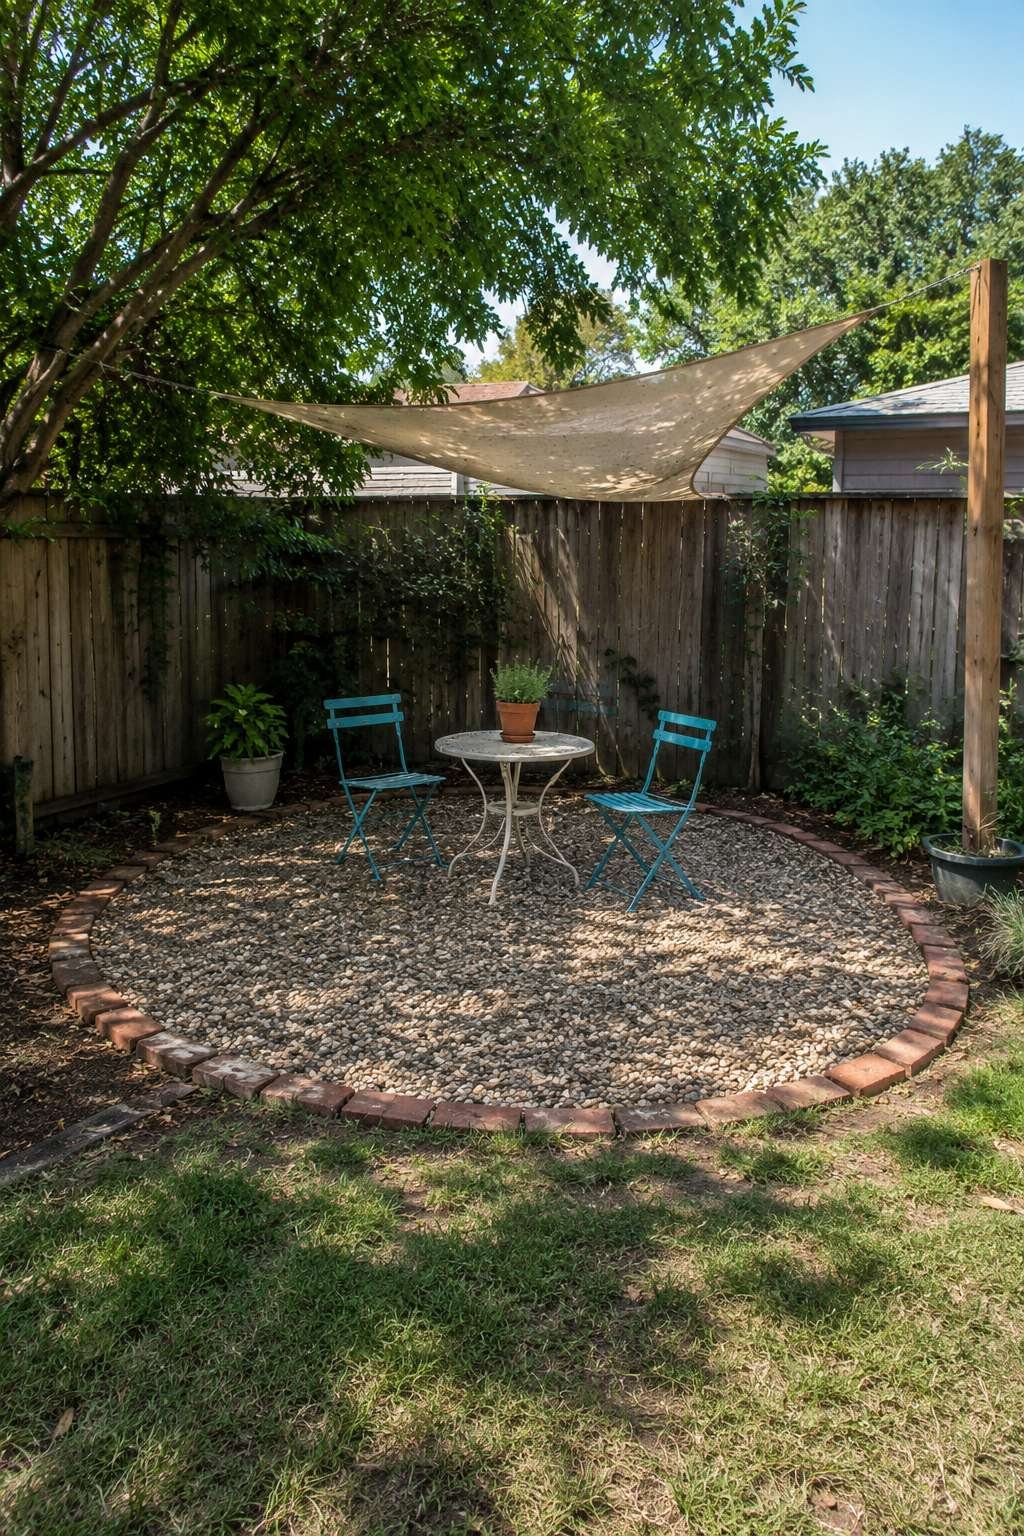
A gravel patio is one of the most cost-effective hardscaping solutions available, and this design pairs inexpensive pea gravel with reclaimed brick edging to give the space a finished, intentional border. Furnished with a simple bistro set made from painted thrifted metal chairs, the patio proves that a few coats of paint can transform mismatched secondhand furniture into a cohesive, charming set.
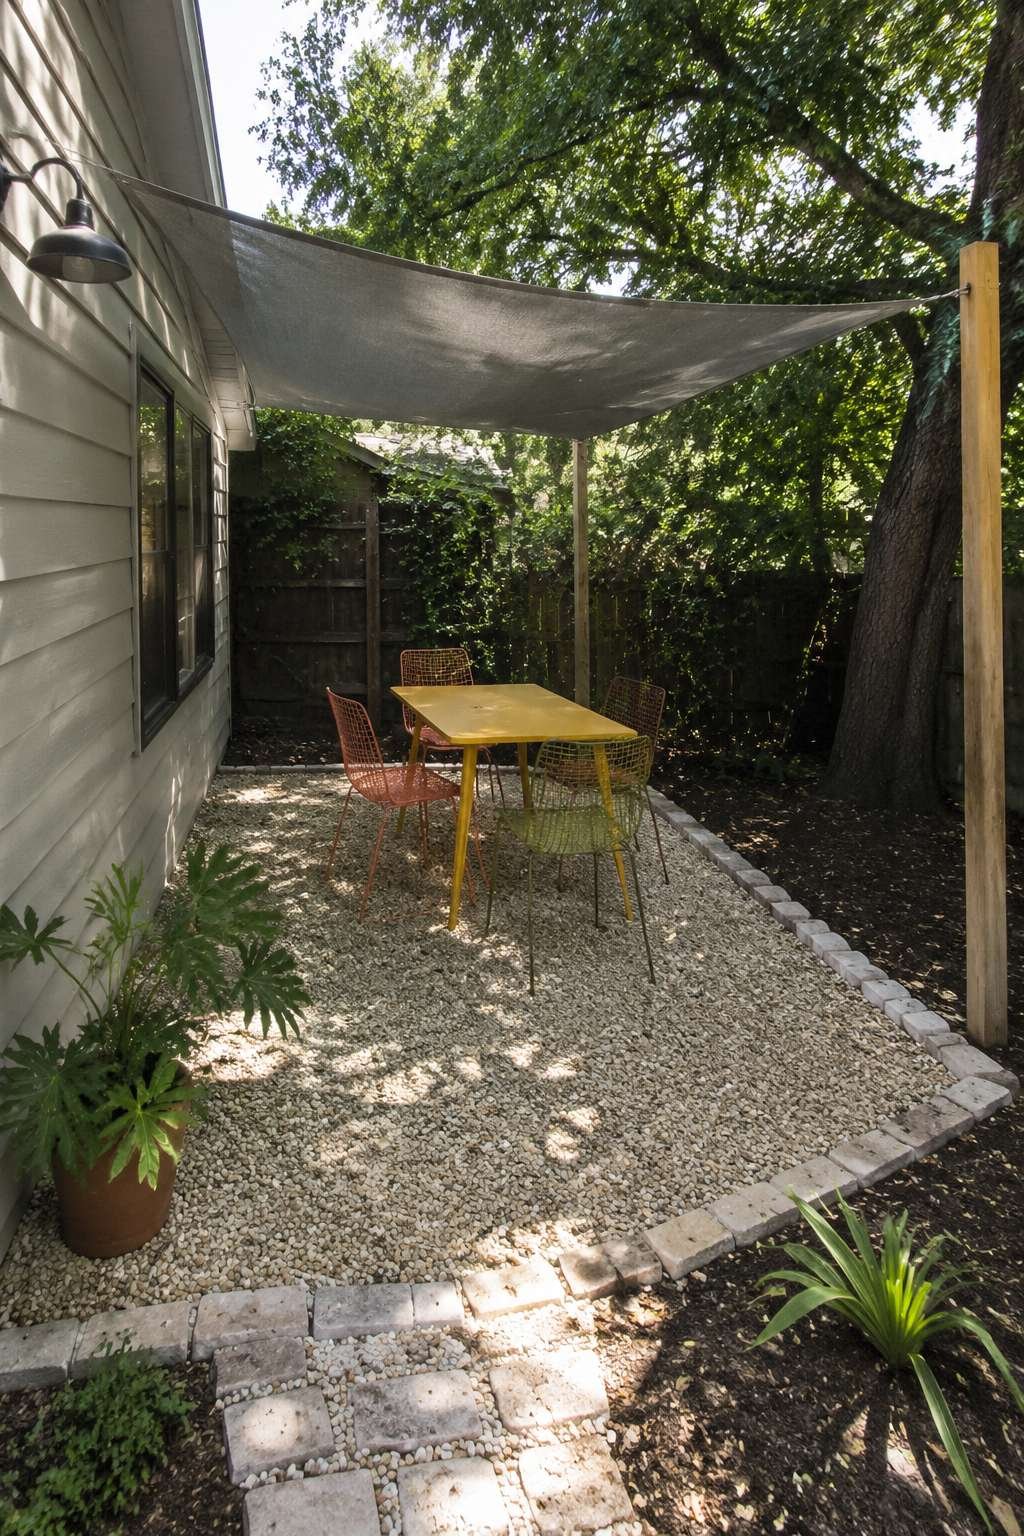
Overhead, a budget shade sail in faded canvas stretches across the seating area, offering relief from direct sun without the cost of a permanent structure. Natural daylight filters through nearby trees, creating dappled shadows across the gravel that shift gently throughout the day, lending the whole patio a soft, ever-changing texture. The reclaimed brick edging not only contains the gravel neatly but also adds a warm, earthy tone that complements the muted palette of the painted chairs.

Because gravel requires no mortar or professional installation, this is a genuinely weekend-friendly project for most homeowners. It’s particularly well-suited to yards with poor drainage or uneven ground, since gravel settles easily and handles moisture far better than a traditional lawn or poured concrete surface.
Key Design Tips:
- Lay landscape fabric beneath gravel to prevent weed growth
- Use reclaimed brick set on edge for a clean, defined patio border
- Paint mismatched metal chairs in a single unifying color
- Choose a shade sail with UV-resistant fabric for longer durability
- Rake gravel periodically to keep the surface even and tidy
4. DIY Vertical Pallet Garden Wall
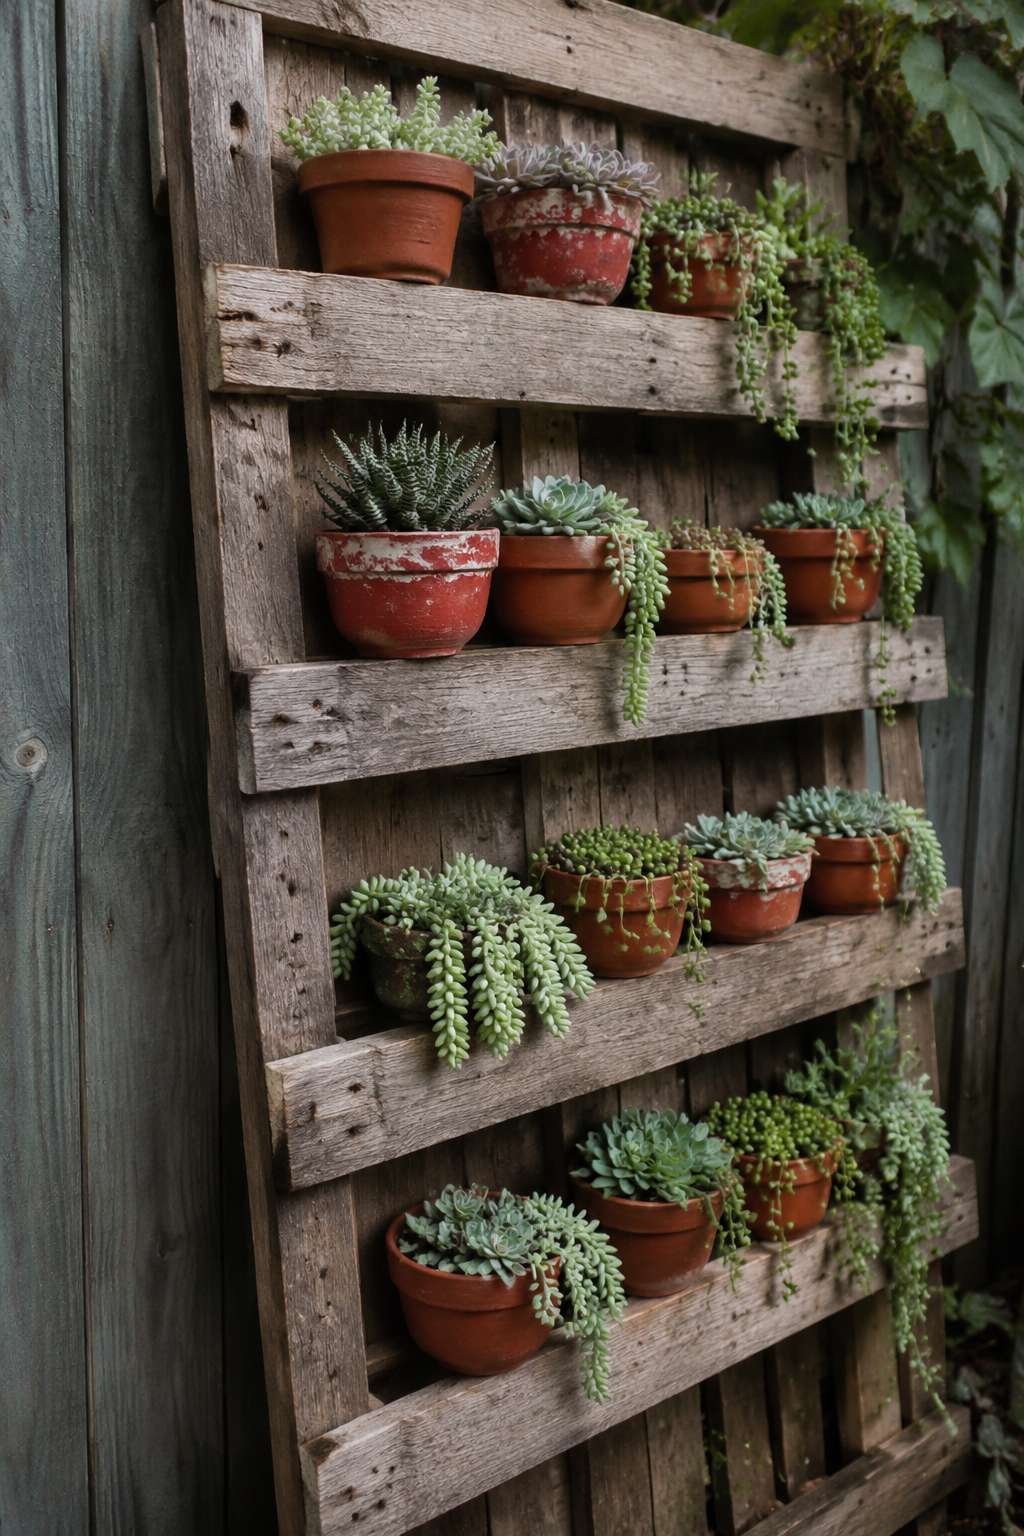
For yards with limited ground space, a vertical garden wall built from an old wooden pallet mounted against a fence offers a clever, low-cost solution. Filled with small potted succulents and trailing plants in mismatched terracotta pots, this design turns unused vertical real estate into a lush, textured feature that draws the eye upward. The pallet itself requires minimal modification — often just a light sanding and a secure mount to the fence.
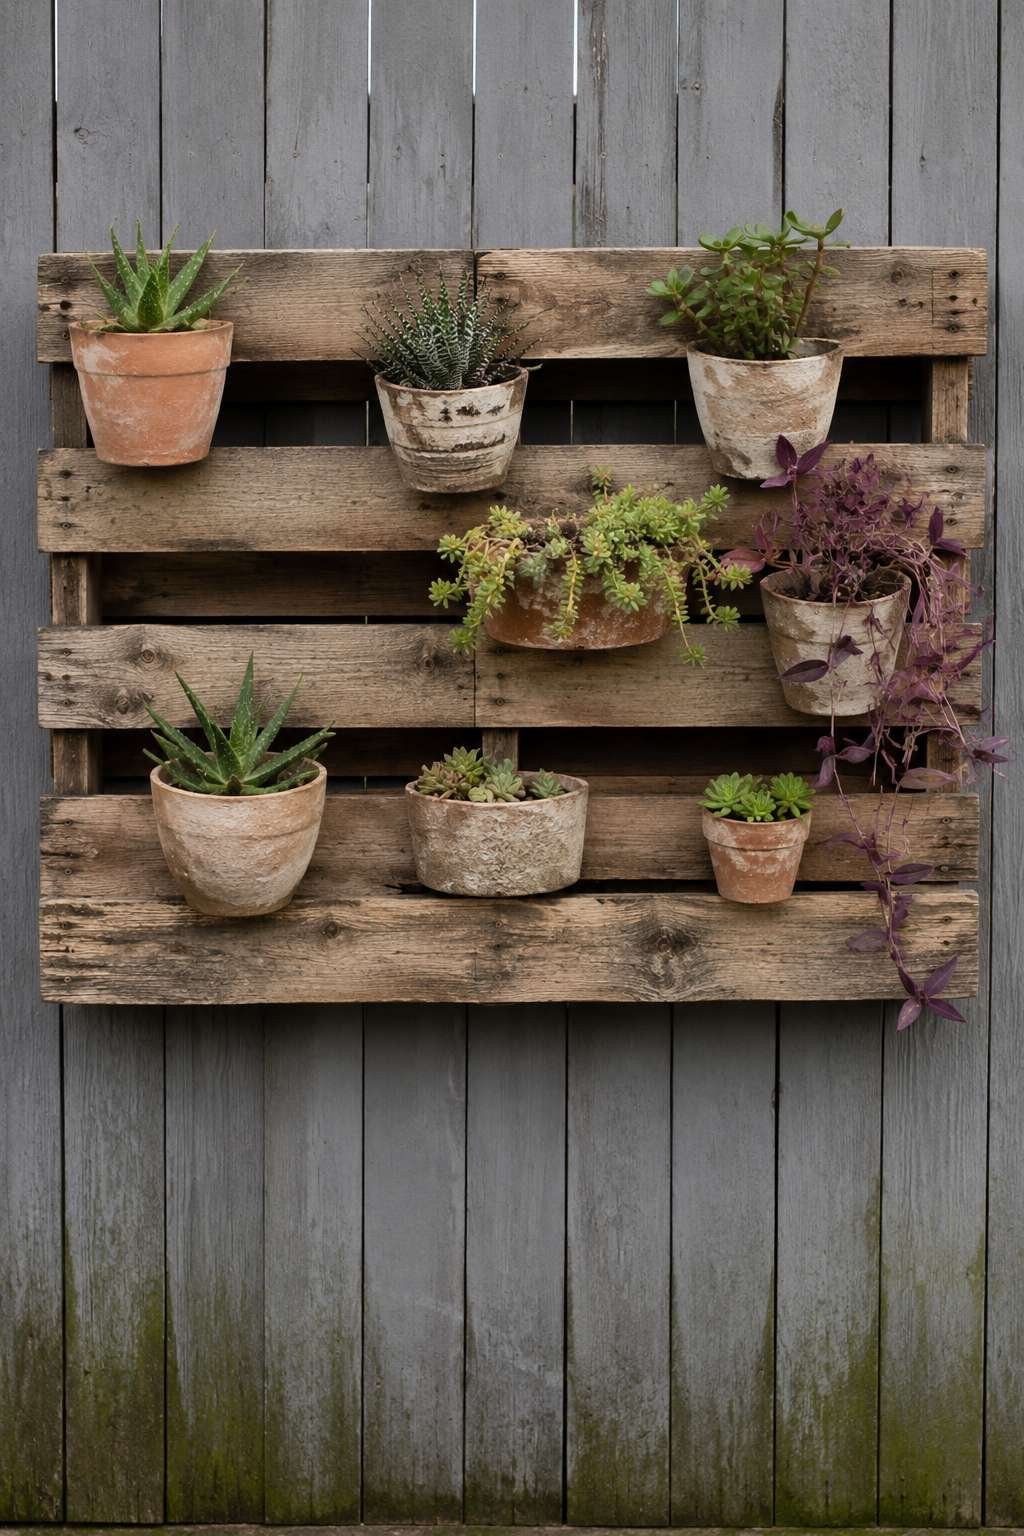
Soft diffused daylight plays beautifully across this setup, highlighting the natural wood texture and the subtle wear patterns that give a reclaimed pallet its character. The mismatched terracotta pots add warmth and an organic, collected-over-time feel, especially as trailing plants begin to spill over the pallet’s slats and soften its geometric lines. This is a design that rewards patience, becoming fuller and more textured as plants establish themselves.
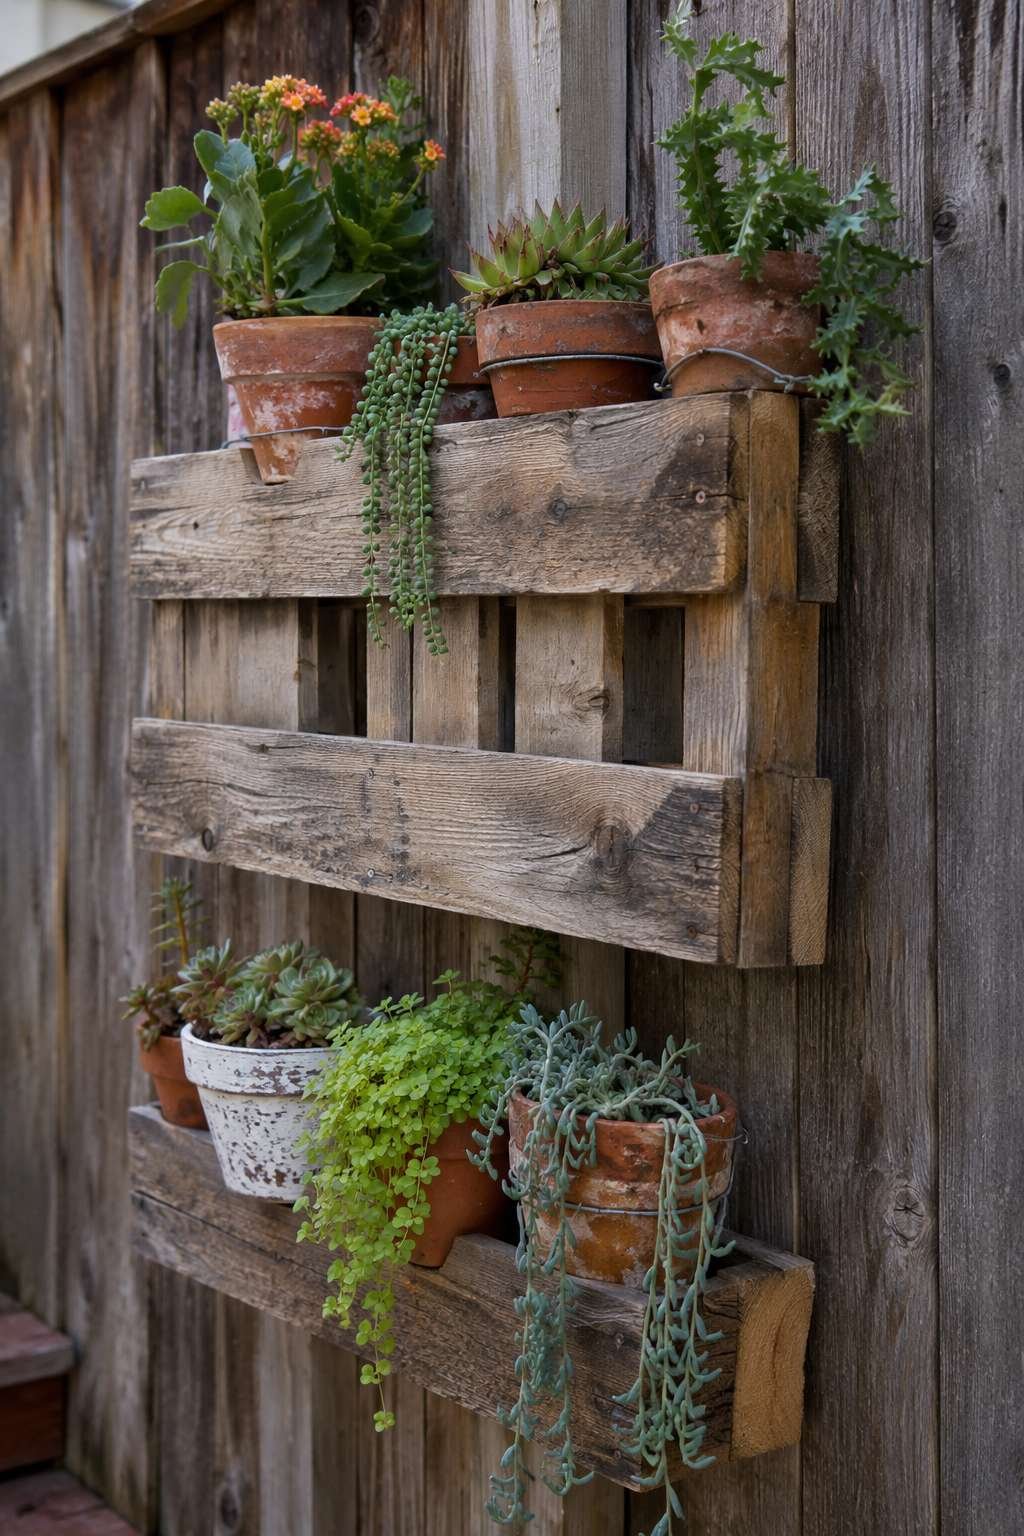
This concept is particularly valuable for small patios, narrow side yards, or rental properties where ground planting isn’t an option. Because succulents require minimal water and maintenance, the vertical garden also stays manageable even for those newer to gardening or short on time.
Key Design Tips:
- Secure the pallet firmly to wall studs or fence posts before planting
- Line pallet slats with landscape fabric to hold soil in place
- Choose trailing varieties for the lower rows to soften hard edges
- Mix pot sizes and tones for a collected, organic appearance
- Water succulents sparingly to avoid root rot in enclosed pallet slots
5. Budget-Friendly Pallet Daybed Lounge Corner
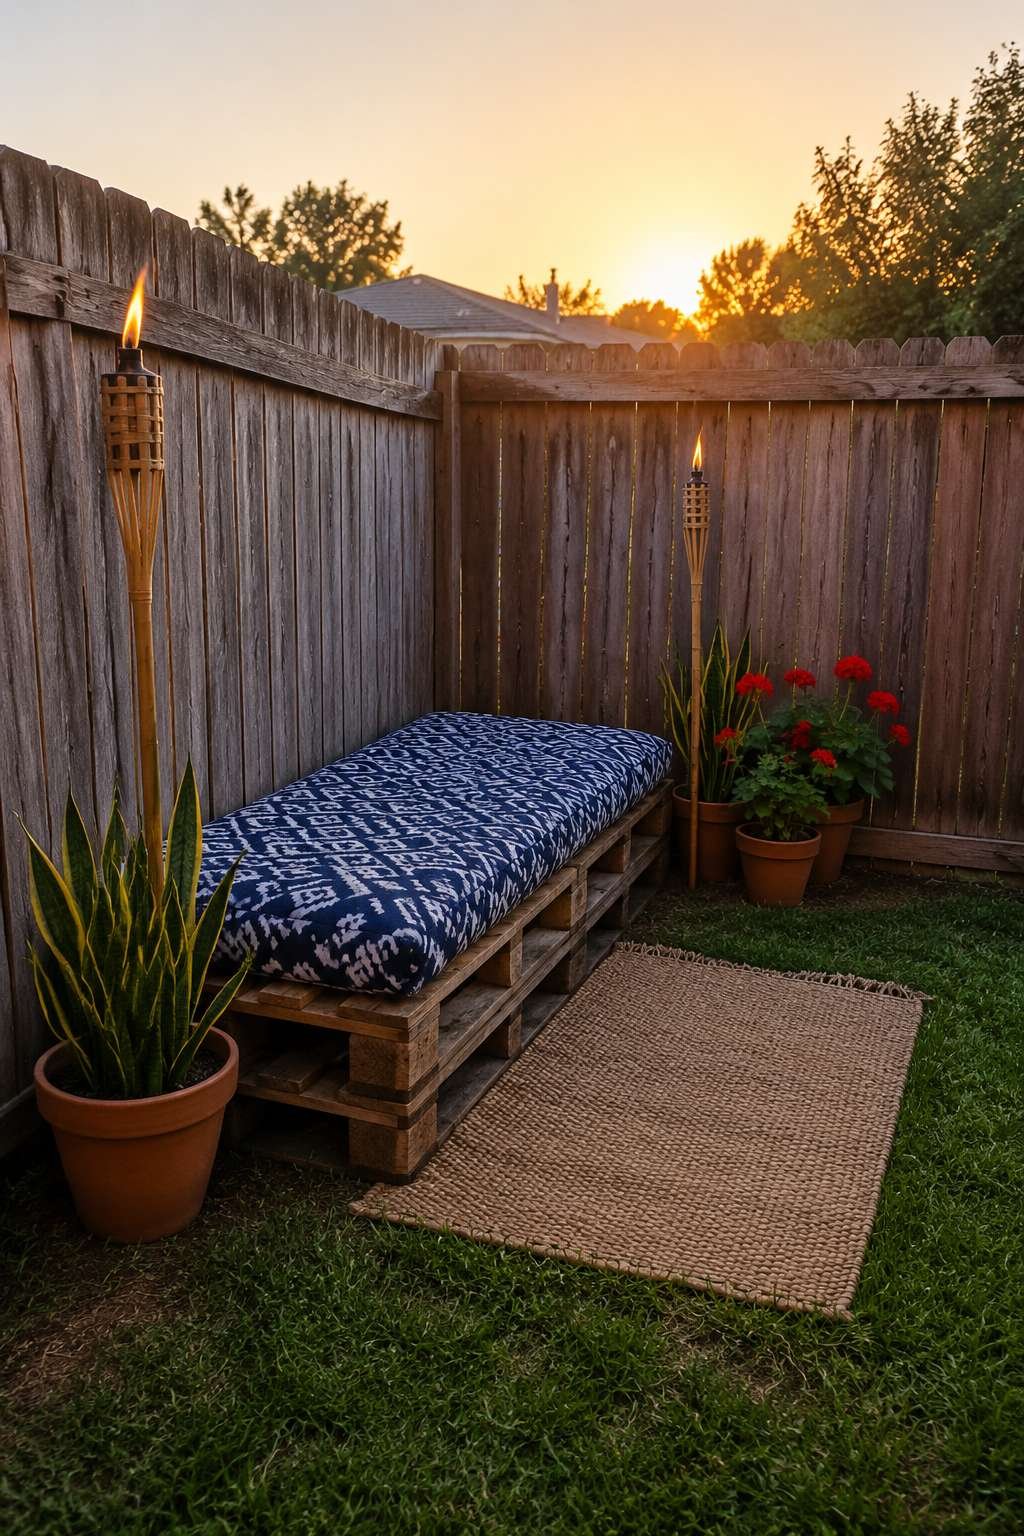
A pallet daybed transforms a quiet corner of the yard into a relaxed outdoor lounge without the expense of purchasing patio furniture. Topped with an inexpensive foam cushion and patterned outdoor fabric, this repurposed pallet base offers surprisingly comfortable seating for lounging, reading, or an afternoon nap. Building the frame typically requires only a few pallets stacked and secured together.
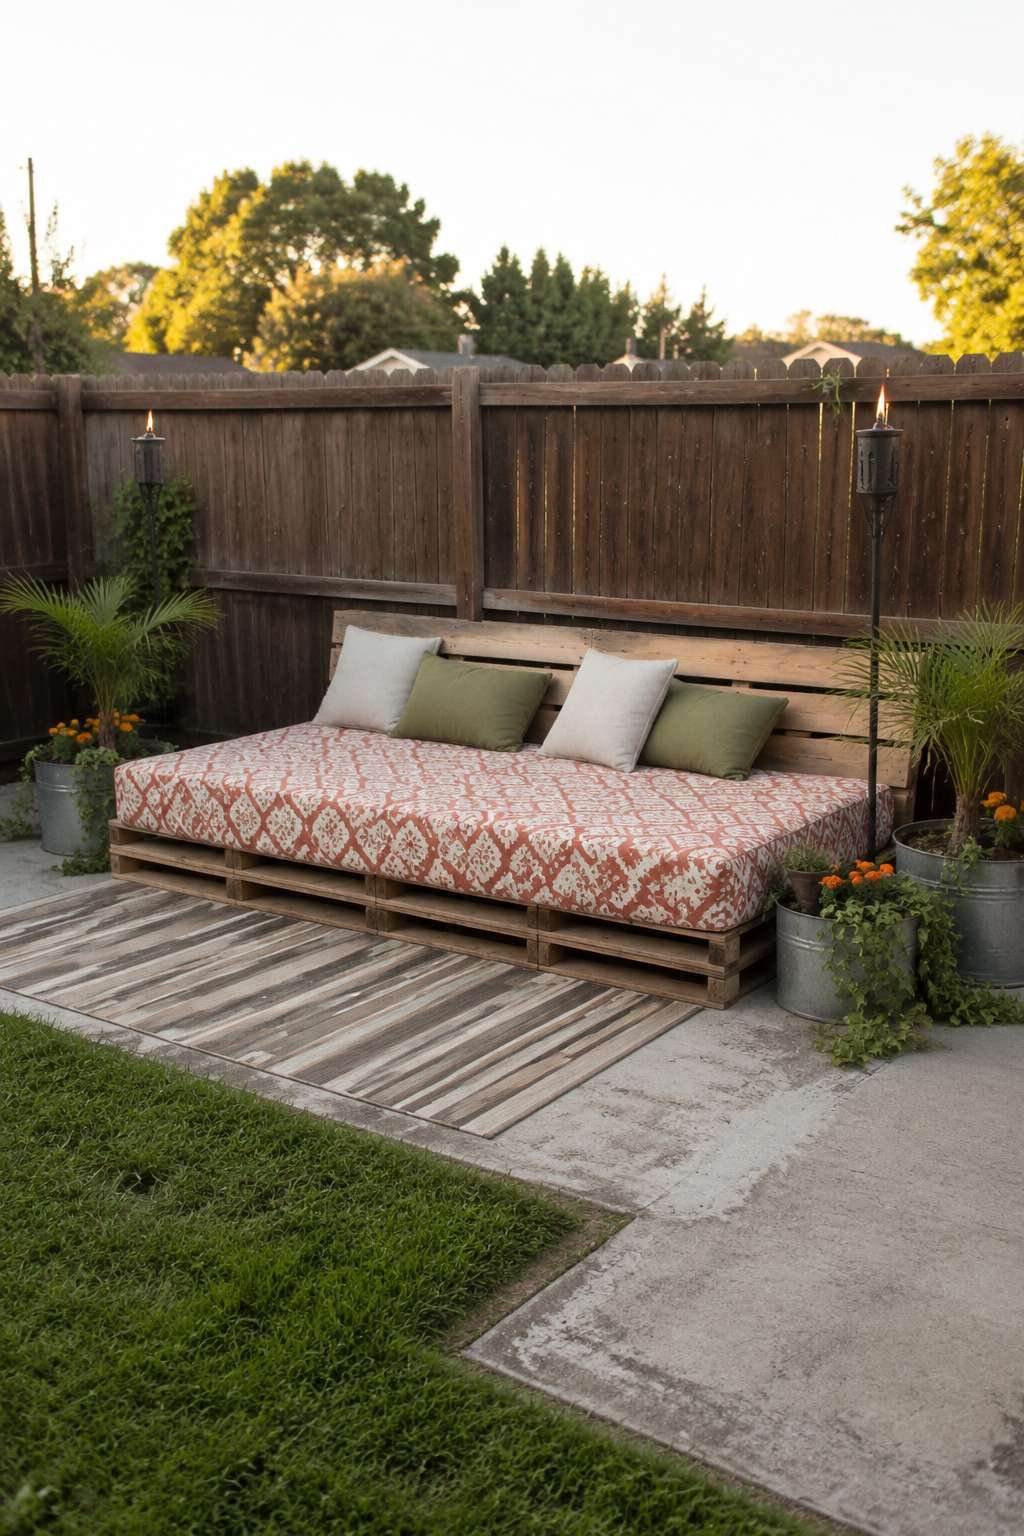
Surrounding the daybed, tiki torches and simple potted plants create an easy, resort-like ambiance without demanding a large investment. Golden hour lighting casts warm tones across the modest yard, flattering the daybed’s natural wood texture and the patterned cushion fabric alike. The overall effect is a lounge corner that feels considered and cozy, proving that comfort doesn’t require costly furniture.
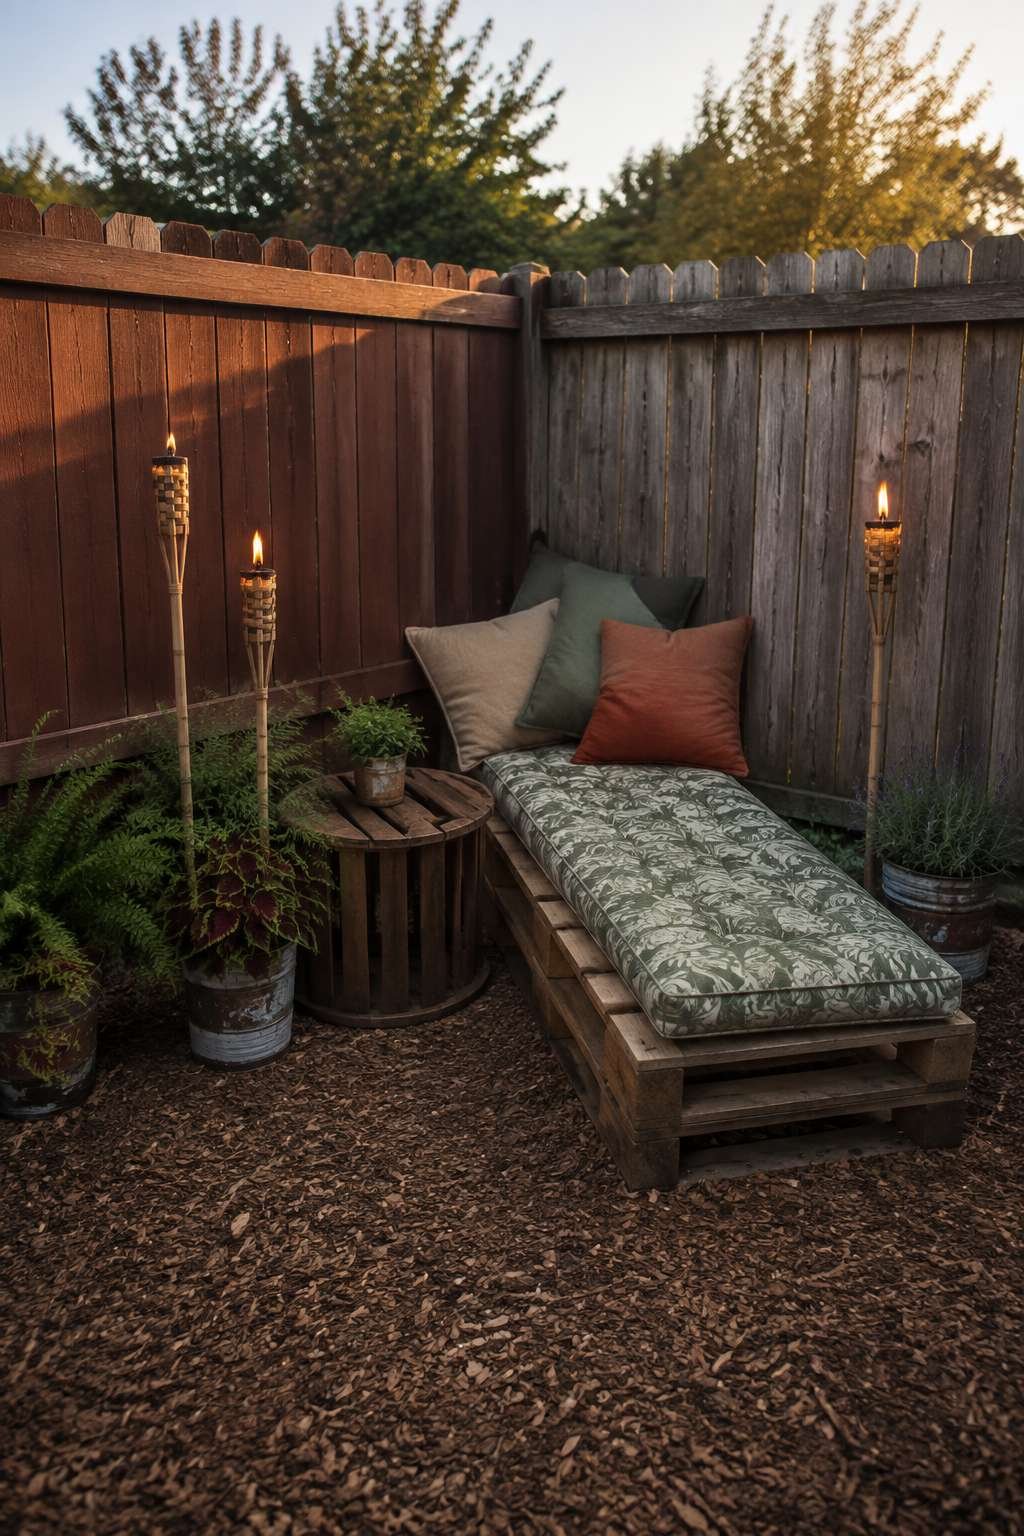
This design works particularly well for smaller yards where a full patio set would feel oversized, since a single daybed can accommodate multiple people while occupying a compact footprint. It’s also an easy project to personalize — the cushion fabric and surrounding potted plants can be swapped seasonally to refresh the look.
Key Design Tips:
- Stack and screw pallets securely to create a stable daybed frame
- Choose outdoor-rated foam and fabric to resist moisture damage
- Add a waterproof cover for the cushion during rainy stretches
- Position tiki torches at a safe distance from cushions and fabric
- Layer smaller throw pillows for extra comfort and visual texture
6. Mosaic Stepping Stone Pathway
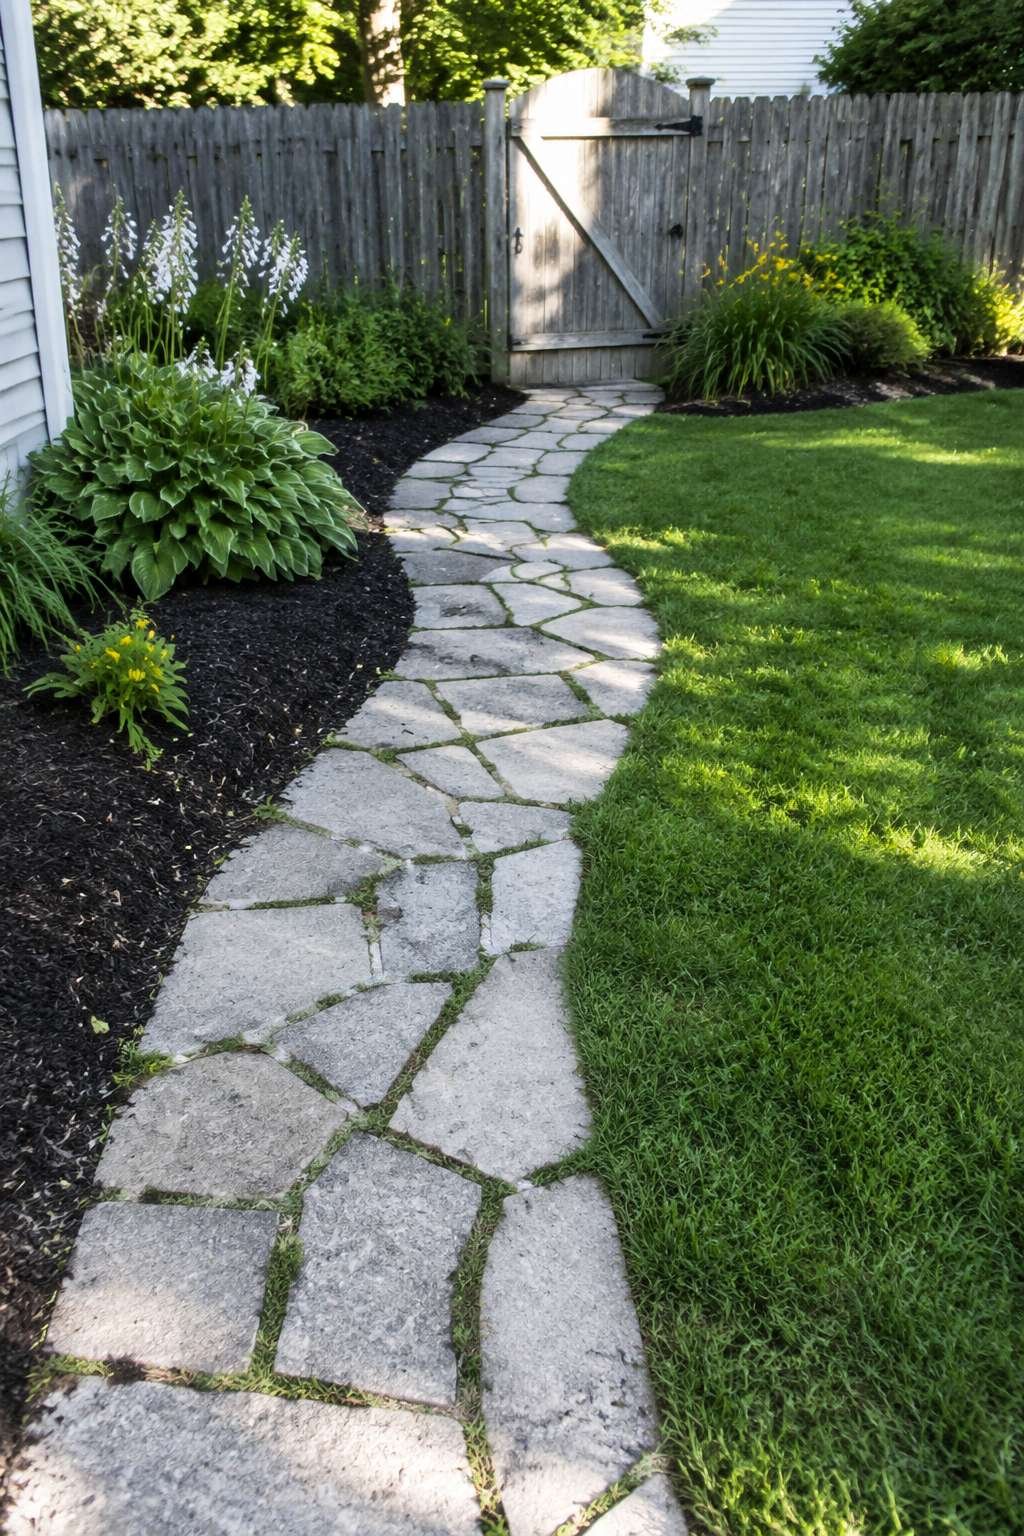
A simple stepping stone pathway made from broken concrete pieces, arranged in an informal mosaic pattern, is one of the most budget-friendly ways to add structure and movement to a backyard. Leading through a small lawn bordered by low-cost mulch beds, this path gives visitors a clear route through the yard while doubling as a genuine design feature rather than a purely functional element.
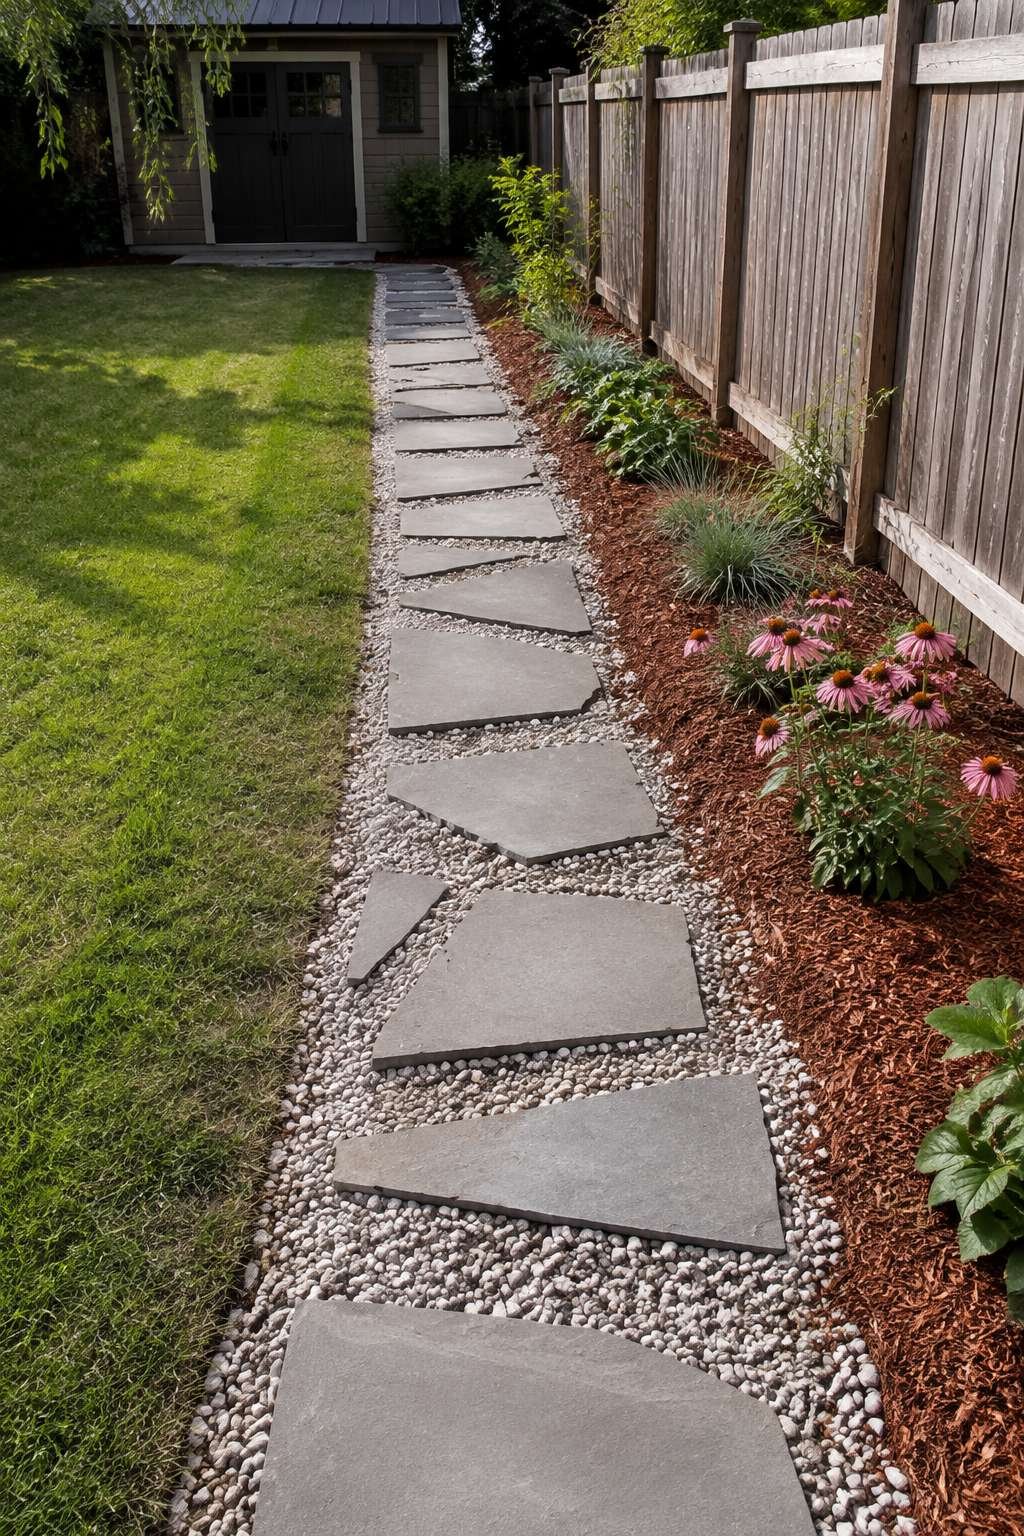
Natural sunlight highlights the varied grey tones and rough texture of the reclaimed concrete, giving each stepping stone its own subtle character despite the material’s humble origin. Because broken concrete is often available free from demolition projects or construction sites, this pathway can be built for little more than the cost of labor and time. The mulch beds bordering the path add a soft, tidy contrast to the irregular stone shapes.
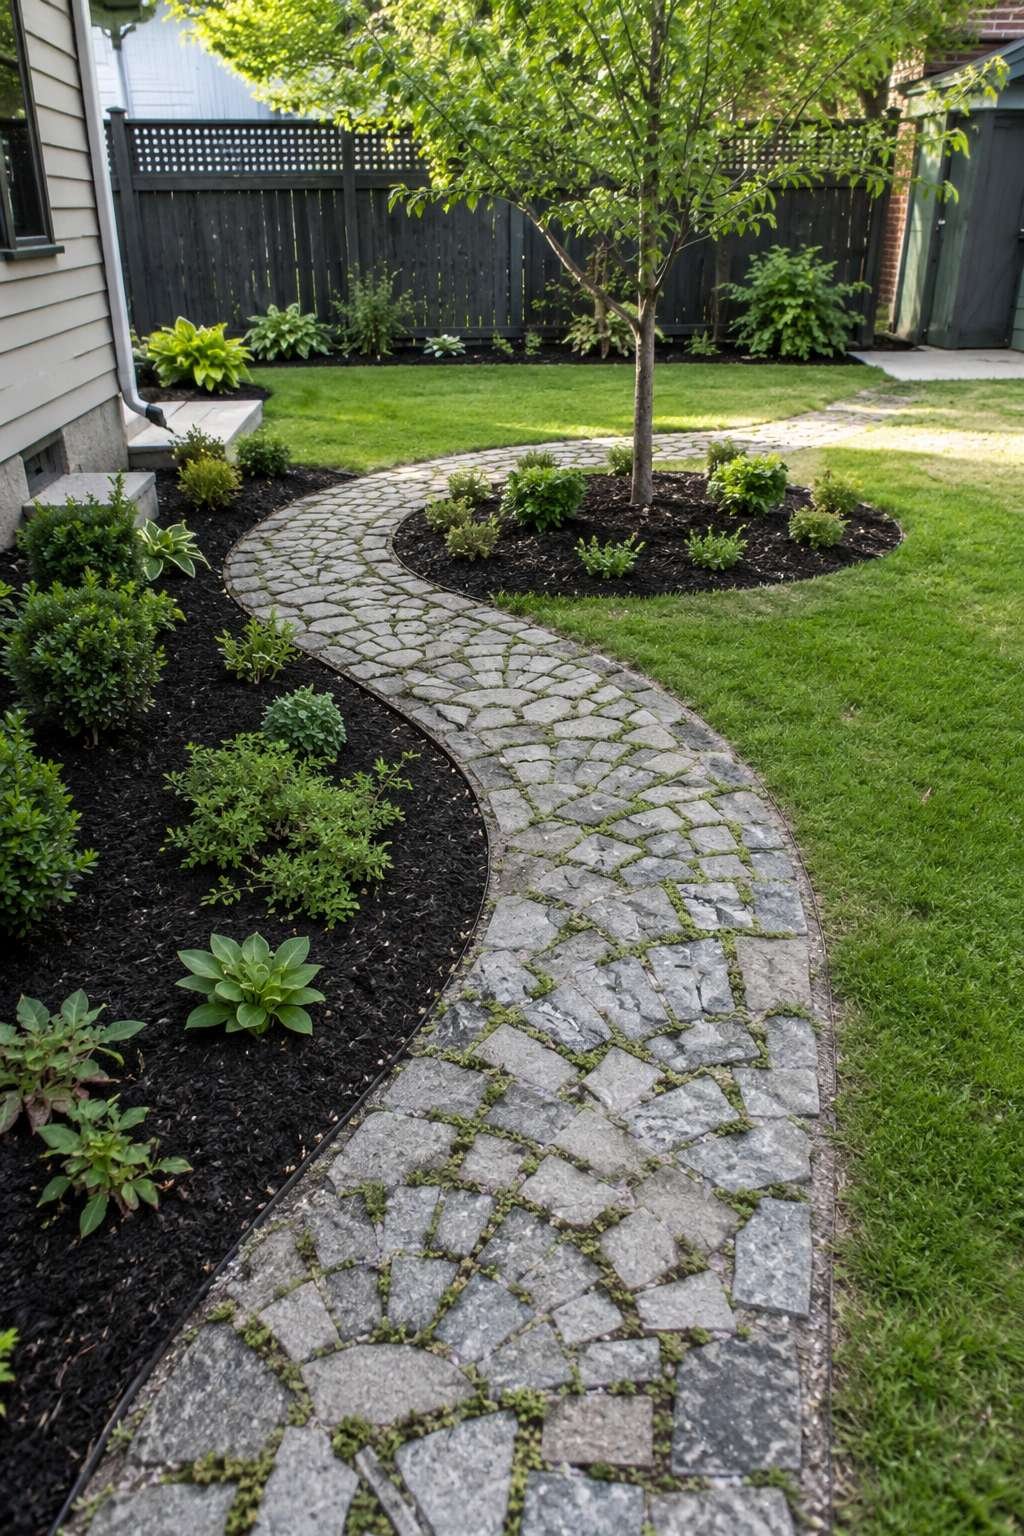
This design is an excellent entry point for homeowners new to DIY landscaping, since the stepping stones can be laid gradually and adjusted easily if the layout needs tweaking. It’s also a practical solution for yards where a full paved path would be cost-prohibitive but bare lawn paths tend to wear down unevenly.
Key Design Tips:
- Source broken concrete from local demolition or construction sites
- Space stepping stones to match a natural walking stride
- Set stones slightly into the soil to prevent shifting underfoot
- Use dark mulch to create contrast against the grey concrete tones
- Fill gaps between stones with gravel or low groundcover plants
7. Budget Outdoor Dining Nook with Picnic Table

A secondhand wooden picnic table, refinished with a matte grey stain, forms the heart of this budget outdoor dining nook. Paired with mismatched thrifted chairs, the table anchors a casual dining area that feels collected and personal rather than uniform. Refinishing a used picnic table is typically far cheaper than buying new outdoor dining furniture, and the grey stain gives it a cohesive, contemporary look.
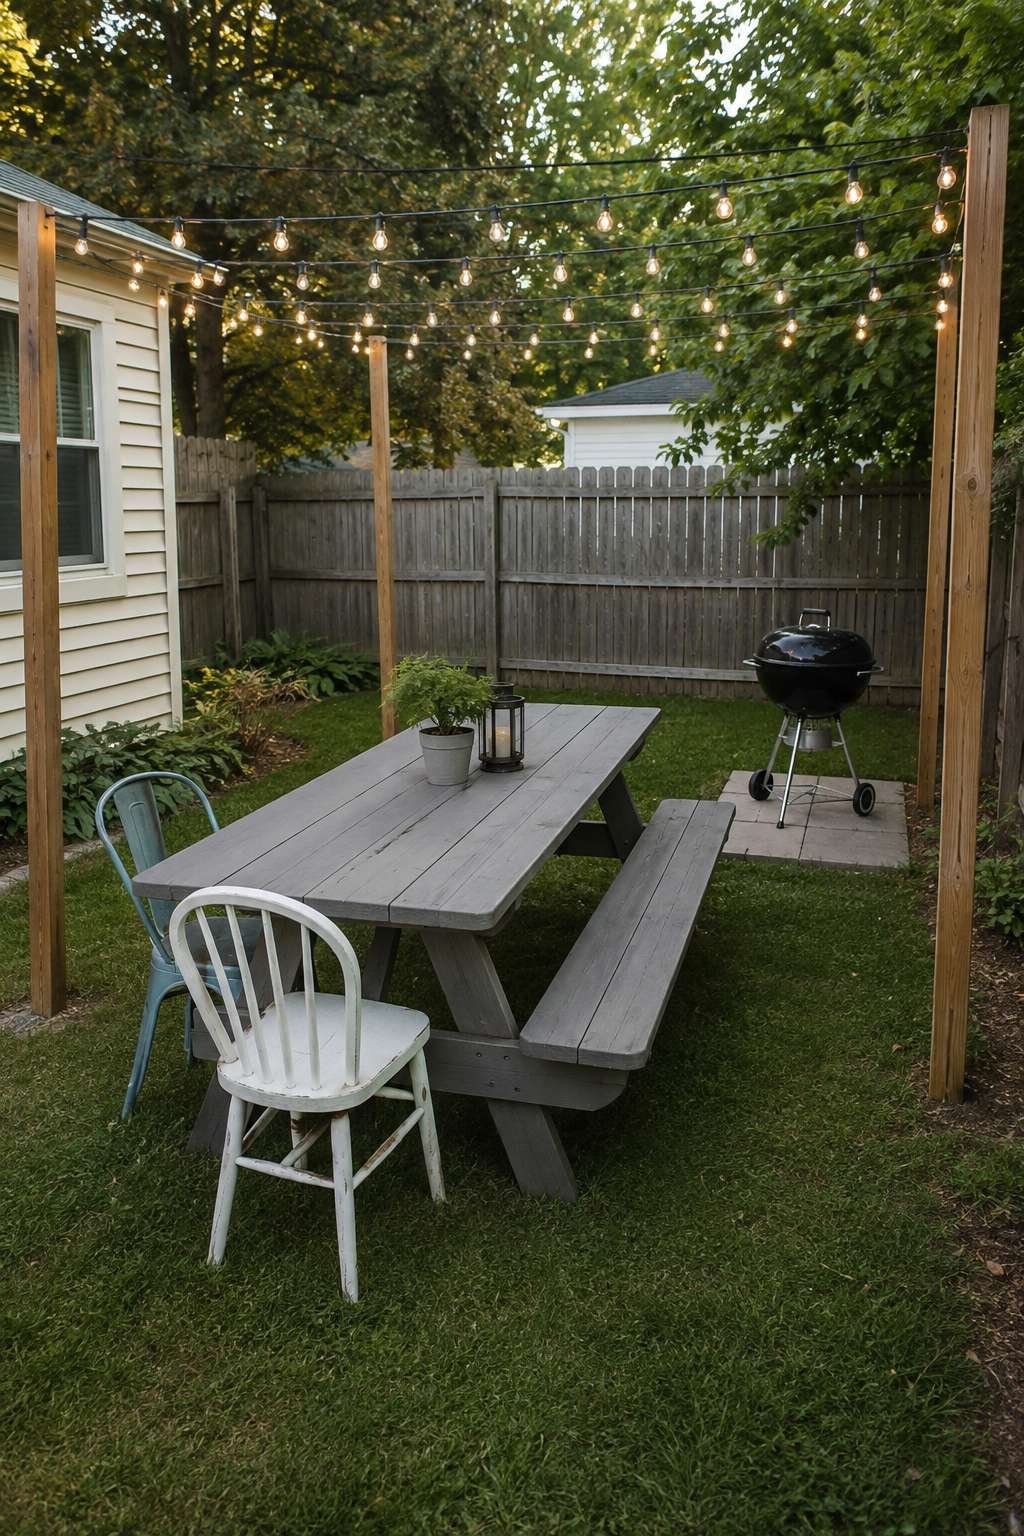
A simple string light canopy hangs above the table, instantly elevating the space for evening meals without requiring a built structure. Nearby, a small charcoal grill sits on a compact concrete paver base, keeping the cooking area tidy and separate from the dining surface. Soft natural daylight illuminates the whole setup, emphasizing the realistic material wear that gives secondhand furniture its charm.

This concept is ideal for households that entertain often but want to avoid the cost of a full outdoor kitchen or built-in dining structure. The combination of a refinished table, thrifted chairs, and a simple paver pad for the grill delivers a fully functional dining area on a fraction of the typical budget.
Key Design Tips:
- Sand and stain a secondhand table for a cohesive, refreshed look
- Mix thrifted chair styles but unify them with matching cushions
- Set the grill on its own paver pad to protect the lawn from grease
- String lights in a canopy pattern for even coverage over the table
- Seal the stained tabletop to protect it from spills and weather
8. Inexpensive Bamboo Privacy Screen
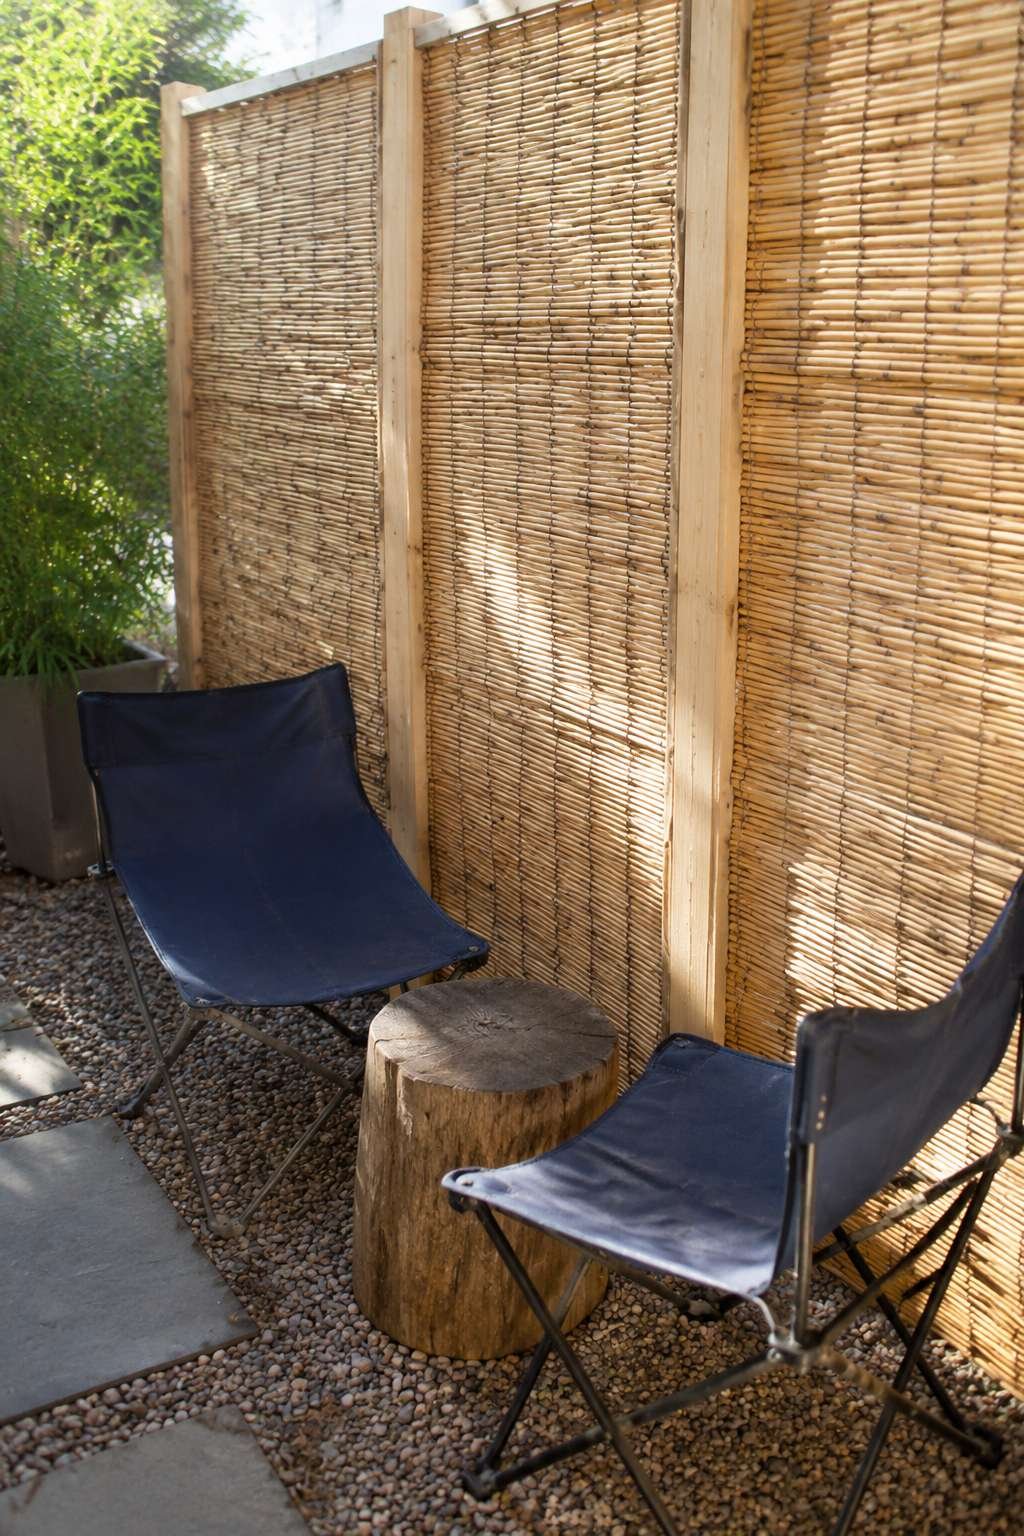
Privacy doesn’t require an expensive fence rebuild — this design uses affordable woven bamboo fencing panels, attached to simple wooden posts, to screen a small patio seating area furnished with thrifted folding chairs. Bamboo panels are widely available at low cost and install quickly, making this one of the fastest privacy upgrades on this list.
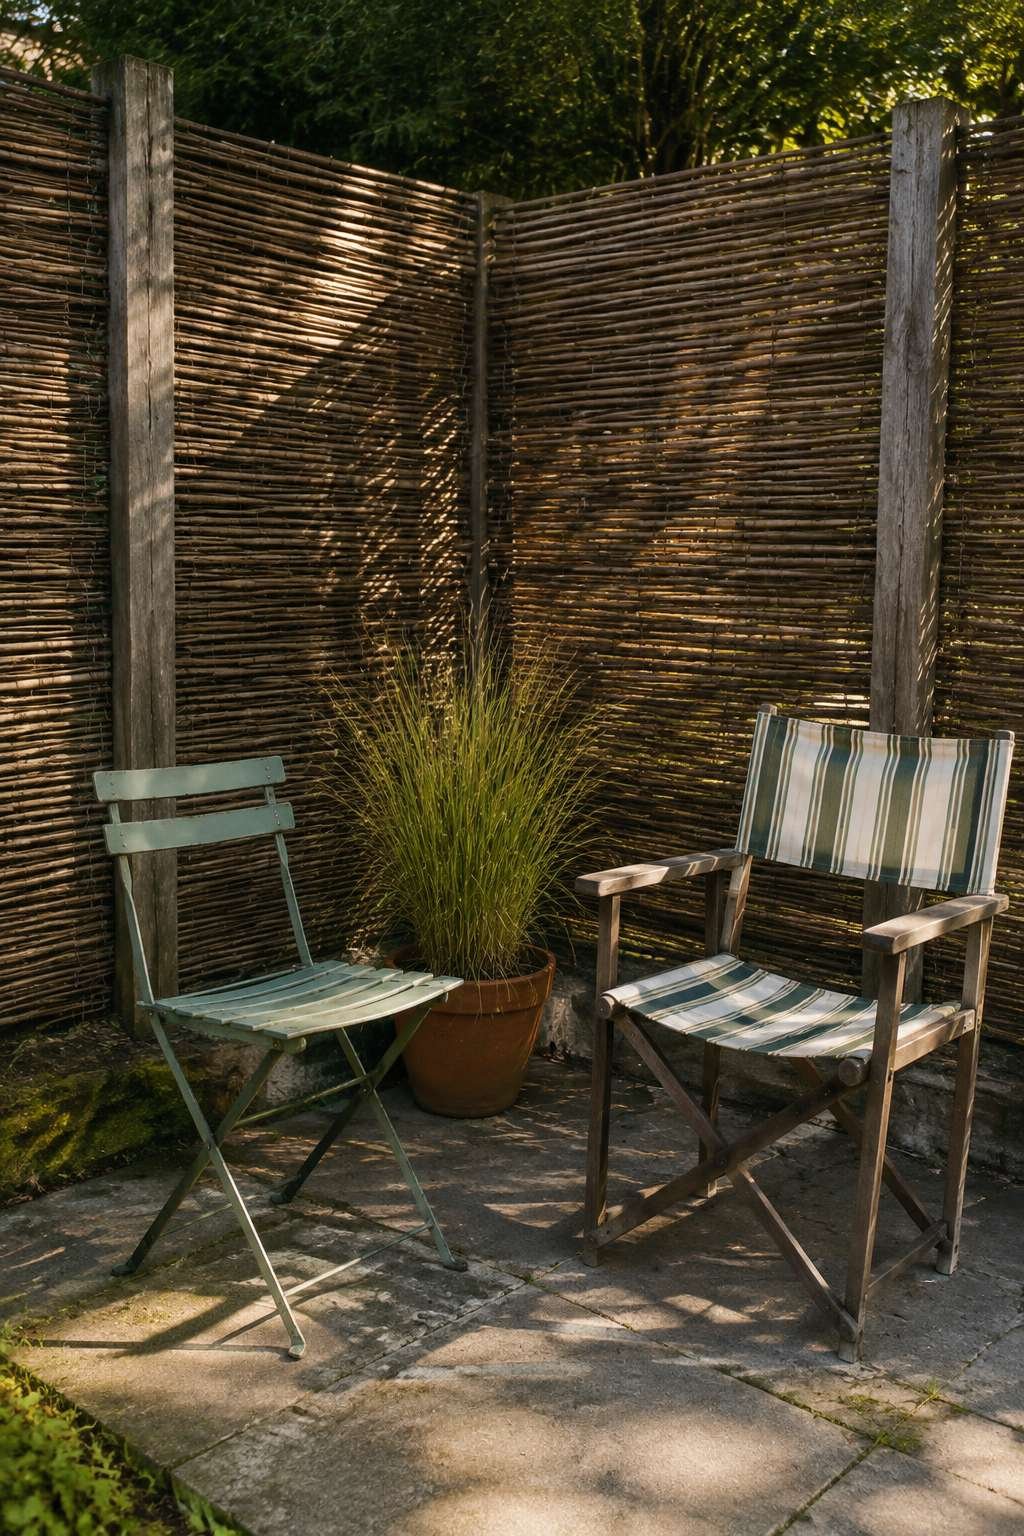
Warm afternoon light filters through the bamboo’s natural texture, creating soft, dappled shadows across the seating area rather than the harsh, solid shade of a traditional privacy fence. This filtered light effect gives the space an airy, relaxed feel while still screening the patio from neighboring views. The thrifted folding chairs keep the furniture budget minimal and allow the seating arrangement to be reconfigured easily as needed.
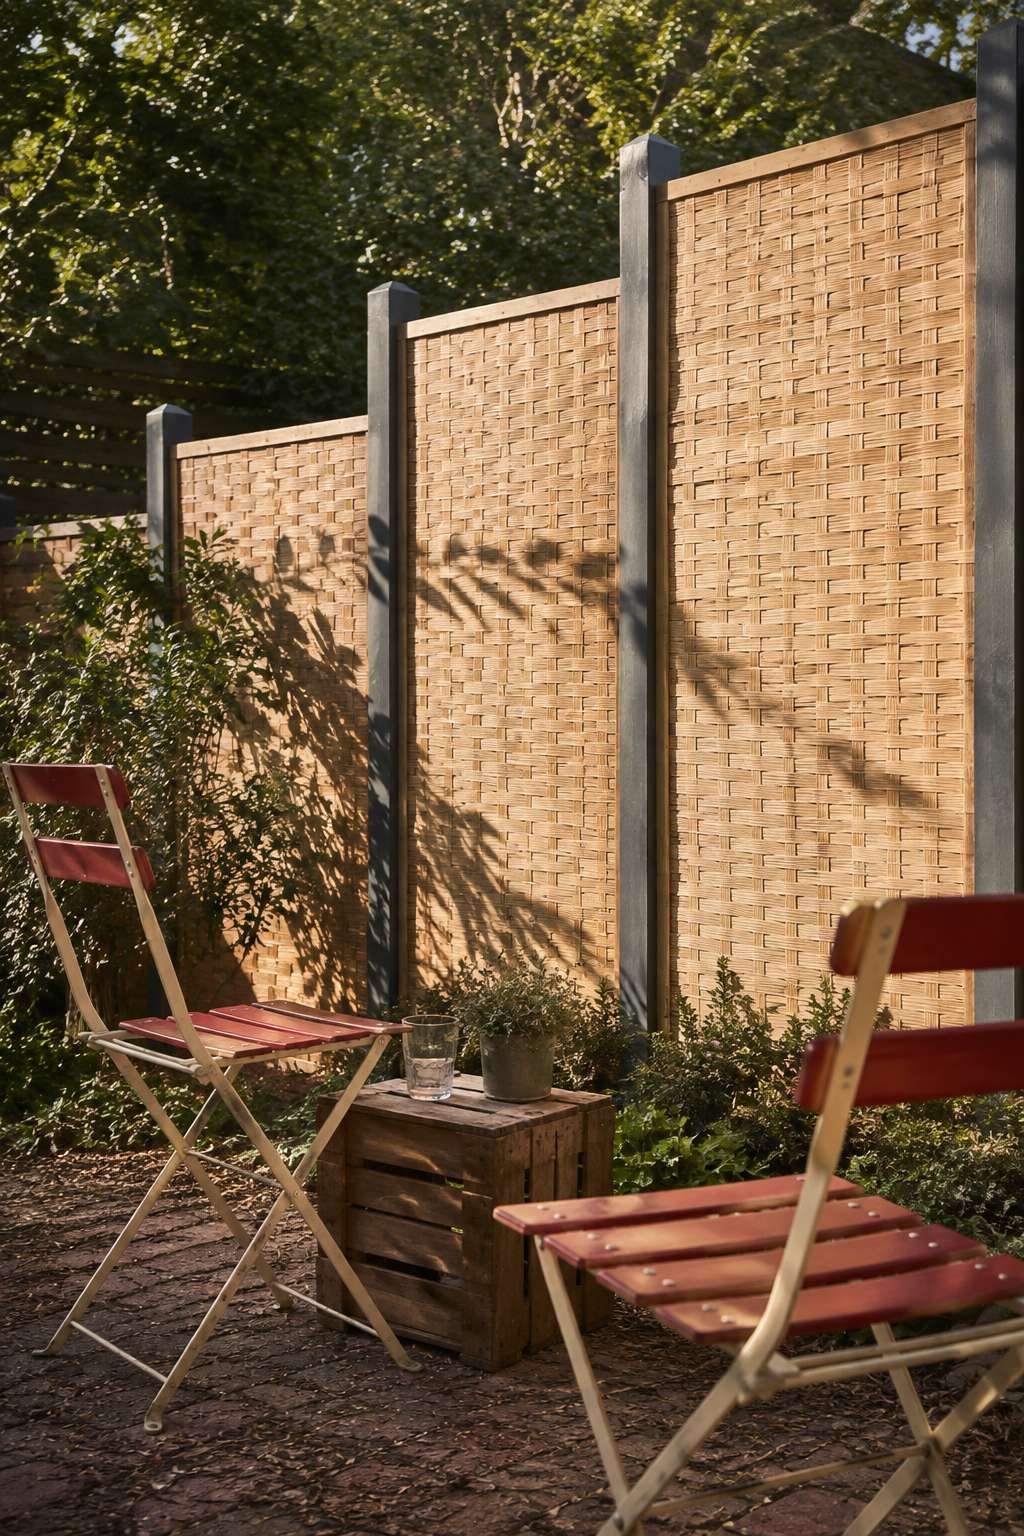
This solution works particularly well for renters or anyone hesitant to invest in permanent fencing, since bamboo panels can be removed or relocated without major construction. It’s also a great option for softening an existing chain-link or plain wood fence that feels too stark or utilitarian.
Key Design Tips:
- Attach bamboo panels to sturdy posts set at least two feet into the ground
- Overlap panel edges slightly to eliminate visible gaps
- Choose folding chairs for easy storage and flexible arrangements
- Position the screen to block the most direct sightlines from neighbors
- Treat bamboo with a weatherproof sealant to extend its lifespan
9. DIY Wash Basin Fire Pit with Log Stools
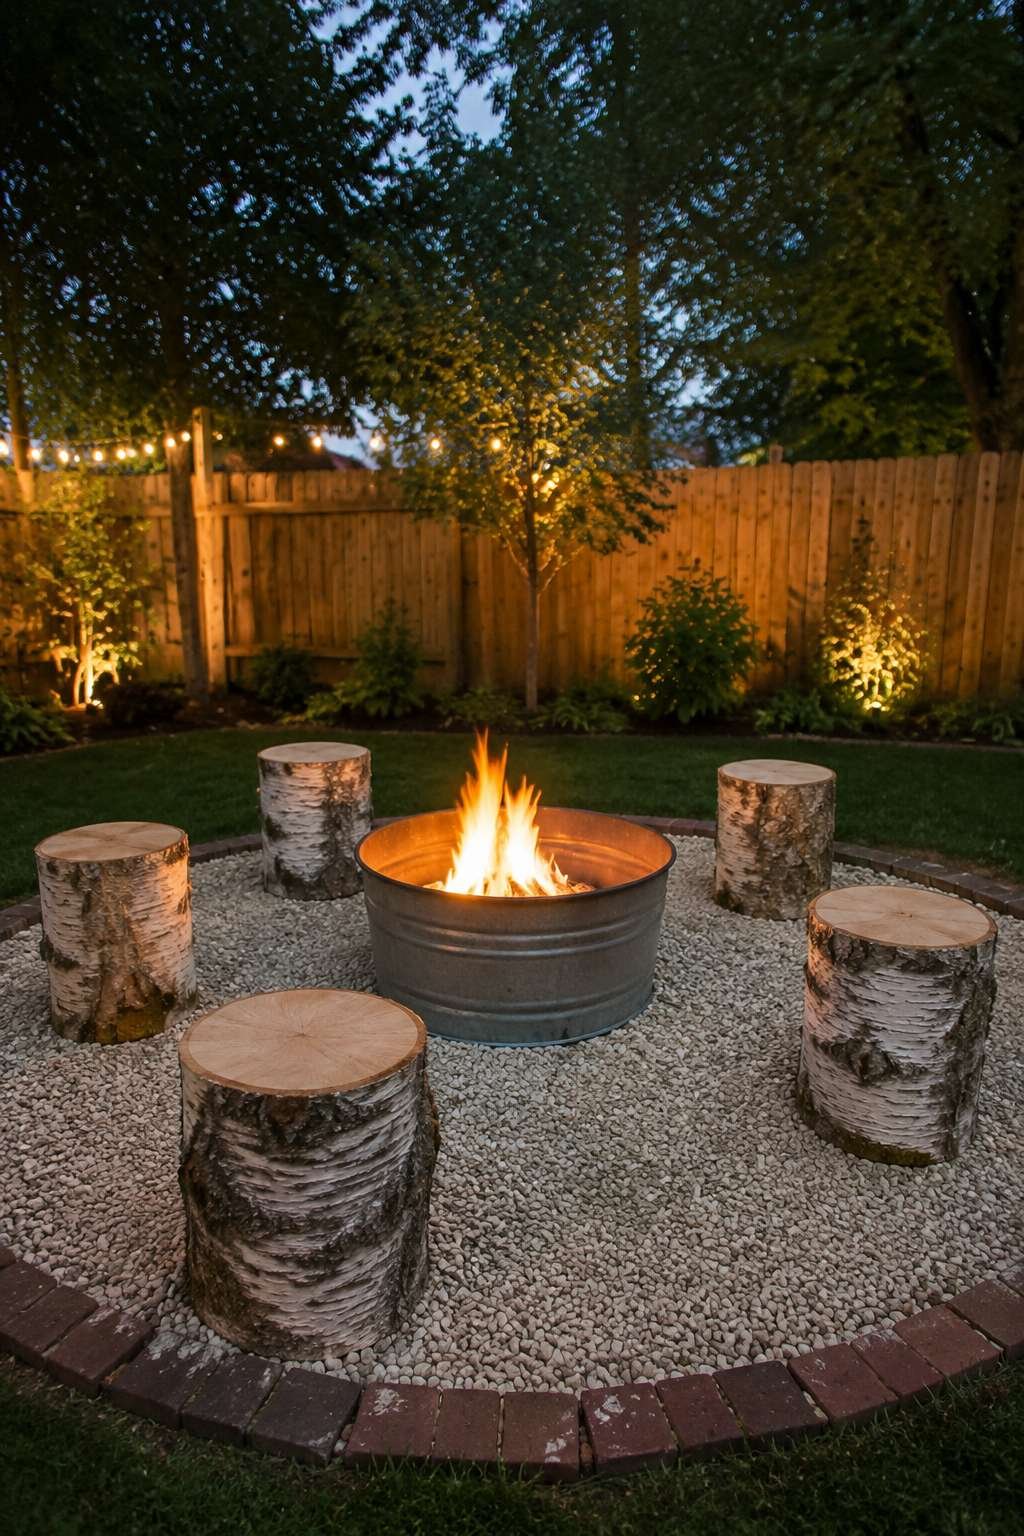
A repurposed metal wash basin, set on a bed of pea gravel, makes for one of the cheapest and most charming fire pit solutions available. Surrounded by low tree stump stools cut from fallen logs, this gathering area embraces raw, natural materials over polished furniture, giving the space a genuinely rustic character. Both the wash basin and log stools can often be sourced for free or very little cost.
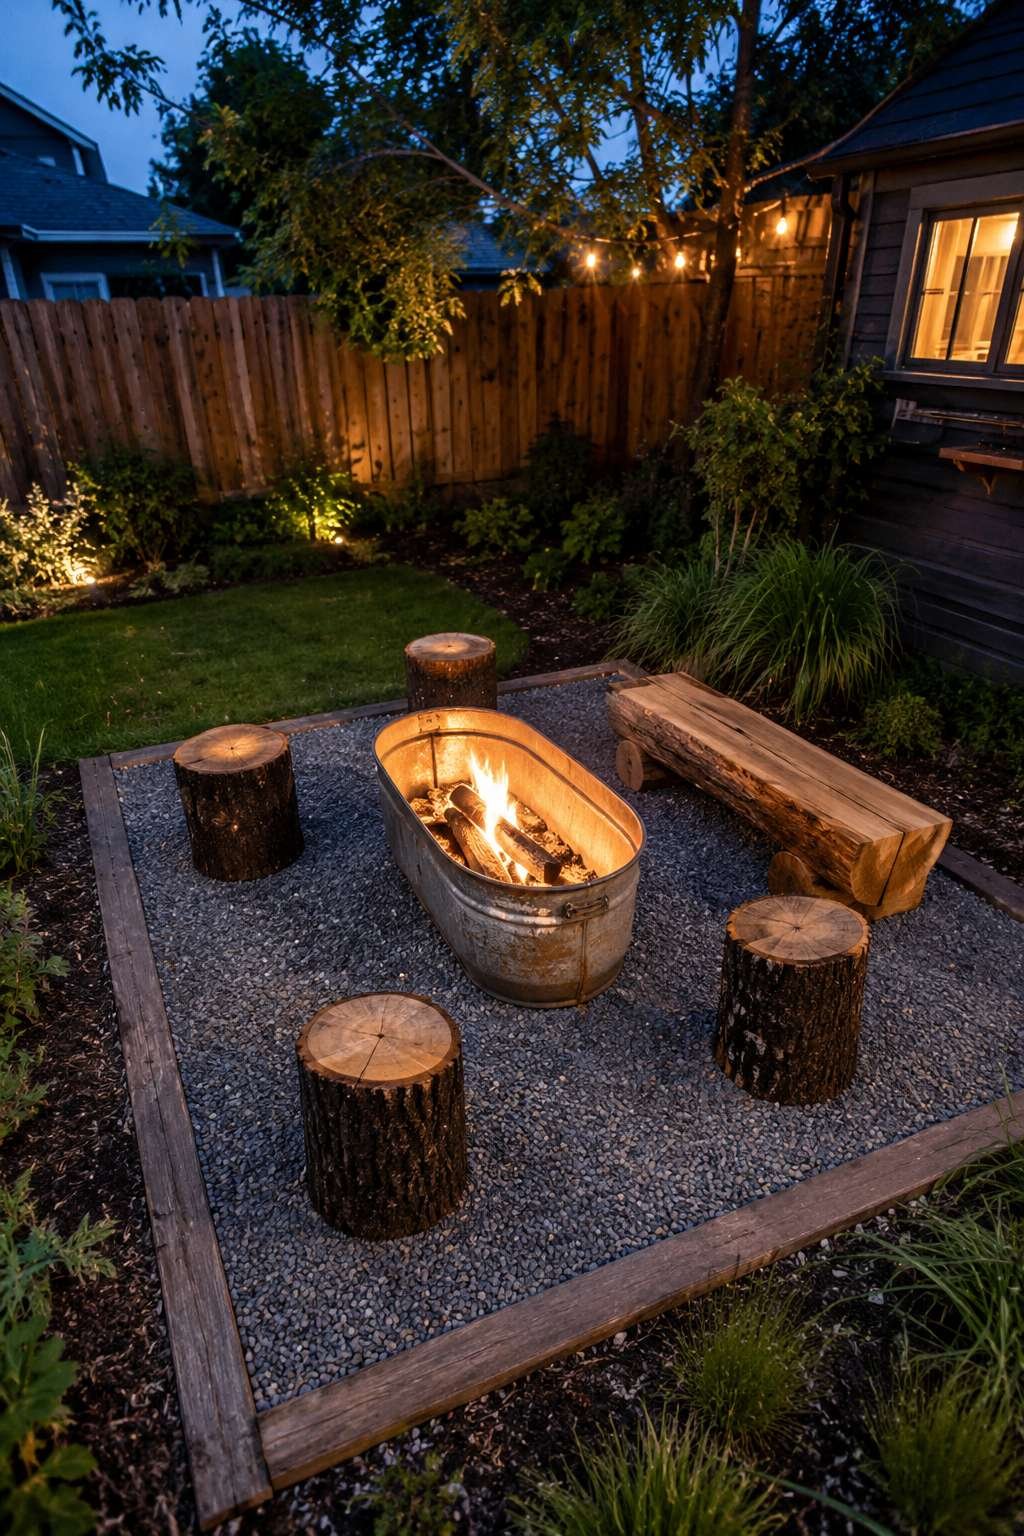
At dusk, the warm, flickering glow of the fire highlights the rustic textures throughout the space — the basin’s weathered metal surface, the rough bark and grain of the log stools, and the loose texture of the surrounding gravel. This lighting transforms even a simple, low-cost setup into an atmospheric gathering spot perfect for evening conversation.
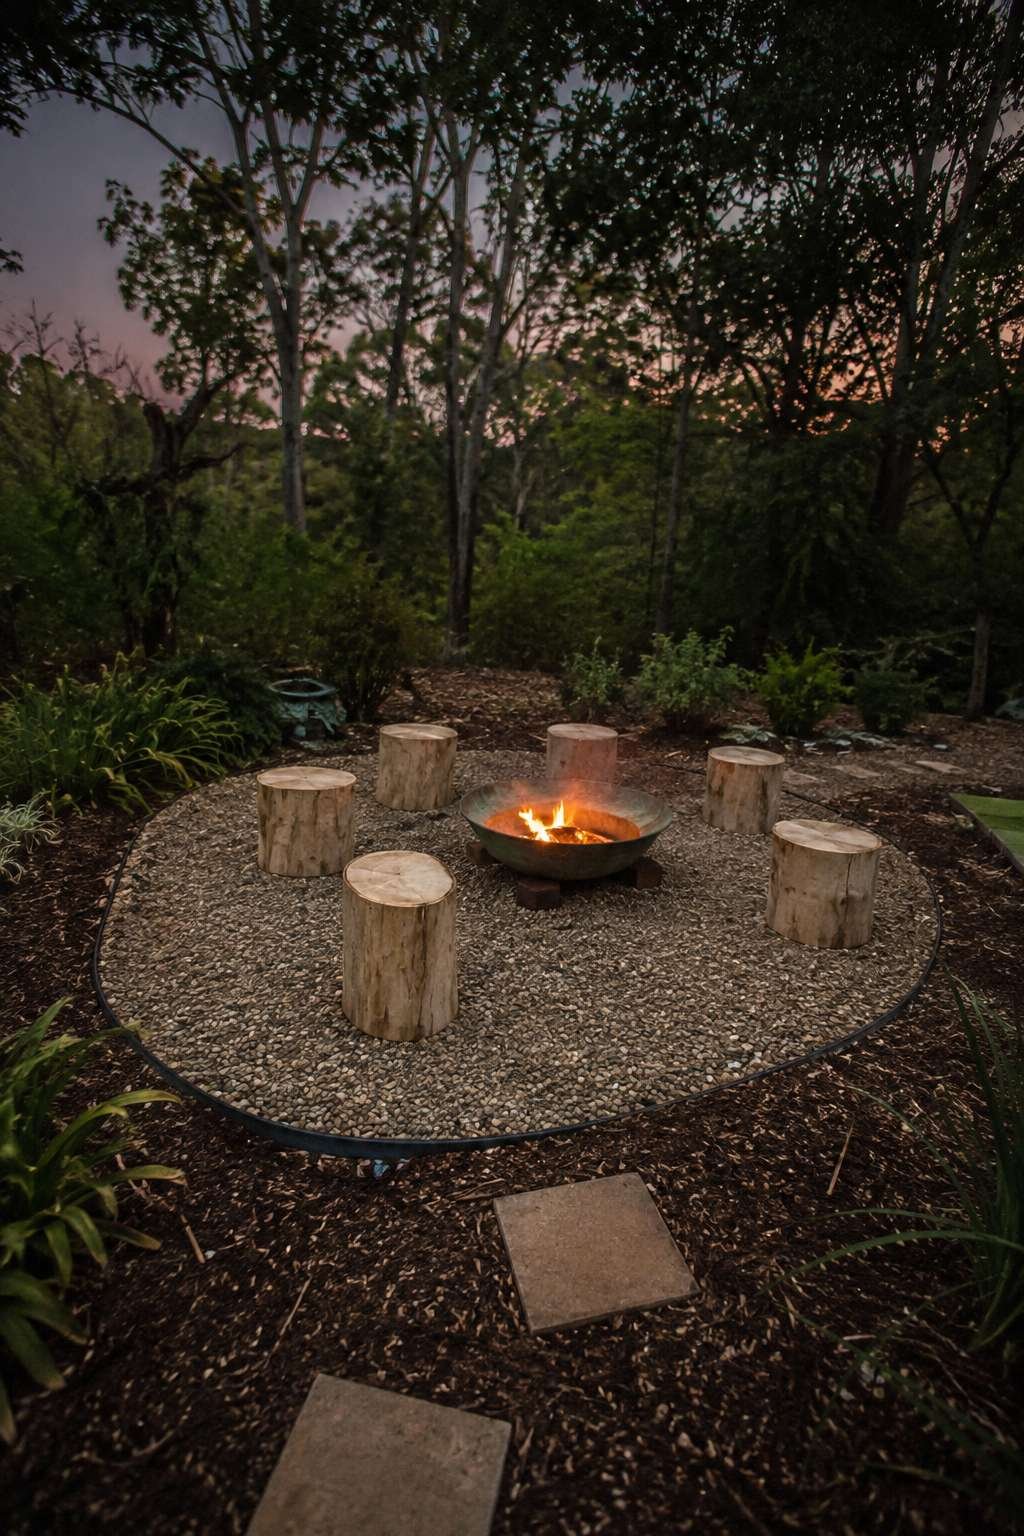
This design is especially well-suited to wooded properties or yards where fallen logs are already available, turning what might otherwise be yard waste into functional seating. It’s a project that requires minimal tools — mainly a saw to level the log stools — making it accessible even to those with little DIY experience.
Key Design Tips:
- Choose a wash basin with drainage holes for safe ash disposal
- Level log stools with a saw so they sit evenly and stably
- Set the basin on gravel, never directly on grass or mulch
- Seal cut log ends to slow cracking and extend their lifespan
- Arrange stools in a loose circle to encourage conversation
10. Budget Hammock Corner Between Trees
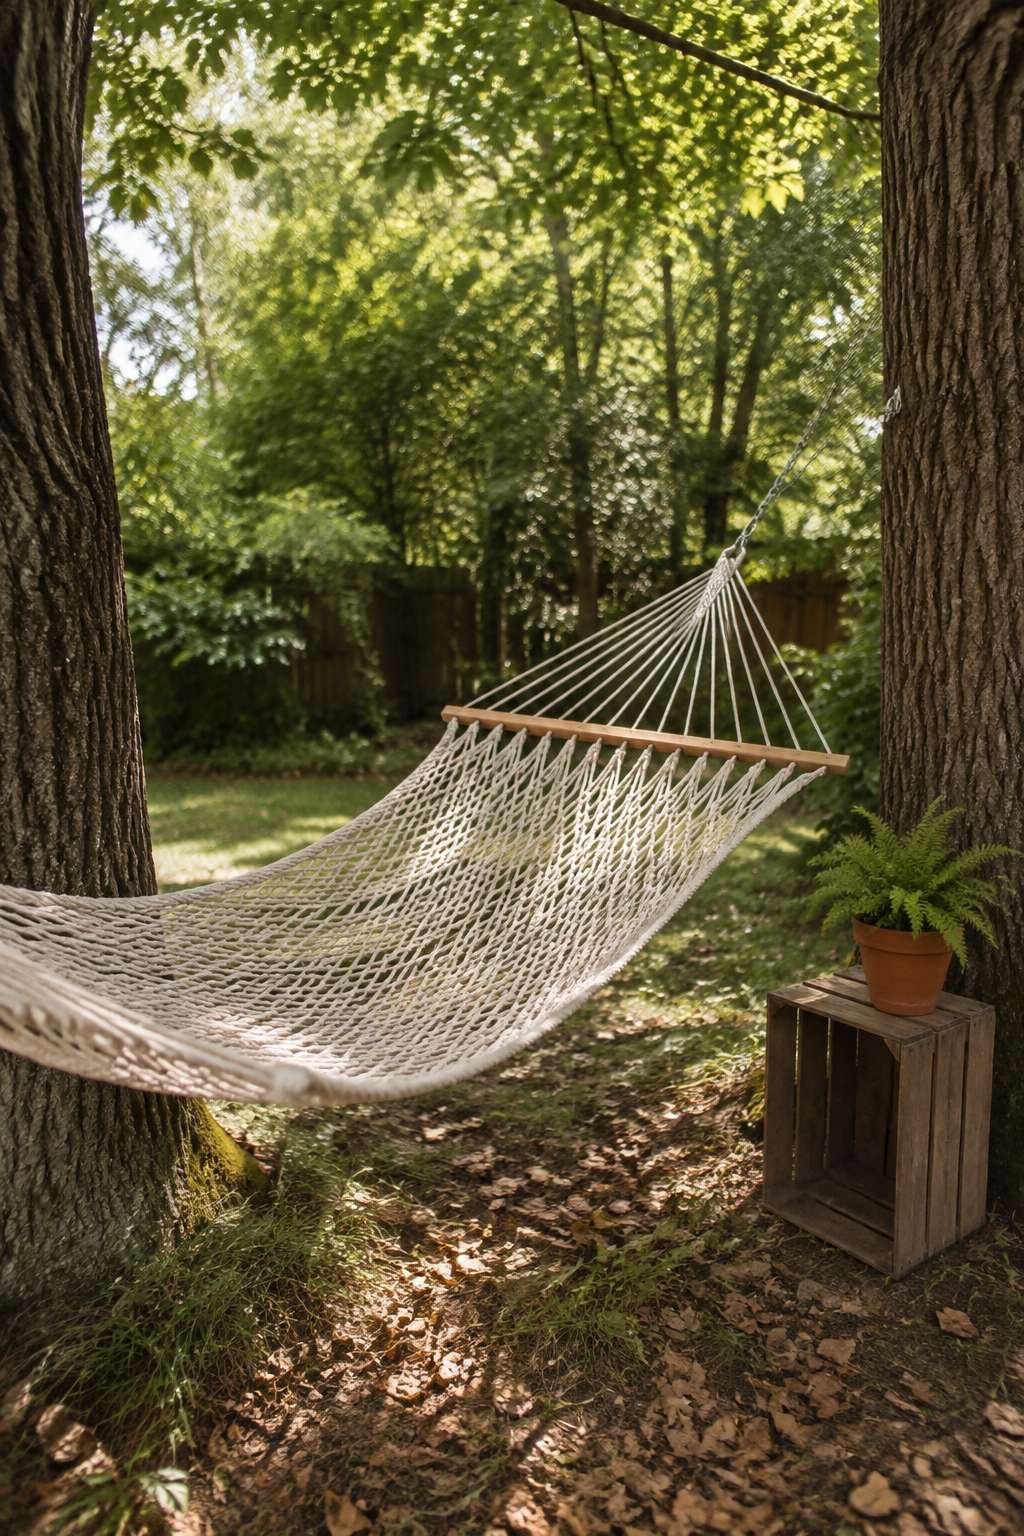
Sometimes the most restful backyard feature costs almost nothing at all. This hammock corner, strung between two mature trees, creates an instantly relaxing retreat with minimal materials or construction. A small thrifted side table, made from an inverted wooden crate, holds a potted plant and keeps a drink or book within easy reach.
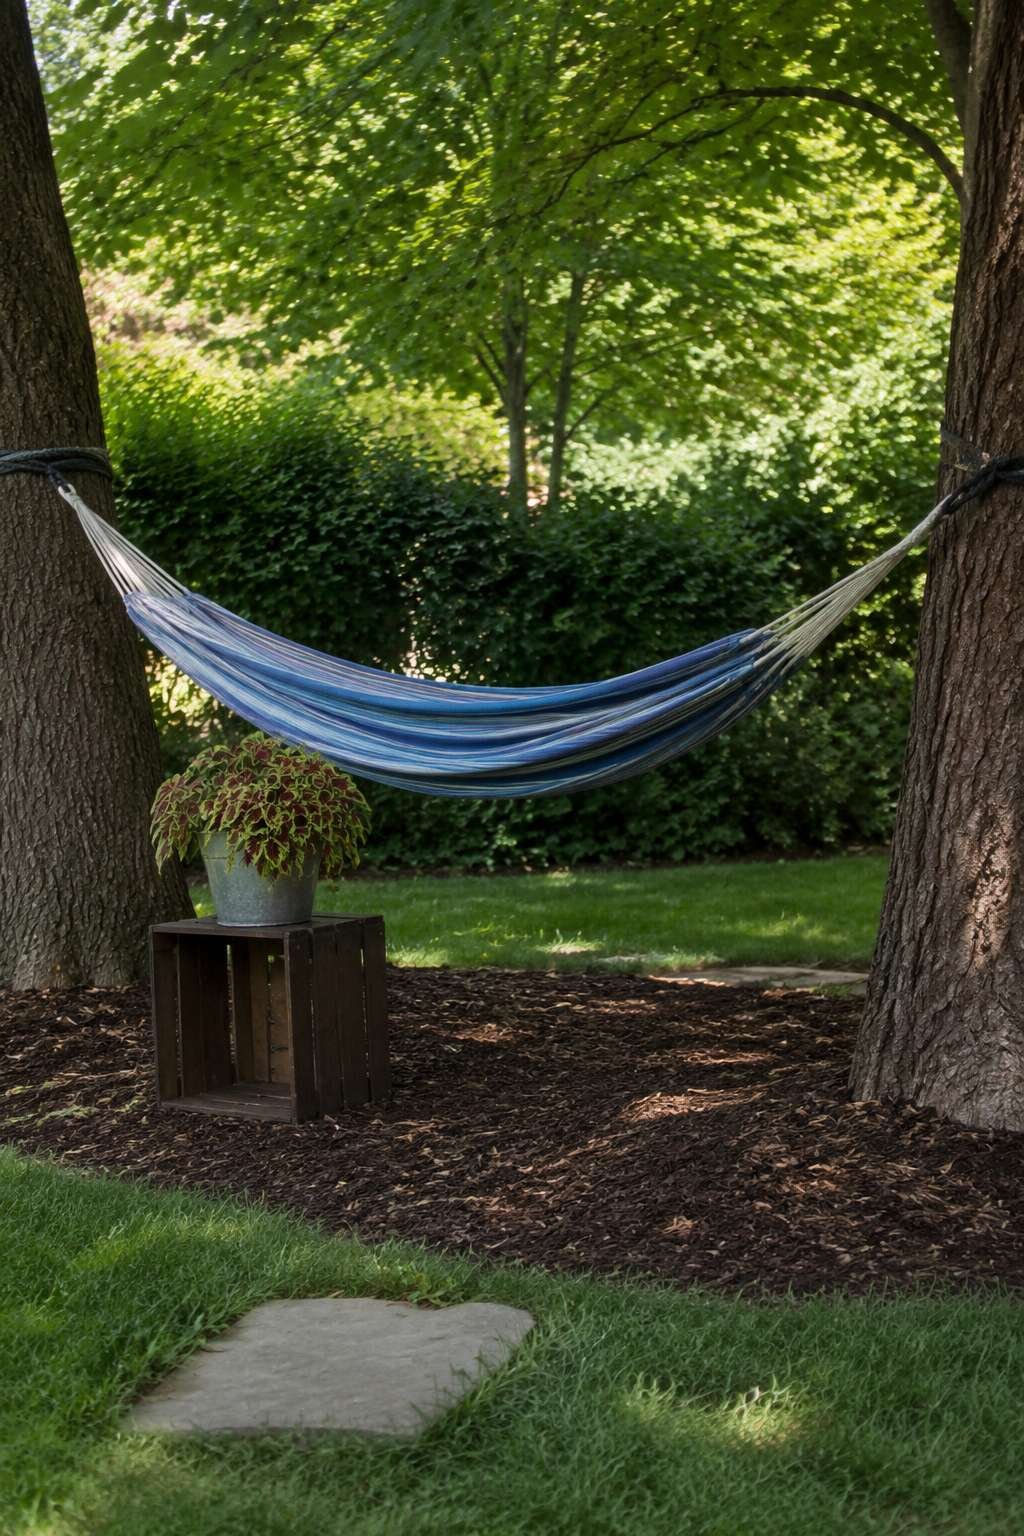
Dappled natural sunlight filters through the leaves above, casting soft, shifting shadows across the hammock and surrounding grass. This natural canopy provides comfortable shade without the cost of a built structure, making the corner pleasant to use throughout the day. The simplicity of the setup — just a hammock, two anchor points, and a repurposed crate table — makes it one of the most affordable ideas on this list.
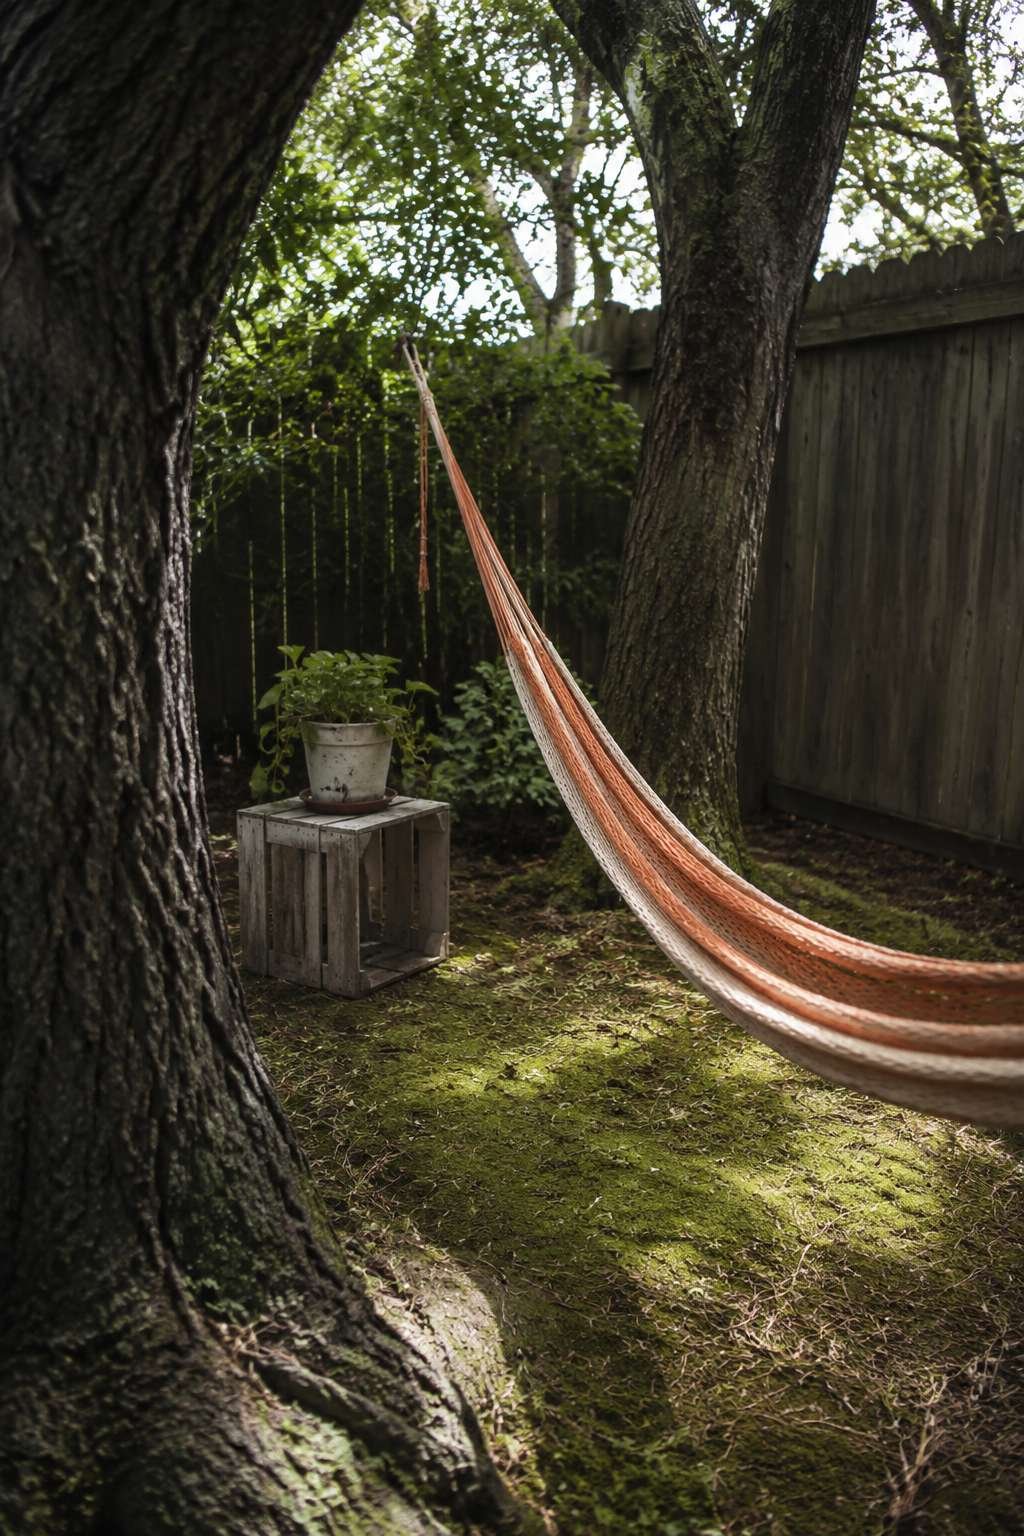
This concept is perfect for yards with established trees spaced appropriately apart, offering a low-cost way to add a genuine relaxation feature without disturbing the rest of the landscape. It’s an especially good fit for anyone who wants a backyard upgrade that requires almost no maintenance once installed.
Key Design Tips:
- Choose trees at least twelve to fifteen feet apart for proper hammock tension
- Use tree-friendly straps rather than rope to prevent bark damage
- Invert a sturdy wooden crate for a simple, functional side table
- Add a small potted plant to the crate table for a finished look
- Test hammock height so feet clear the ground comfortably
11. Simple Raised Garden Bed from Pine Boards
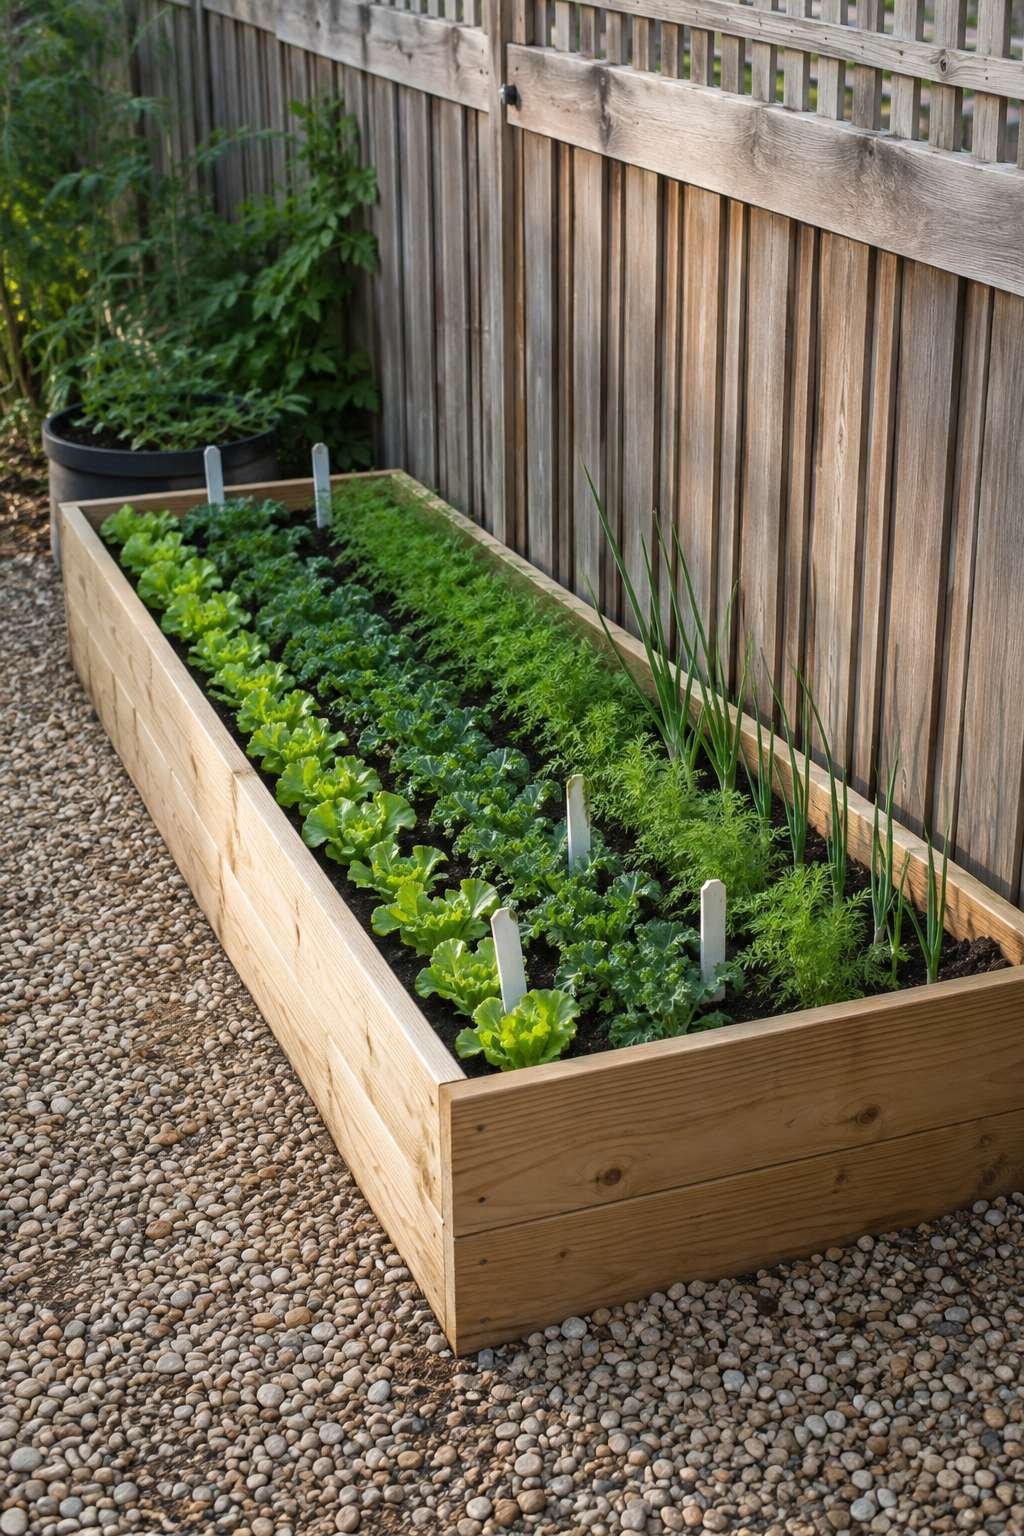
A raised garden bed built from inexpensive untreated pine boards offers an affordable, beginner-friendly way to grow vegetables in controlled, well-draining soil. Filled with neat rows of vegetables and marked with hand-painted wooden plant stakes, this design combines practicality with a homemade, personal touch that store-bought garden markers can’t replicate.
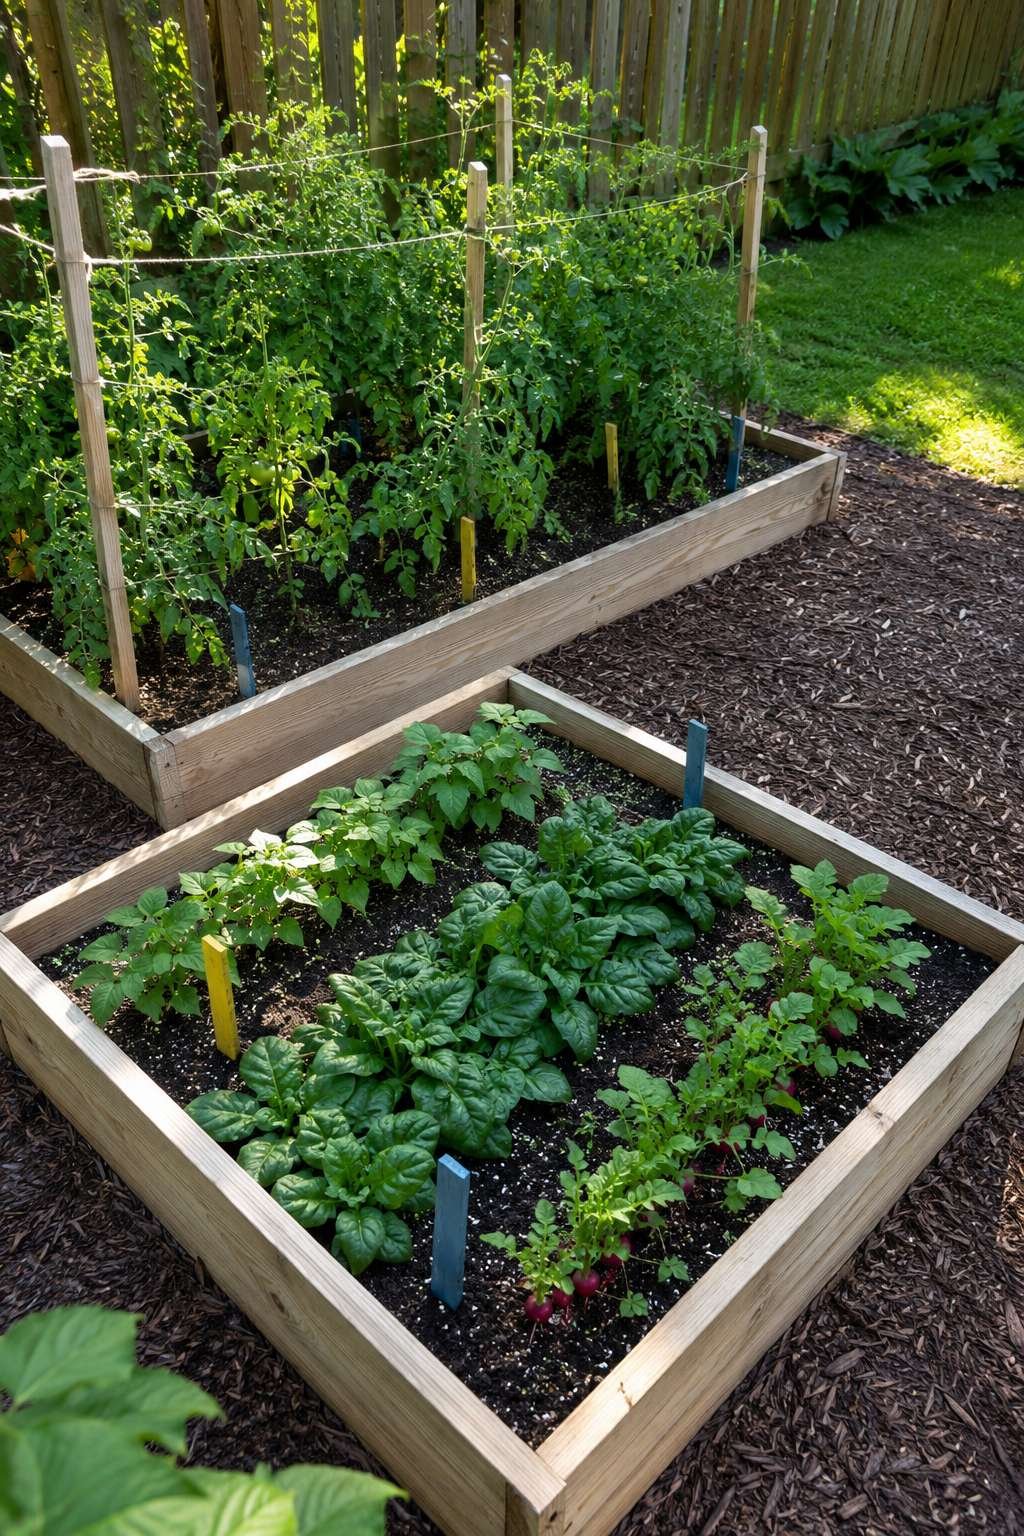
Morning natural light highlights the fresh-cut texture and subtle grain variations of the pine boards, giving the bed a warm, honest character even before any plants have filled in. Untreated pine is one of the more budget-friendly lumber choices for garden beds, and while it won’t last as long as cedar, its low cost makes it easy to rebuild every few seasons as needed.
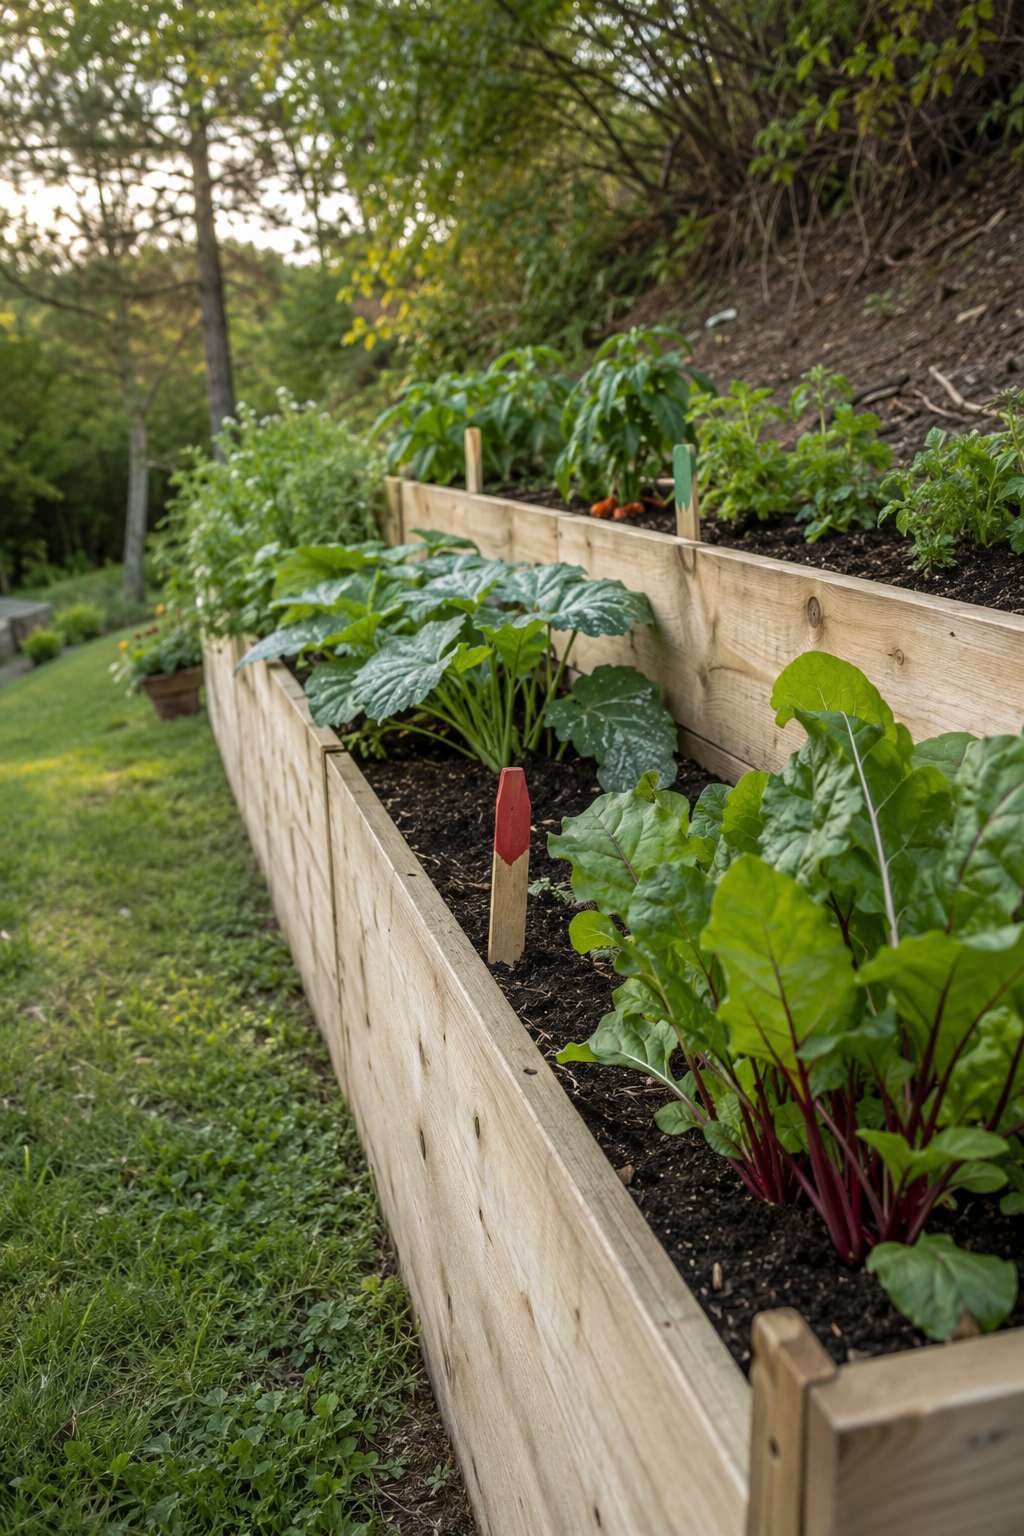
This design is ideal for first-time gardeners or anyone wanting a defined, manageable growing space without a large upfront investment. The hand-painted stakes add a playful, personalized element that makes the bed feel like a genuine labor of love rather than a purely functional structure.
Key Design Tips:
- Line the bed interior with landscape fabric to slow wood decay
- Fill with a mix of topsoil and compost for healthy drainage
- Space plant rows according to each vegetable’s mature size
- Paint stakes with outdoor-rated paint to resist fading
- Rotate crops yearly to keep soil nutrients balanced
12. Sage Green Painted Concrete Patio
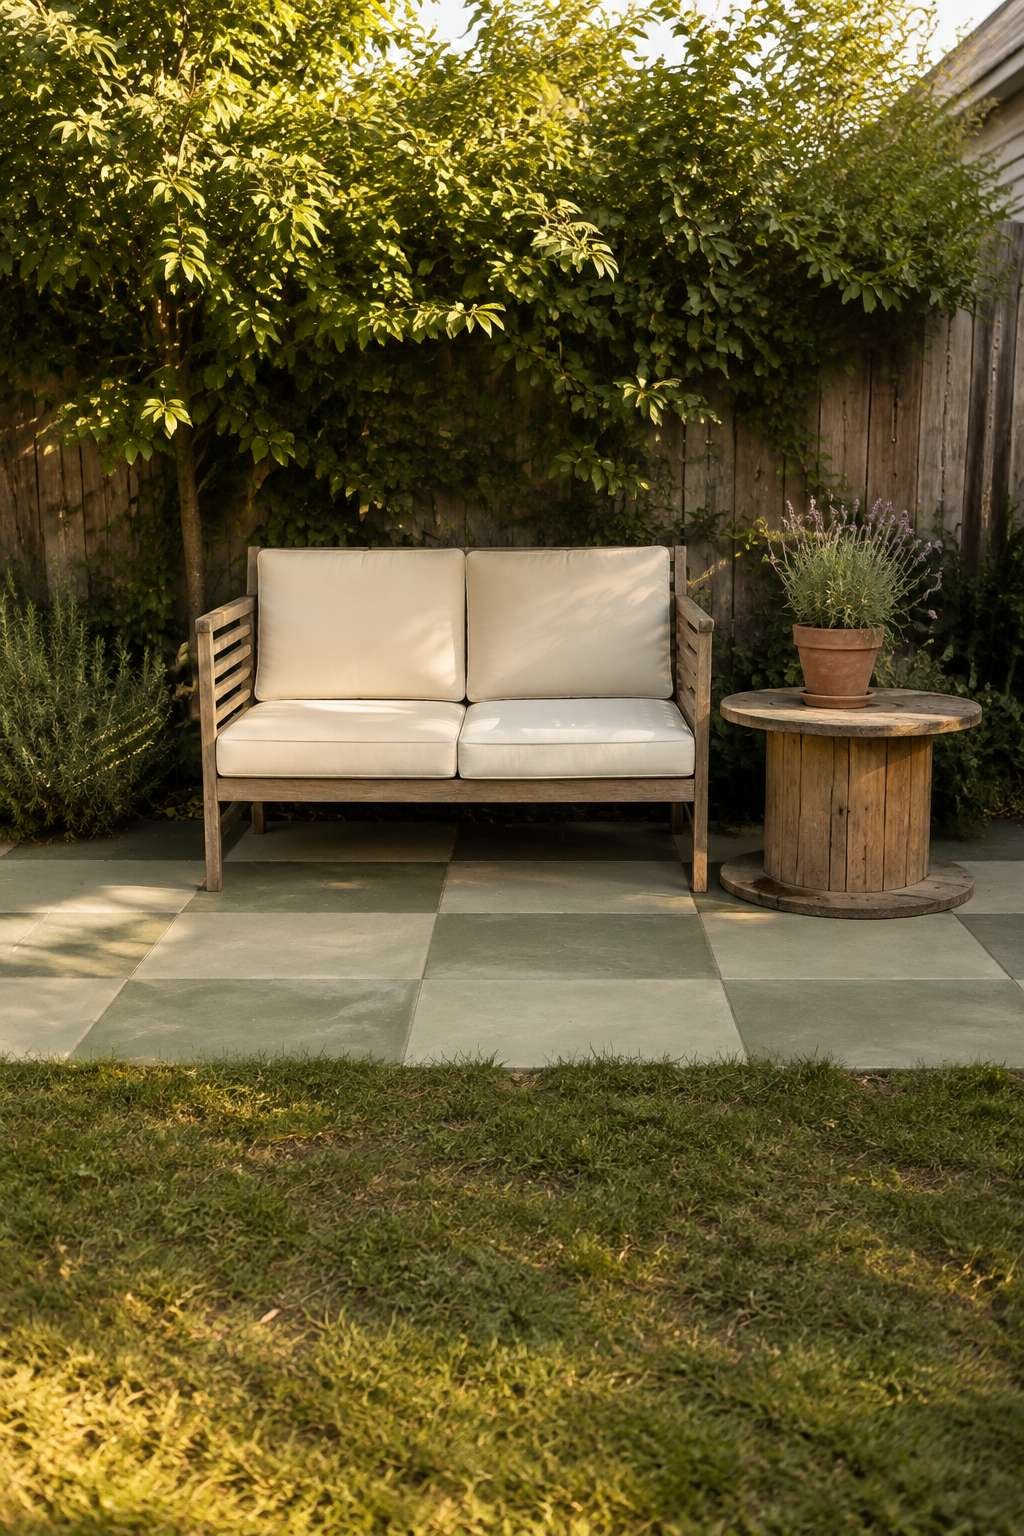
A tired concrete slab doesn’t need to be replaced to feel new — this design simply repaints it in a soft sage green, instantly refreshing the space at a fraction of the cost of new hardscaping. Furnished with a small secondhand loveseat bench and a repurposed wooden spool used as a side table, the patio feels updated and cohesive without any major construction.
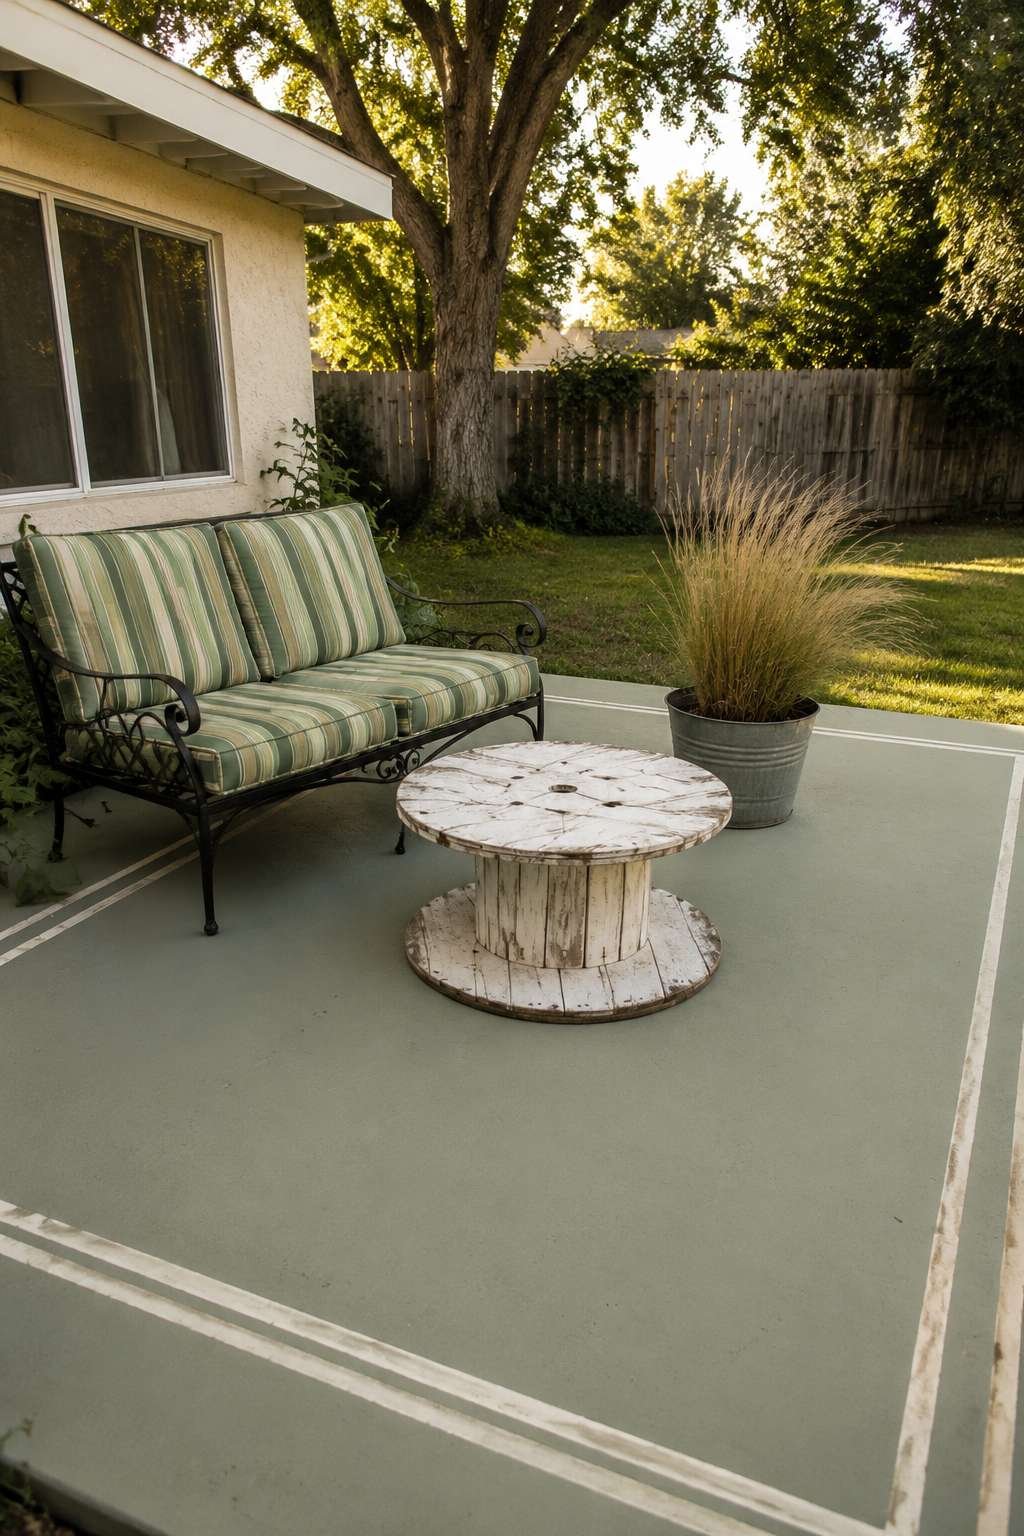
Golden afternoon light casts warm tones across the space, flattering both the muted green concrete and the natural texture of the wooden spool table. The realistic wear that develops on painted concrete over time only adds character, giving the patio a lived-in charm rather than looking artificially perfect. This approach proves that a can of concrete paint can do as much for a backyard’s atmosphere as an expensive resurfacing project.
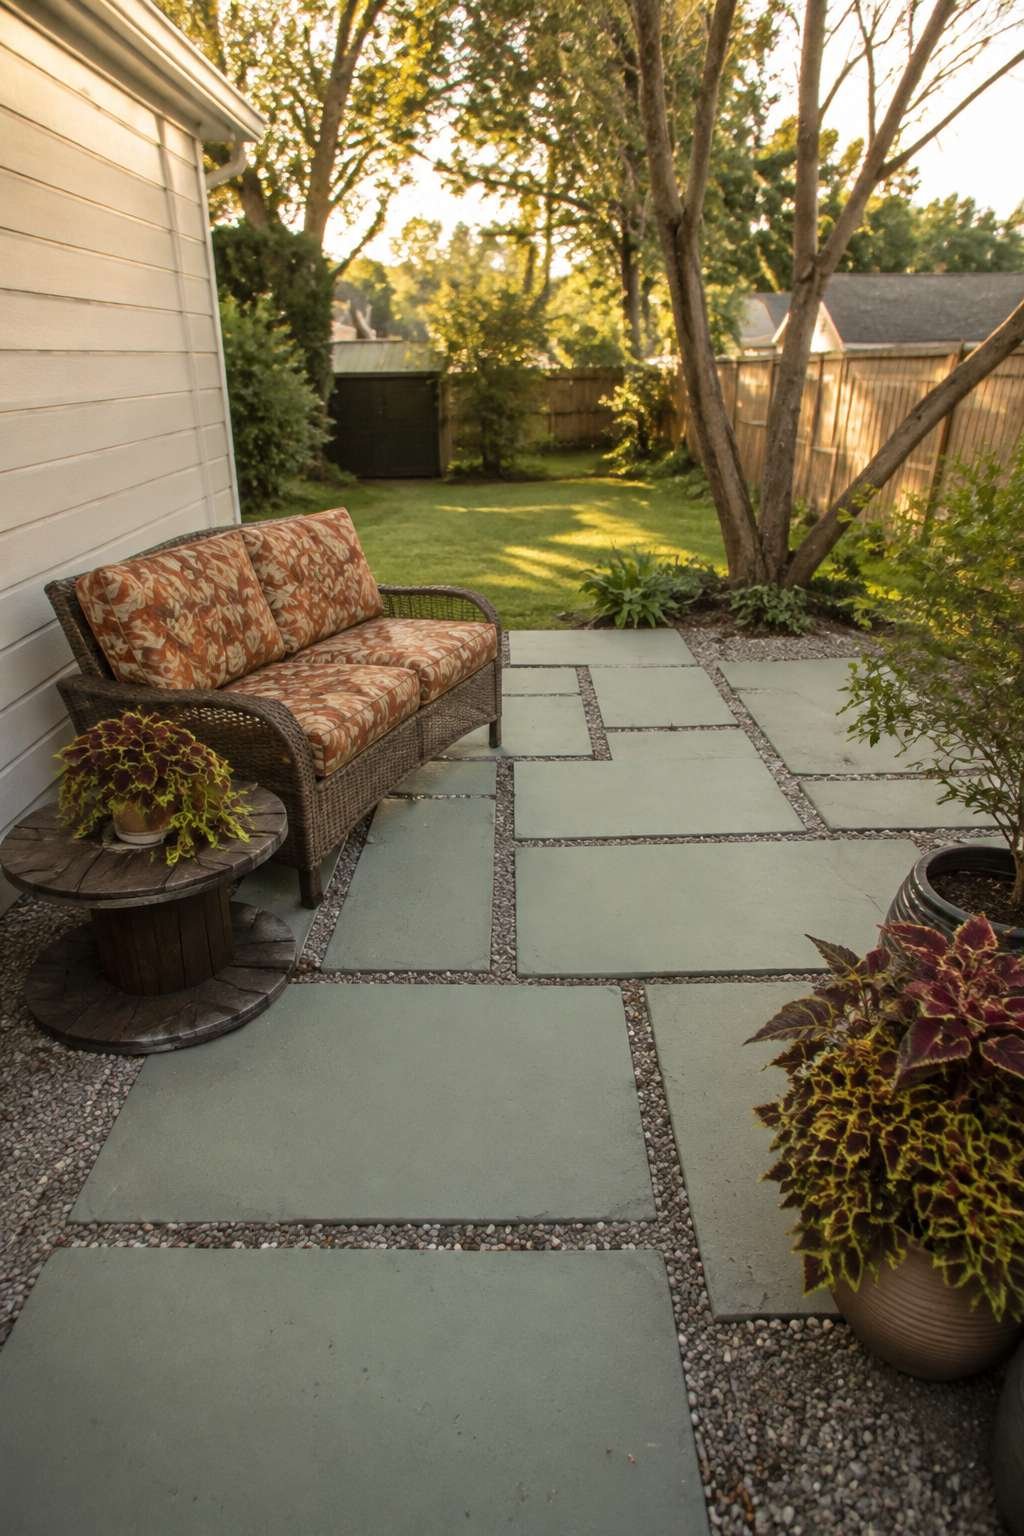
This idea is especially valuable for homeowners with existing concrete patios that feel outdated or plain, offering an affordable weekend project that dramatically changes the space’s mood. The secondhand loveseat and spool table keep furniture costs minimal while still delivering a finished, intentional look.
Key Design Tips:
- Clean and etch concrete thoroughly before painting for better adhesion
- Choose exterior concrete paint rated for foot traffic
- Sand a secondhand loveseat and refresh it with new outdoor cushions
- Use a cable spool as a side table, sanded smooth and sealed
- Reapply a protective topcoat every couple of seasons
13. Affordable Kids Play Corner with Sandbox
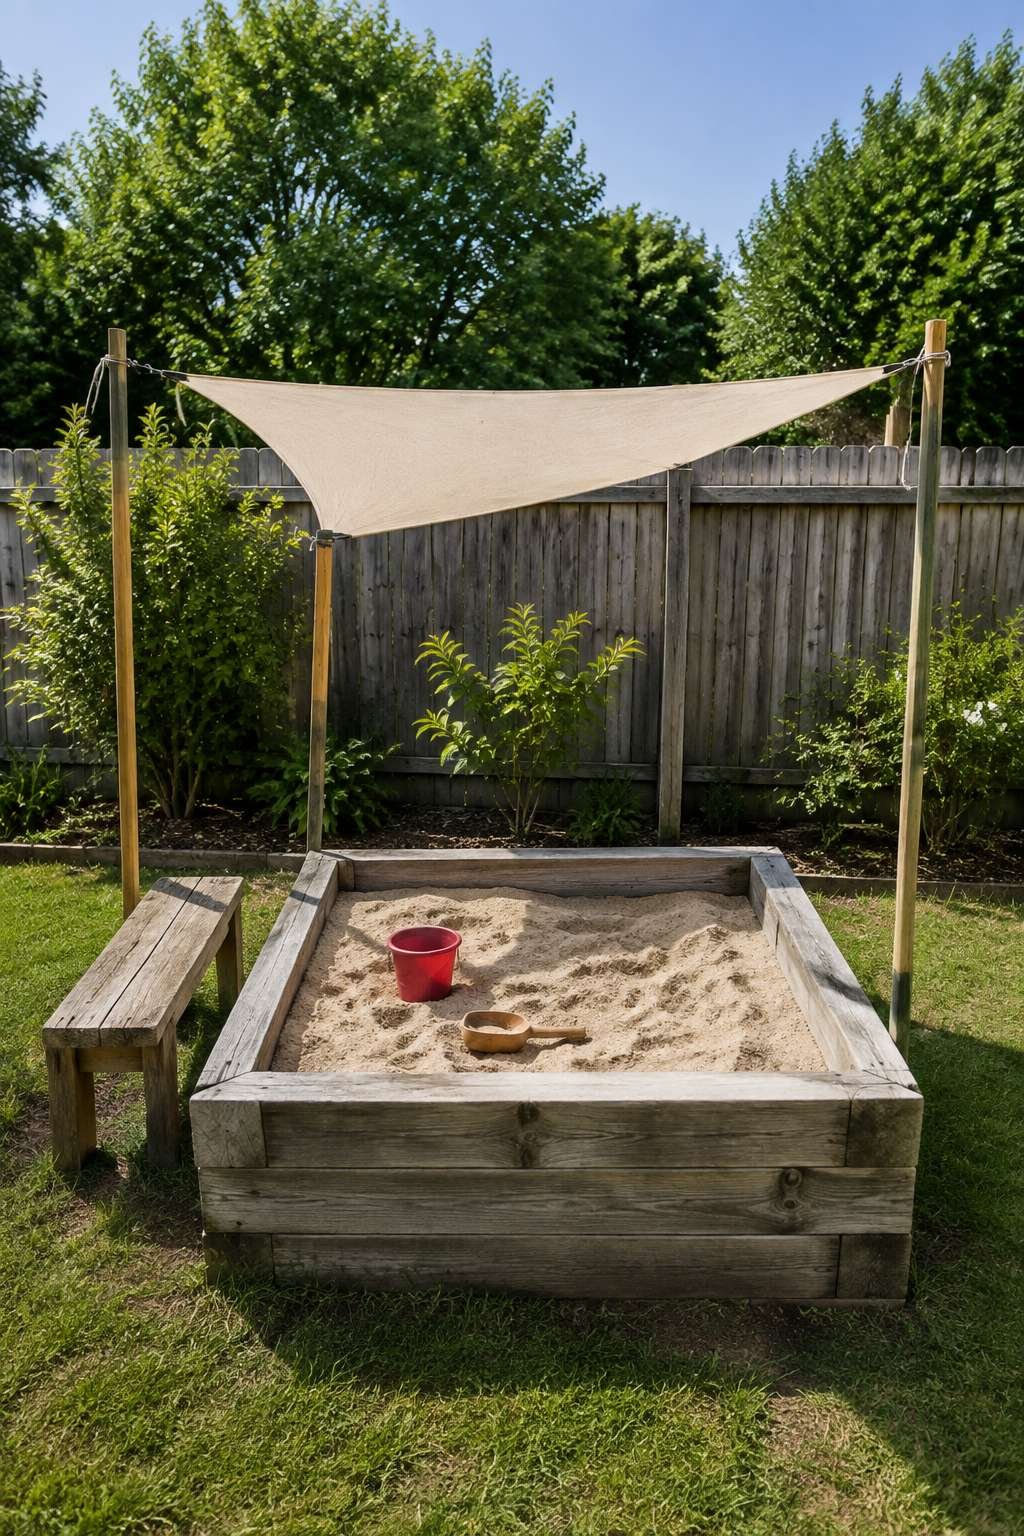
Family-friendly backyards don’t need elaborate play structures — this design centers on a simple sandbox built from reclaimed wooden planks and filled with clean play sand, positioned near a small canvas shade canopy. The reclaimed planks keep material costs low while still providing a sturdy, contained frame for hours of imaginative play.
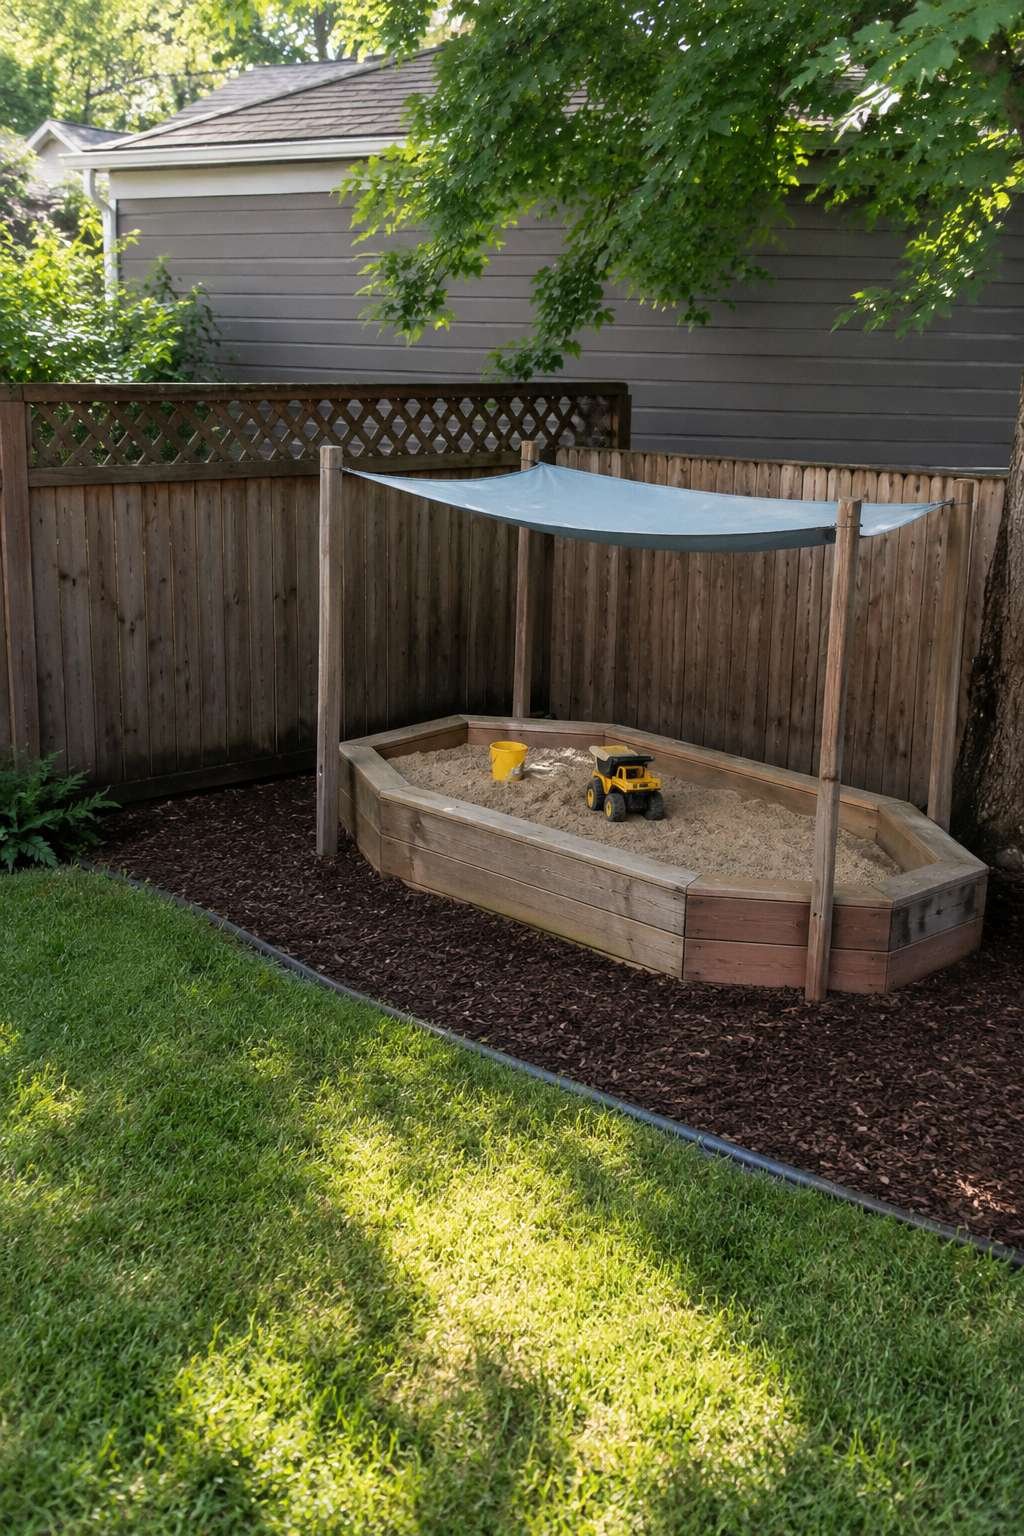
Bright natural daylight illuminates the modest suburban yard, keeping the play area cheerful and easy to supervise from anywhere nearby. The canvas canopy offers relief from direct sun during peak hours, protecting young children without the expense of a permanent shade structure. Together, these simple elements create a genuinely practical, low-cost family space.

This concept is particularly appealing to parents who want a functional play area without dedicating significant yard space or budget to it. Because the sandbox frame is straightforward to build, it’s also an achievable weekend project for most skill levels, and the canopy can be repositioned as the sun’s angle shifts throughout the seasons.
Key Design Tips:
- Line the sandbox base with landscape fabric to deter weeds and pests
- Use untreated or child-safe sealed wood for the sandbox frame
- Cover the sandbox when not in use to keep sand clean and dry
- Position the canopy to block peak midday sun exposure
- Check play sand periodically for debris or insect activity
14. Low-Budget Herb Spiral Garden
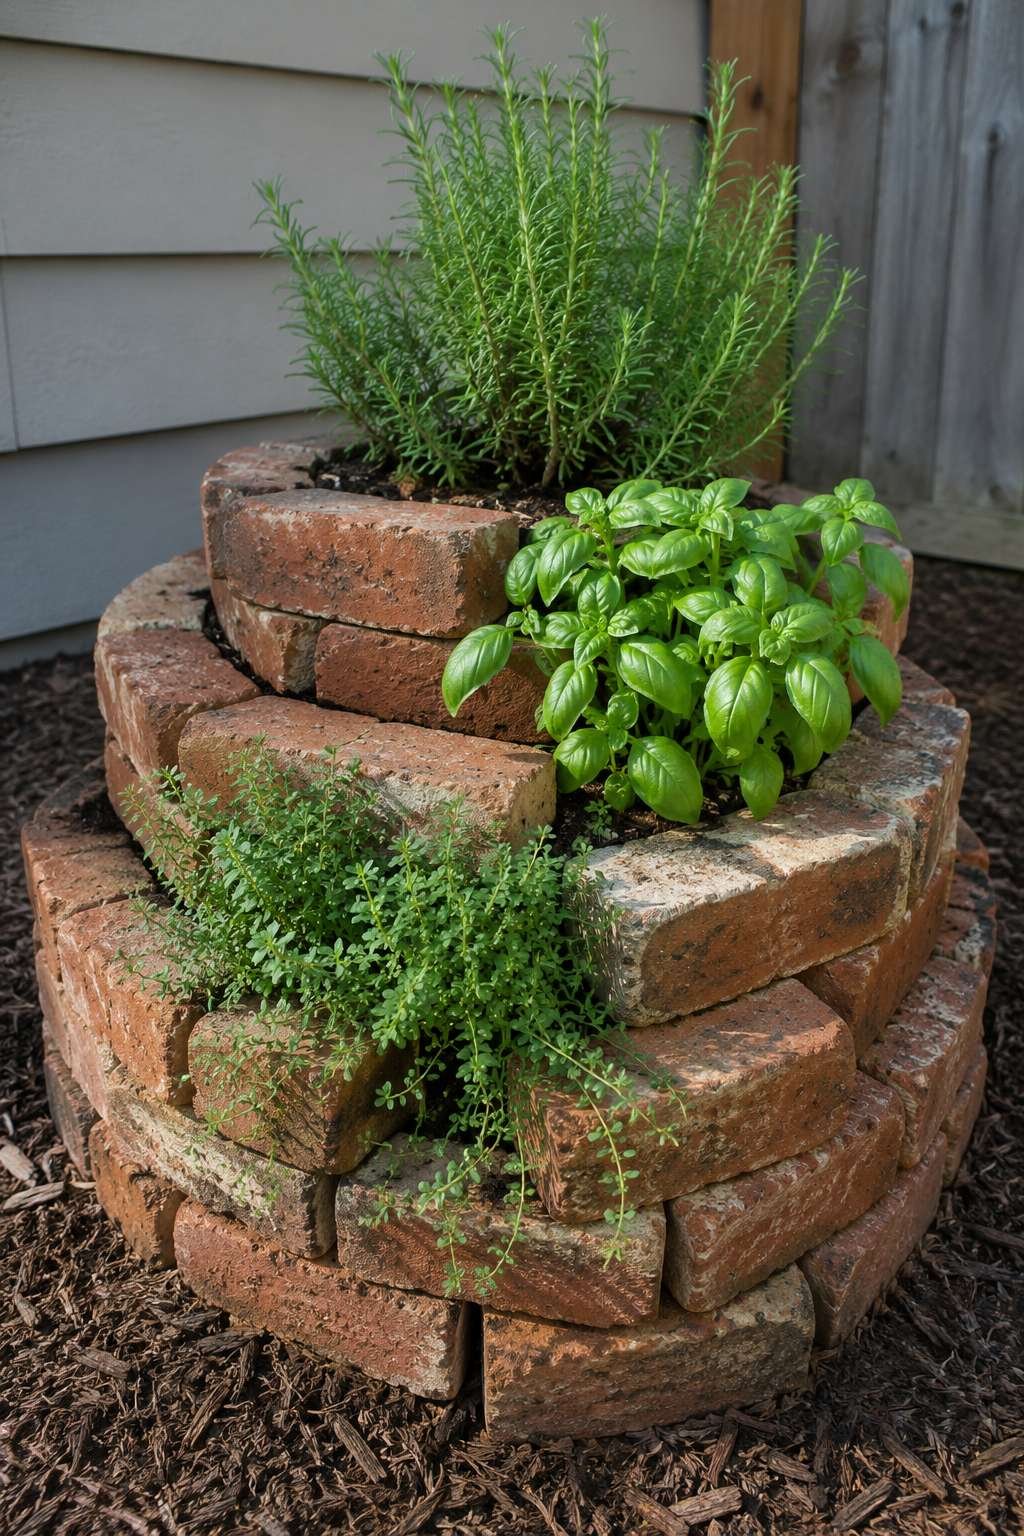
A herb spiral garden, built from stacked reclaimed bricks, is one of the most space-efficient and visually striking budget garden designs available. Planted with basil, rosemary, and thyme, the spiral shape allows different microclimates to form naturally within a single small footprint — drier, sunnier conditions near the top and moister shade lower down, letting a wider variety of herbs thrive together.

Soft natural sunlight highlights the rough texture of the reclaimed brick alongside the vivid green foliage spilling from each tier, creating a compact but visually rich garden feature. Because the spiral relies on stacked, unmortared brick, it requires no specialized skills or tools to build, and the bricks themselves are often available secondhand at little to no cost.

This design is ideal for small suburban yard corners where a full garden bed isn’t practical, offering an efficient way to grow a variety of culinary herbs in a tight space. Its sculptural form also makes it a genuine design feature in its own right, not merely a functional planting area.
Key Design Tips:
- Stack bricks in a tightening spiral, building height gradually toward the center
- Place drought-tolerant herbs like rosemary near the sunny top tier
- Keep moisture-loving herbs like basil in the lower, shadier sections
- Fill gaps between bricks with soil to stabilize the structure
- Harvest herbs regularly to encourage fuller, bushier growth
15. Simple DIY Pergola with Canvas Shade
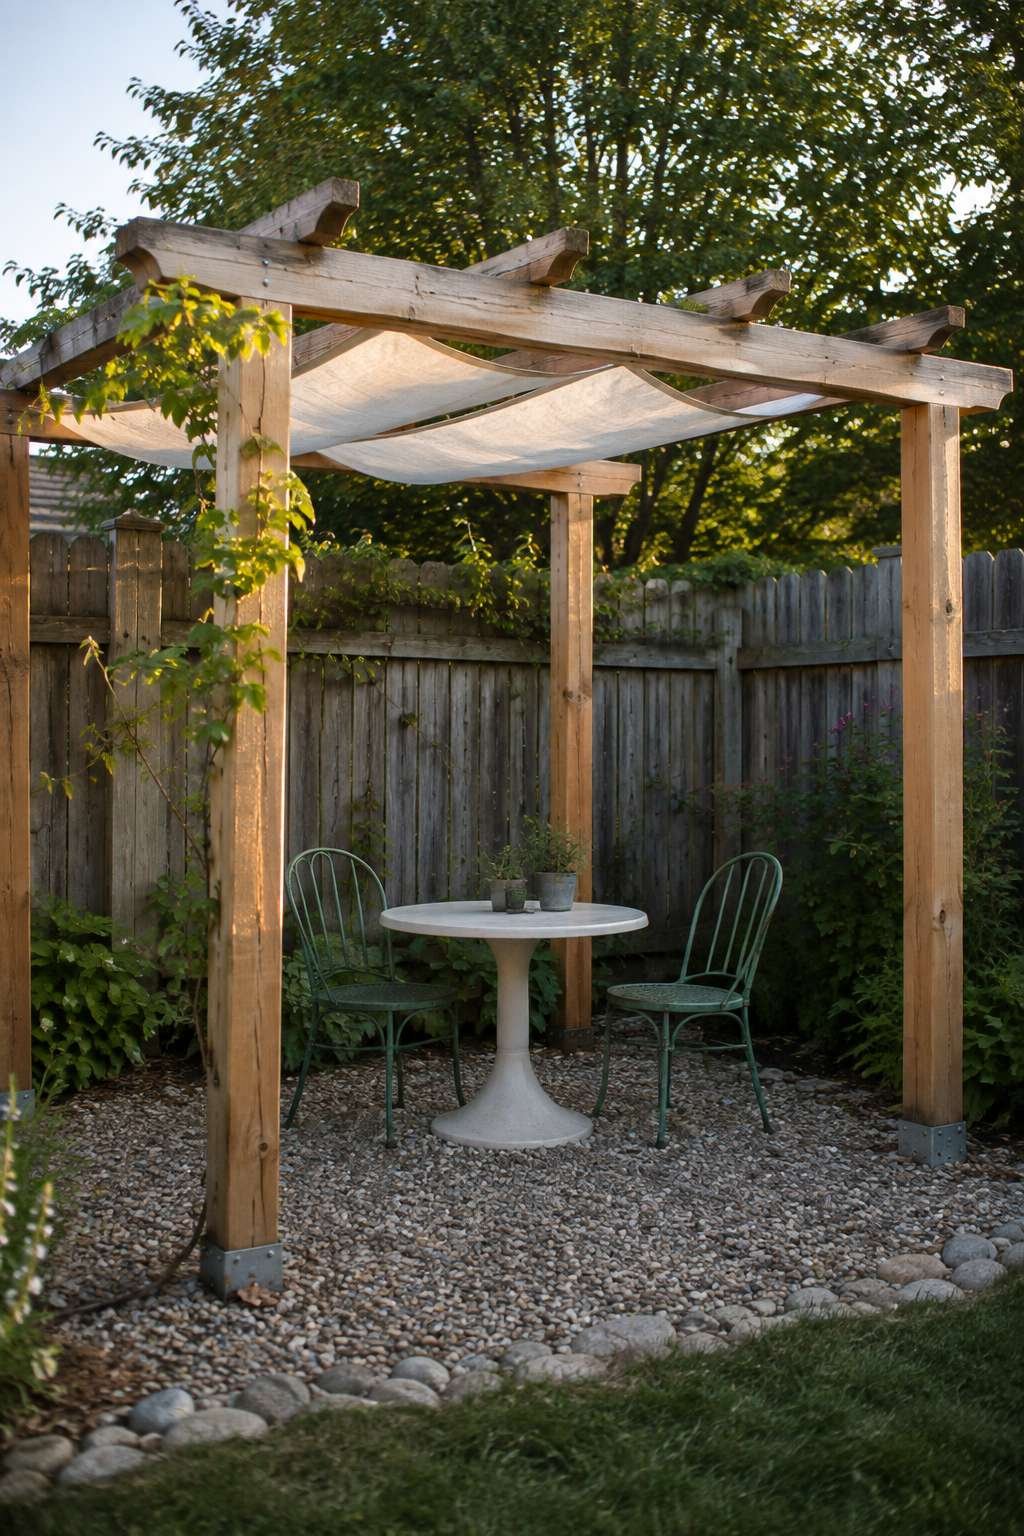
A basic pergola frame, built from unfinished cedar posts and crossbeams, offers budget-friendly shade and structure without the cost of a fully enclosed structure. Draped with an affordable canvas shade cloth and climbing vines, the pergola softens over time as plants fill in, becoming more lush and established each season. Beneath it, a small thrifted table and chairs set creates a cozy, defined seating area.
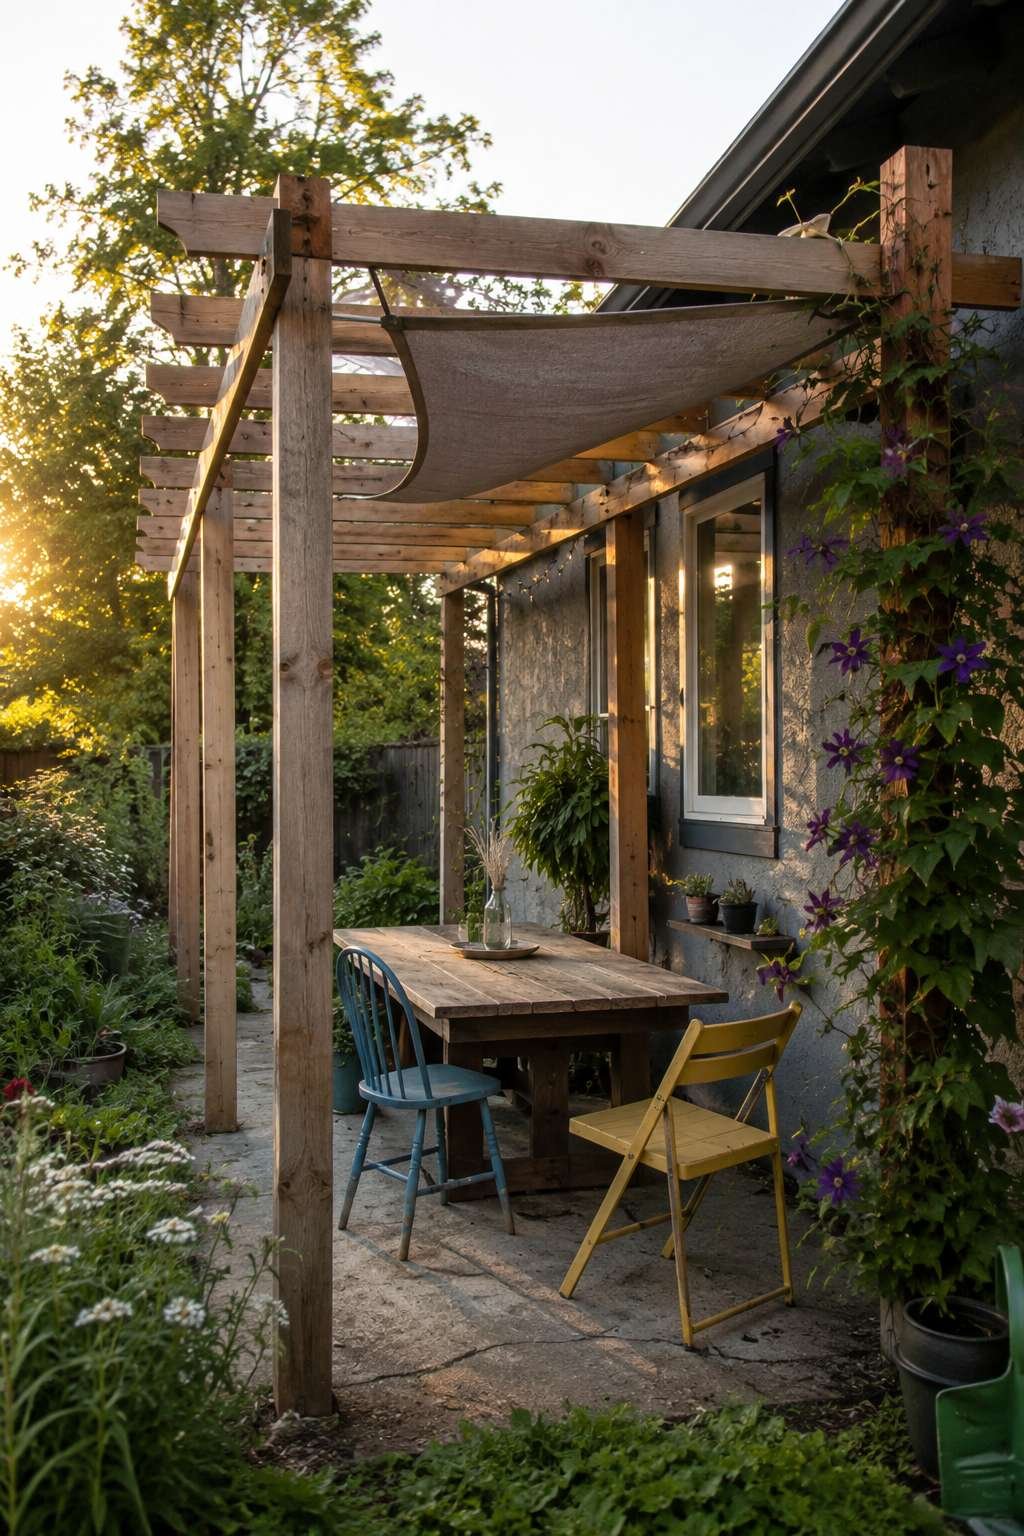
Warm golden hour light filters through the structure, creating natural shadows that shift and dance across the seating area as the sun moves. This interplay of light and shade gives even a simple, unfinished cedar frame a sense of warmth and dimension. Because the frame uses straightforward post-and-beam construction, it’s an achievable project for those with basic carpentry skills and standard tools.
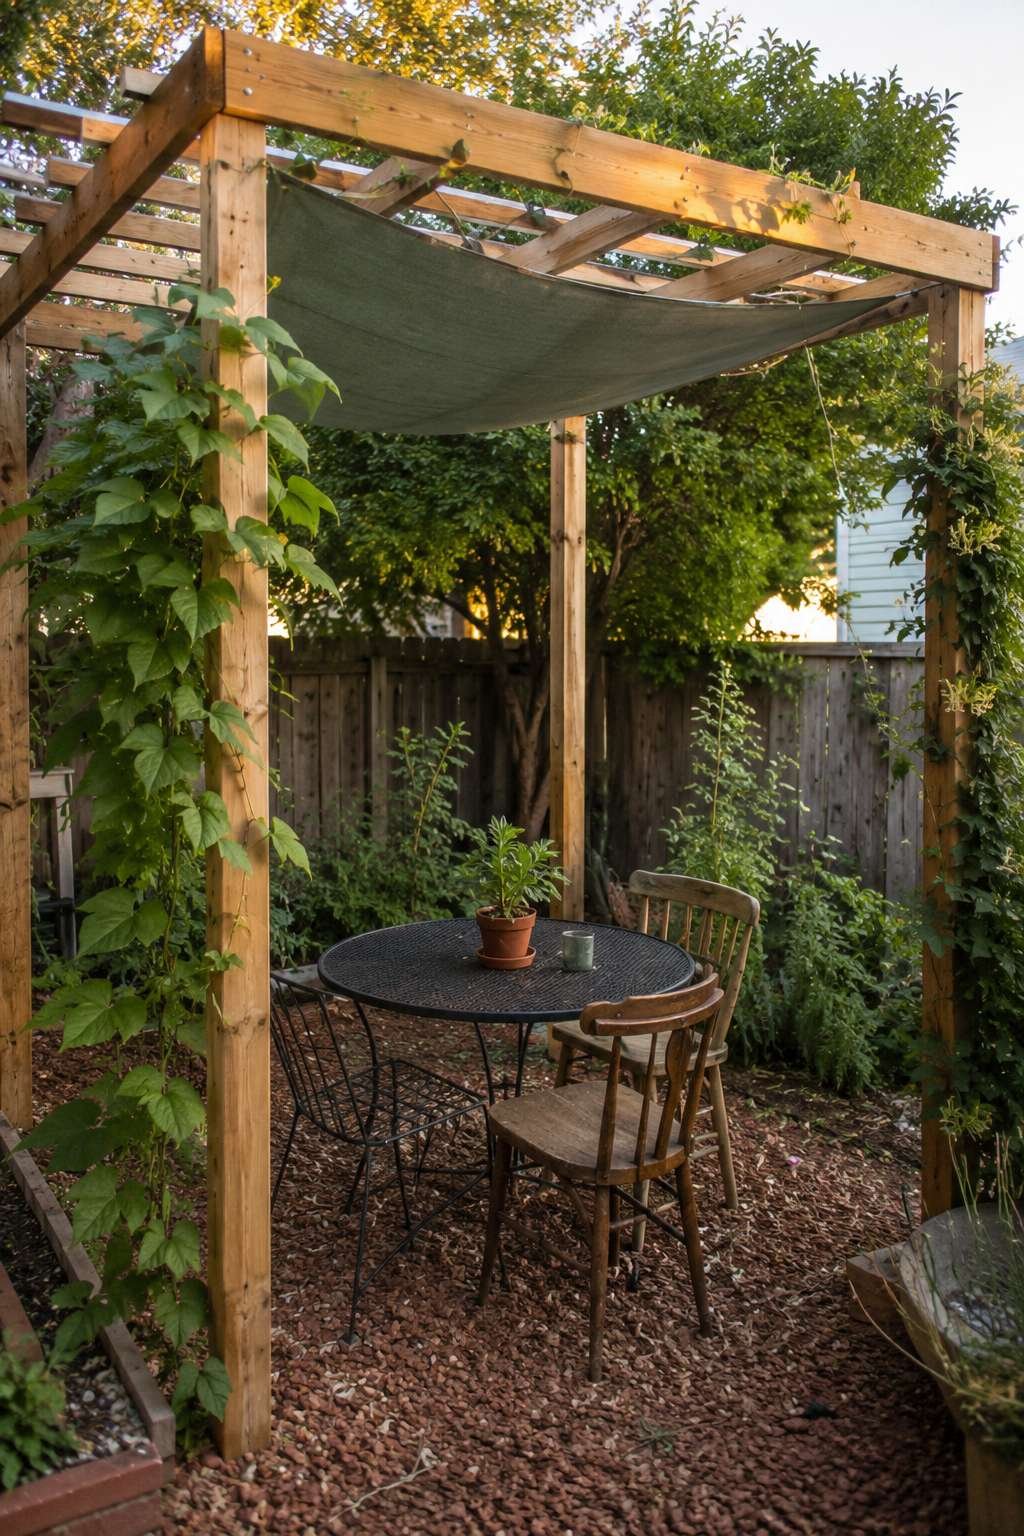
This concept suits homeowners who want defined outdoor structure and partial shade without committing to a permanent roof or professional installation. The combination of unfinished cedar, affordable canvas, and climbing vines delivers a genuinely charming outdoor room for a modest material investment.
Key Design Tips:
- Set posts in concrete footings for long-term stability
- Choose canvas shade cloth rated for UV resistance and outdoor use
- Train climbing vines along crossbeams early for fuller coverage
- Leave cedar unfinished initially to weather naturally over time
- Furnish beneath the pergola with lightweight, easily moved furniture
Every idea in this guide proves the same point: a beautiful backyard doesn’t hinge on a big budget, but on resourcefulness, texture, and a willingness to embrace imperfection. From a pallet wood seating area warmed by firelight to a herb spiral garden built from stacked reclaimed brick, these fifteen concepts show how secondhand materials, simple carpentry, and a little patience can transform an ordinary yard into a space that feels personal and complete.
The best place to start is with what you already have on hand — a few pallets, some leftover brick, a couple of trees perfectly spaced for a hammock. Pick one idea from this list, gather your materials, and give yourself permission to build it imperfectly. Over time, as plants fill in and furniture weathers naturally, your backyard will only grow more charming — proof that the most memorable outdoor spaces are often built one small, budget-conscious project at a time.
