The bedroom should be your personal sanctuary, a space that perfectly balances functionality with aesthetic appeal. Built-in storage solutions have become increasingly popular among homeowners seeking to maximize space while creating a custom, high-end look. However, installing bedroom built-ins is a significant investment that requires careful planning and consideration.
Before you commit to this transformative project, understanding the essential factors can save you time, money, and potential regrets. From measuring your space accurately to choosing the right materials, each decision impacts the final result. Proper planning ensures your built-ins enhance rather than overwhelm your bedroom, creating a seamless integration with your existing design scheme.
This comprehensive guide explores six critical considerations that every homeowner should understand before installing bedroom built-ins. Whether you’re dreaming of a walk-in closet alternative, a reading nook with integrated shelving, or a sleek entertainment center, these insights will help you make informed decisions and achieve the bedroom of your dreams.
1. Assess Your Space and Measurements Carefully
The foundation of any successful built-in project begins with precise measurements and a thorough understanding of your room’s dimensions. Many homeowners underestimate this crucial step, leading to costly mistakes and design compromises. Your bedroom’s unique layout, including window placement, door swing patterns, and ceiling height, directly influences what’s possible.
Consider the room’s traffic flow before finalizing your built-in placement. Built-ins should enhance movement through the space, not create obstacles or cramped pathways. Account for furniture placement, ensuring adequate clearance for bed access, dresser drawers, and closet doors. A general rule is maintaining at least 36 inches of walking space around major furniture pieces.
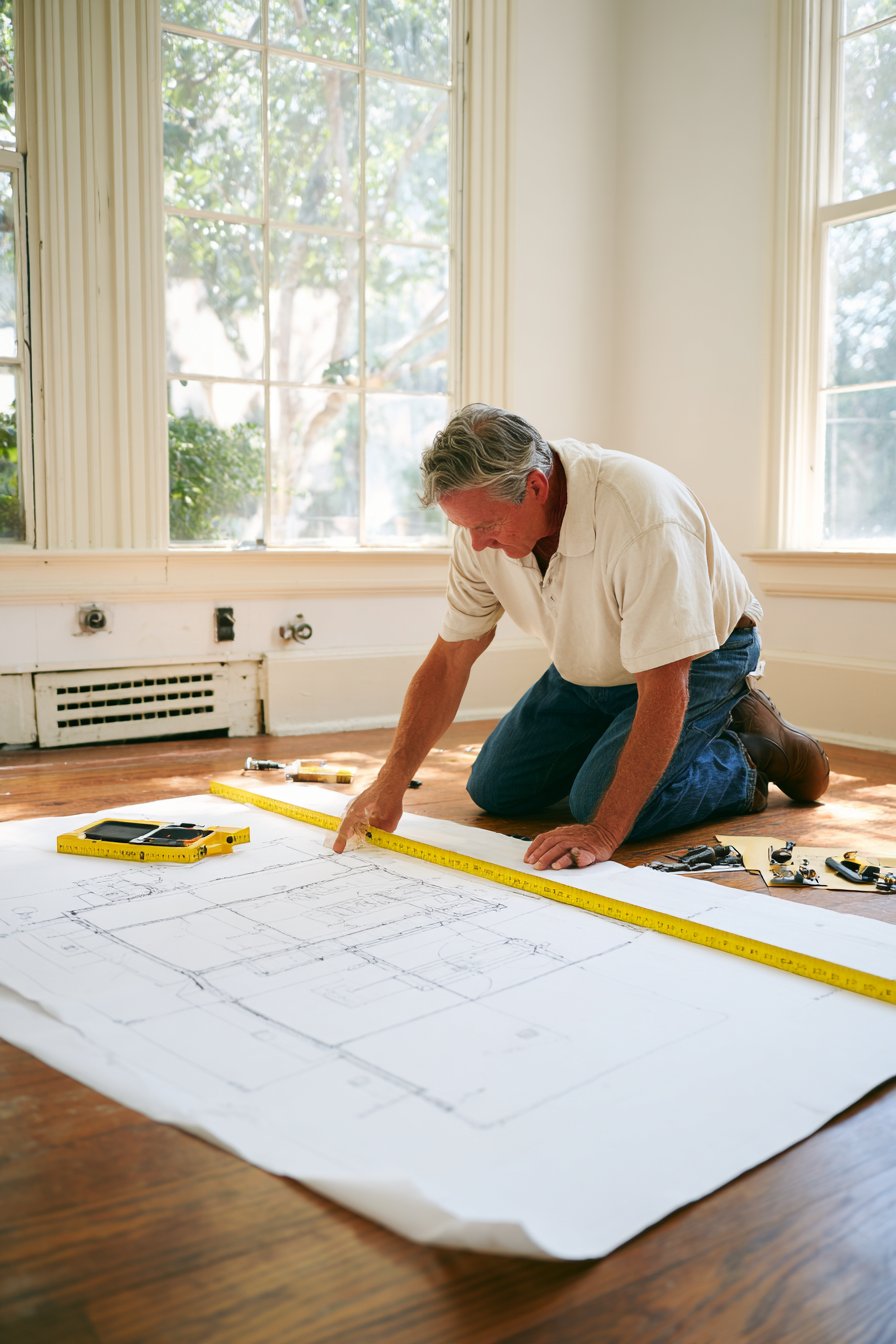
Don’t forget to evaluate structural elements like electrical outlets, heating vents, and baseboards. These features may require relocation or creative integration into your built-in design. Professional installers can work around these challenges, but identifying them early prevents surprises during construction and helps establish a realistic budget.
- Measure room dimensions at multiple points, as walls aren’t always perfectly straight
- Document ceiling heights, especially in older homes with sloped or uneven ceilings
- Photograph existing electrical outlets and switches for reference during planning
- Create a scaled floor plan to visualize different built-in configurations
- Consider future needs, like accommodating a larger bed or additional furniture
- Account for door clearances and ensure built-ins won’t interfere with opening mechanisms
2. Determine Your Budget and Cost Factors
Built-in installations vary dramatically in cost, with custom solutions ranging from a few thousand to tens of thousands of dollars. Understanding the financial commitment upfront helps you make realistic decisions about materials, complexity, and whether to hire professionals or attempt a DIY approach. Labor typically represents 40-60% of the total project cost.
Material selection significantly impacts your bottom line while affecting durability and aesthetic appeal. Solid hardwoods like oak or maple deliver superior quality but command premium prices. Medium-density fiberboard (MDF) offers an affordable alternative that accepts paint beautifully, making it popular for painted finishes. Plywood provides a middle ground with good strength and reasonable cost.
Hidden expenses often catch homeowners off guard during built-in projects. Professional installation fees, electrical work for integrated lighting, paint or finish materials, and hardware selections add up quickly. Budget an additional 15-20% beyond quoted estimates for unexpected complications or design changes that emerge during construction.
- Request detailed quotes from at least three contractors for comparison
- Allocate funds for quality hardware like soft-close hinges and drawer slides
- Consider phasing the project if budget constraints exist, completing sections over time
- Research DIY options for simpler designs to reduce labor costs substantially
- Factor in costs for removing existing furniture or storage you’ll be replacing
- Set aside contingency funds for potential wall repairs or electrical updates needed
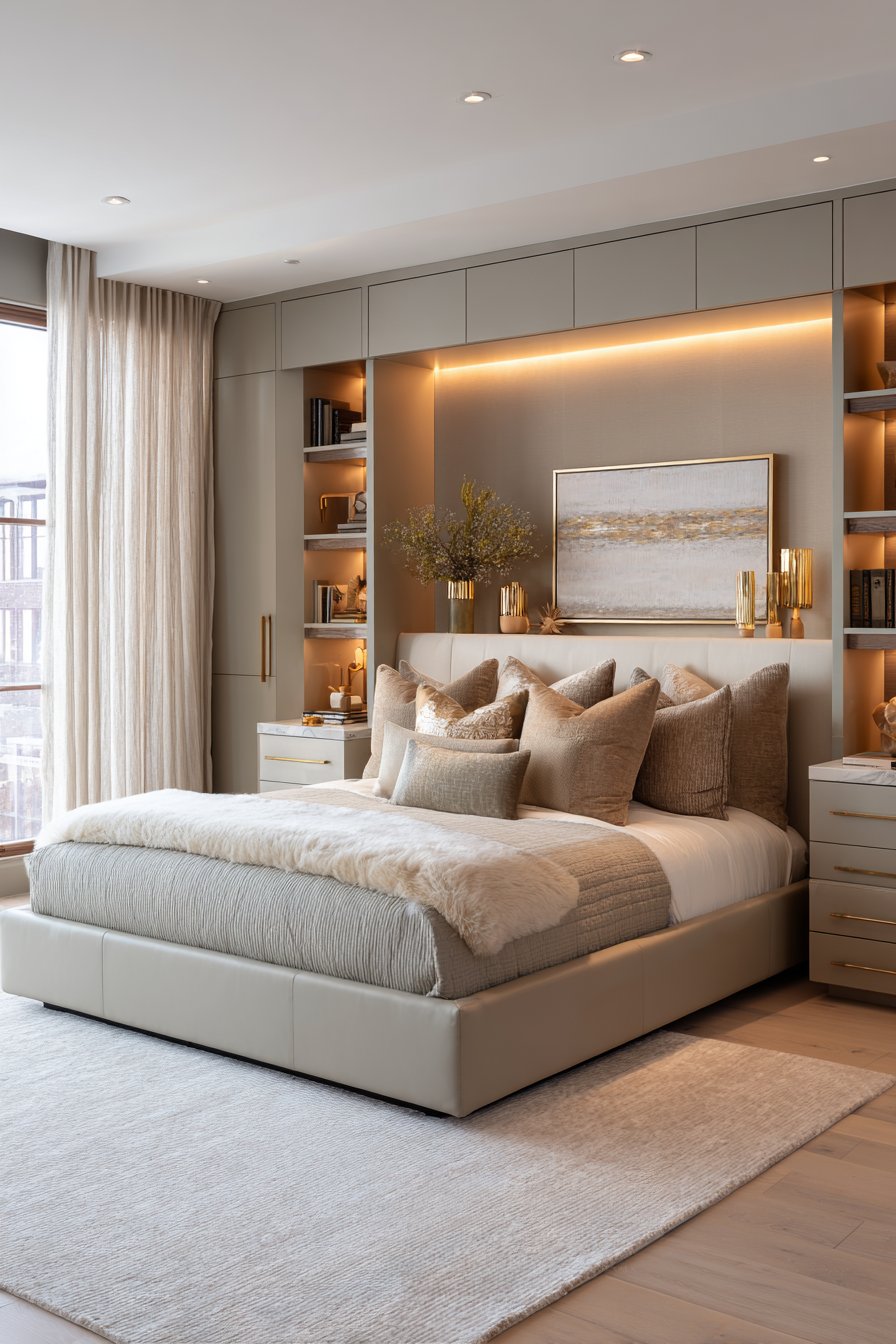
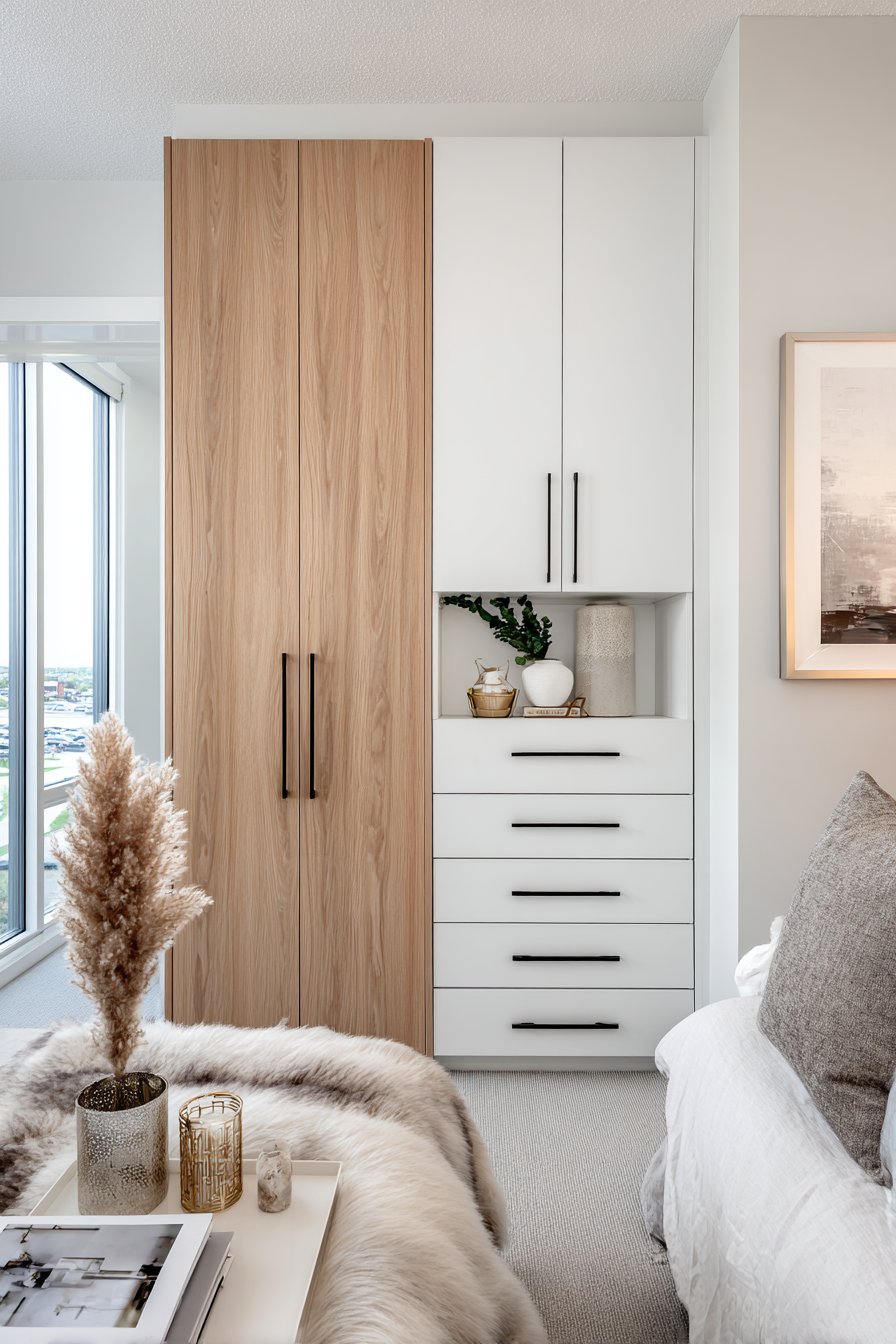
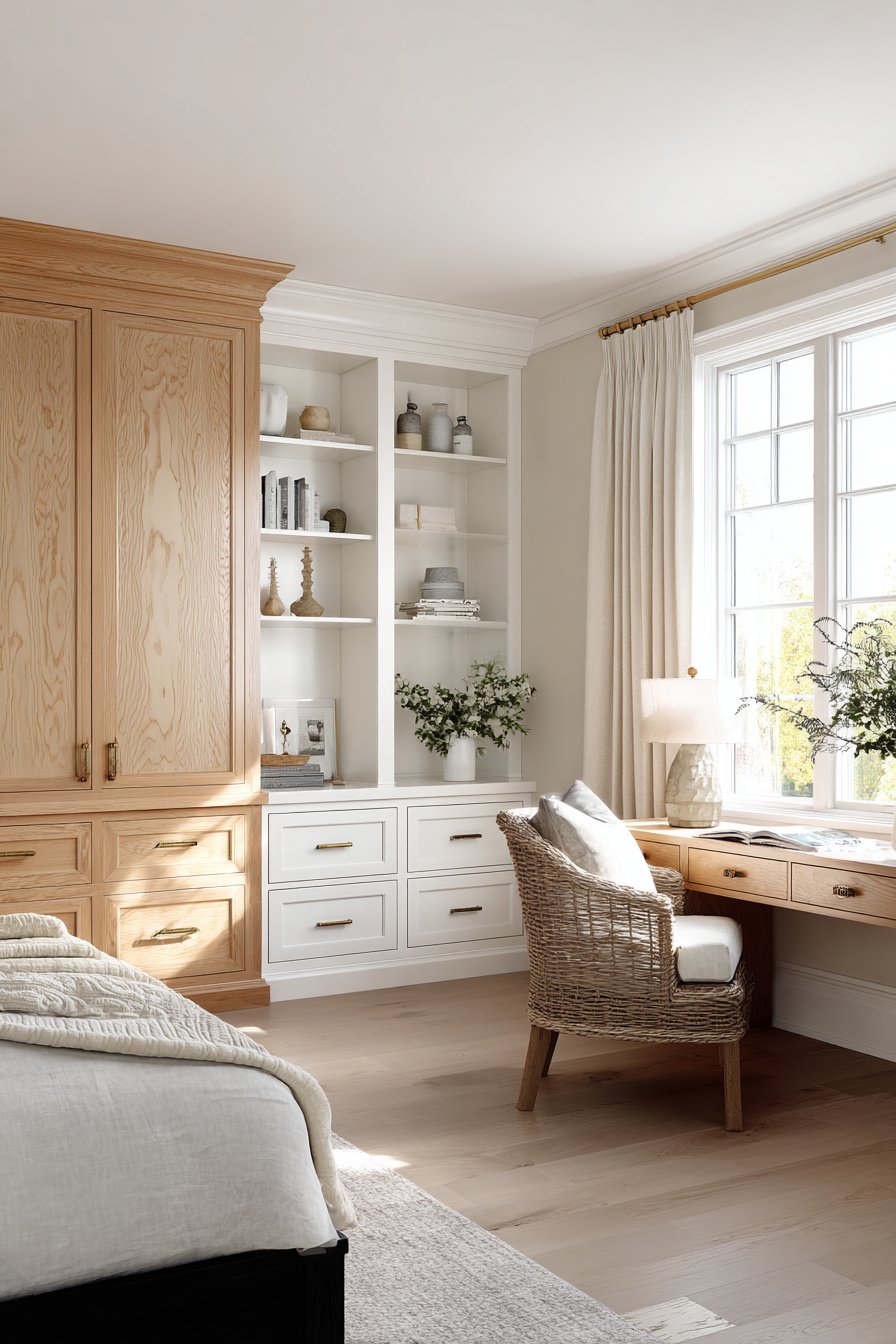
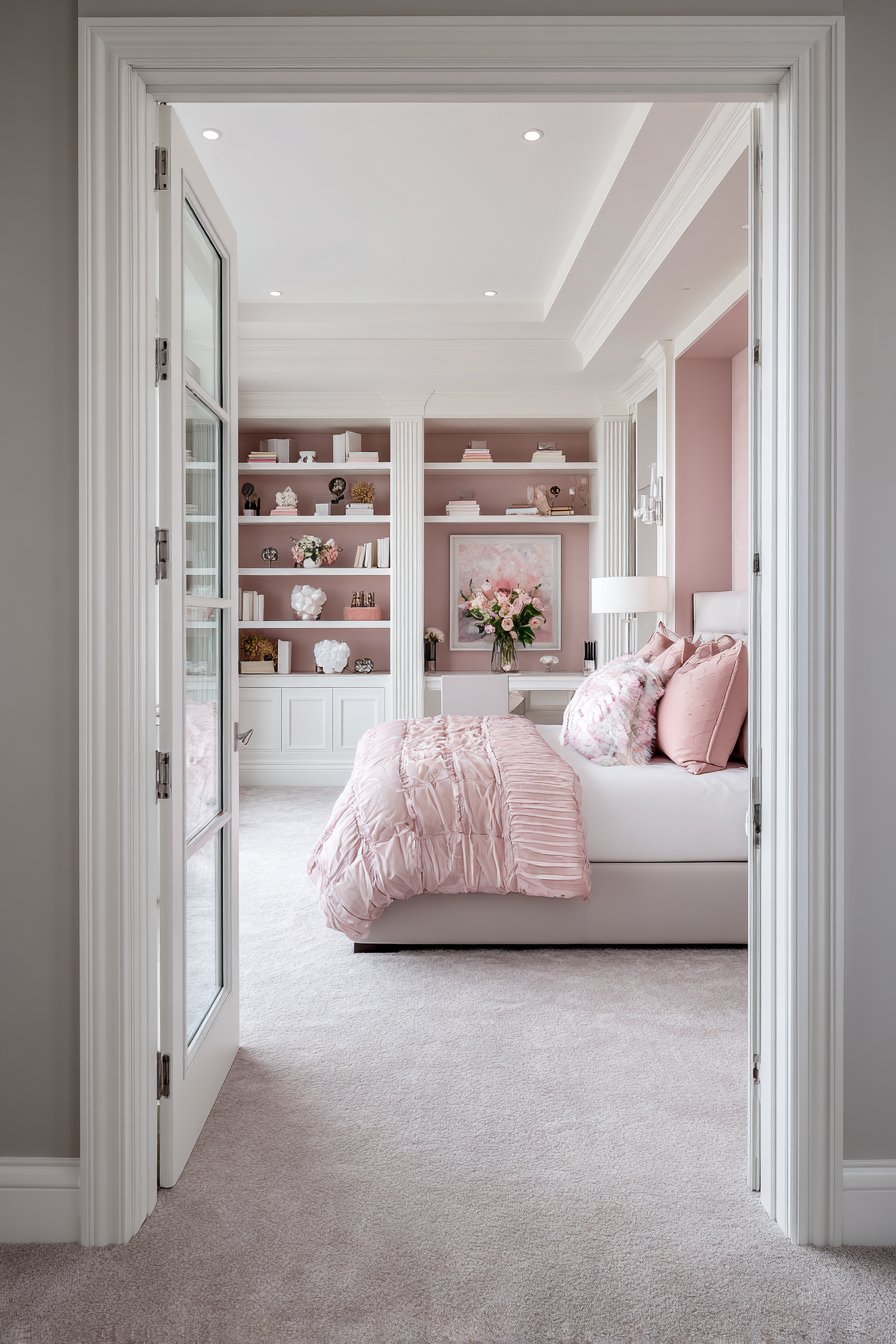
3. Choose the Right Style and Design Aesthetic
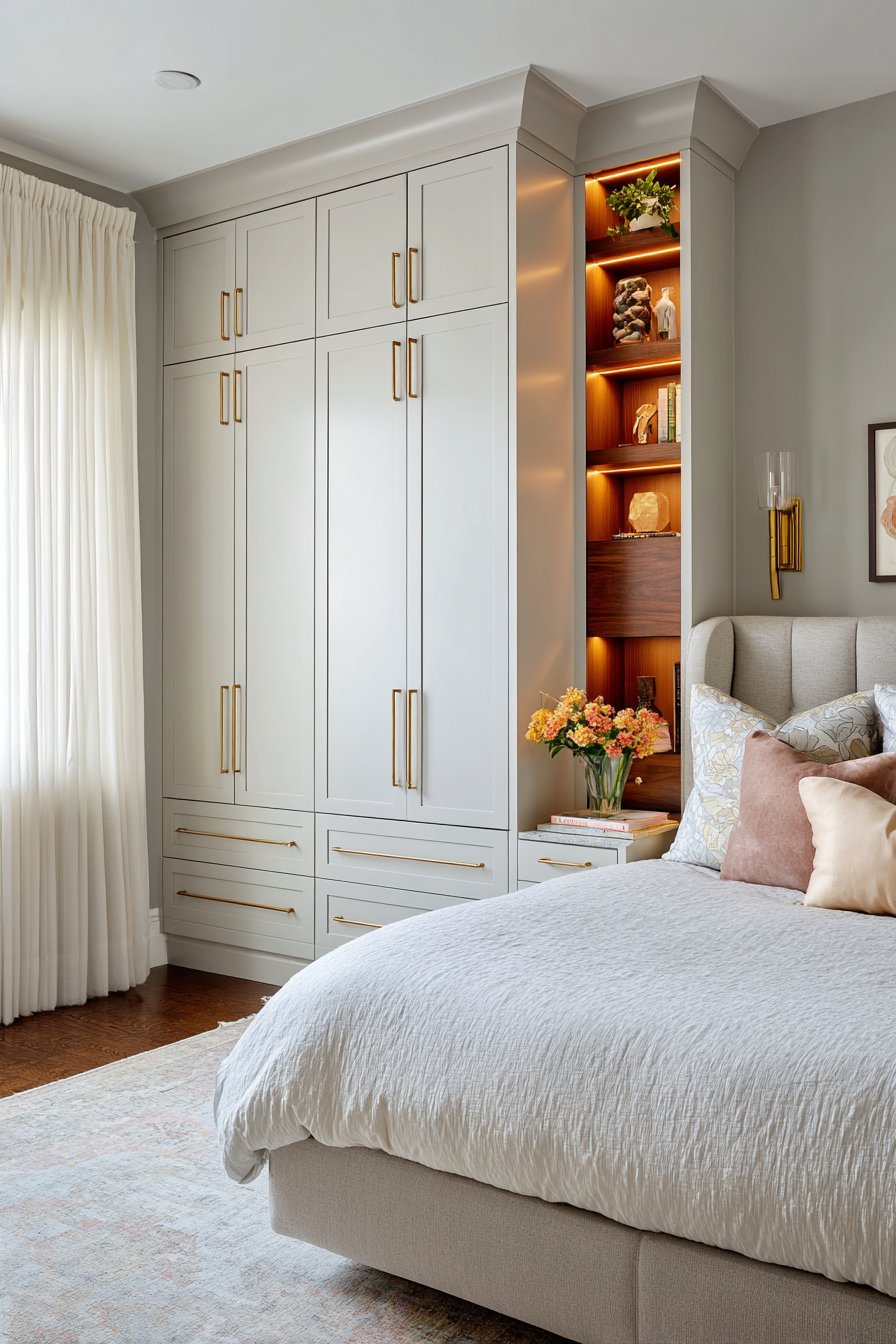
Your built-ins should complement your bedroom’s existing design language rather than clash with established aesthetics. Modern minimalist bedrooms benefit from clean-lined, handleless cabinetry in neutral tones, while traditional spaces welcome ornate moldings and classic hardware finishes. Consistency creates visual harmony and elevates the room’s overall sophistication.
Consider functional design elements that enhance daily living beyond pure aesthetics. Built-in nightstands with integrated charging stations, adjustable shelving for growing book collections, or display niches with accent lighting transform ordinary storage into personalized features. The best designs anticipate your specific lifestyle needs and usage patterns.
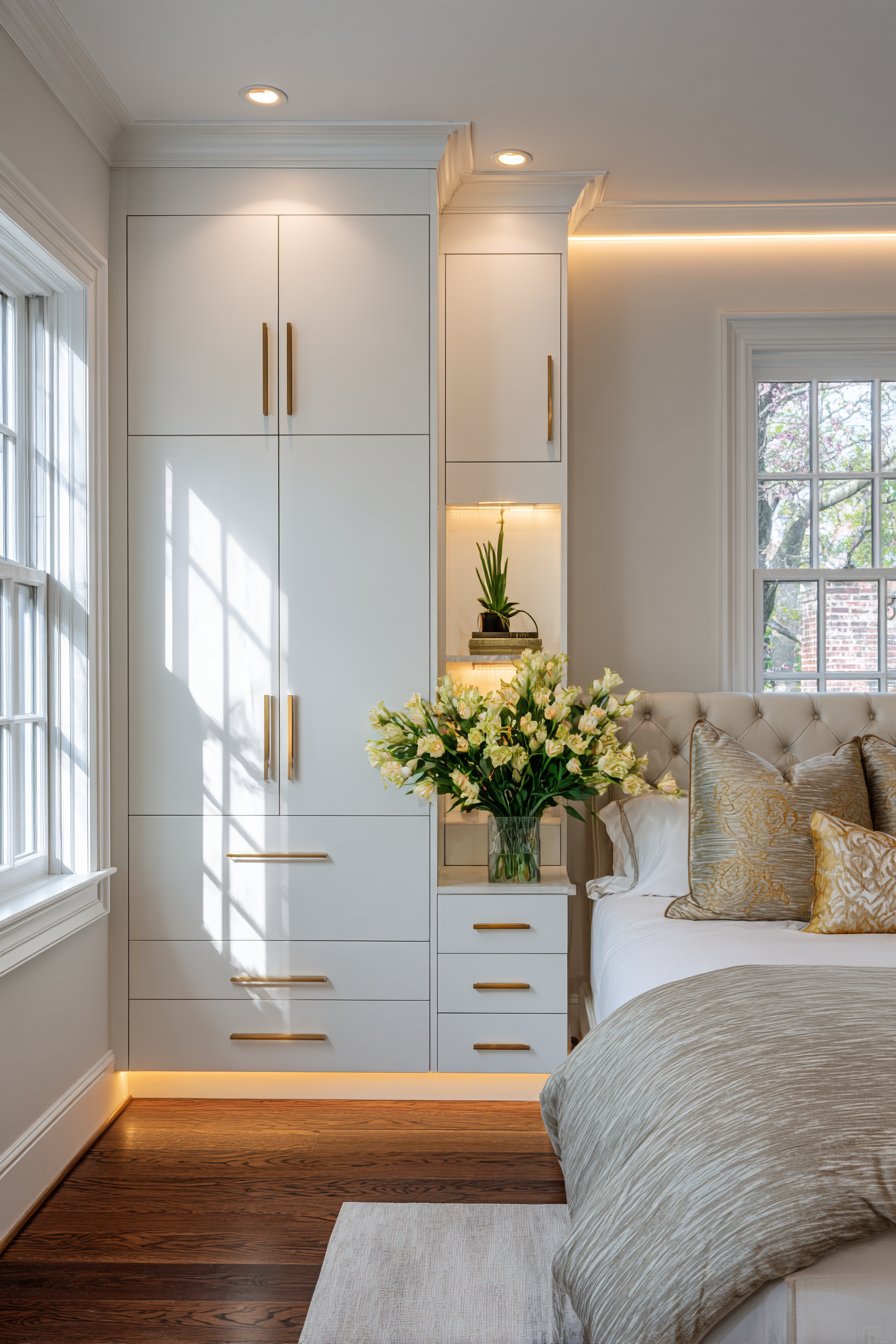
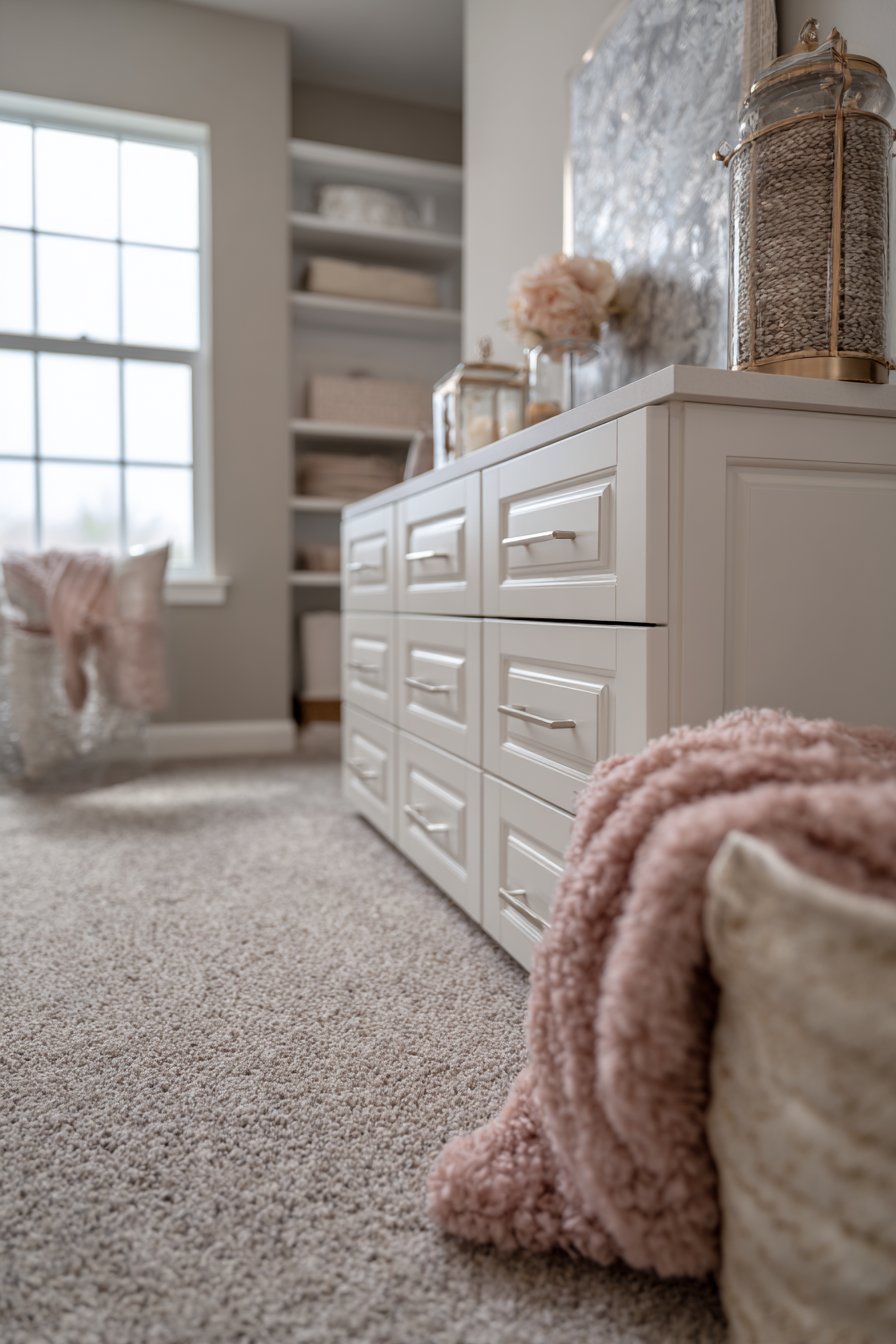
Color and finish selections dramatically influence how built-ins integrate with your space. Matching existing trim work creates seamless cohesion, while contrasting colors make built-ins a bold focal point. White or light-colored built-ins visually expand smaller bedrooms, whereas darker tones add drama and coziness to spacious suites.
- Select finishes that coordinate with existing furniture wood tones or paint colors
- Incorporate glass-front cabinets to display cherished items while protecting from dust
- Add crown molding or decorative trim for an upscale, furniture-quality appearance
- Consider two-tone designs with contrasting interiors for visual interest
- Include open shelving mixed with closed storage for balanced functionality
- Research current trends but prioritize timeless design for long-term satisfaction
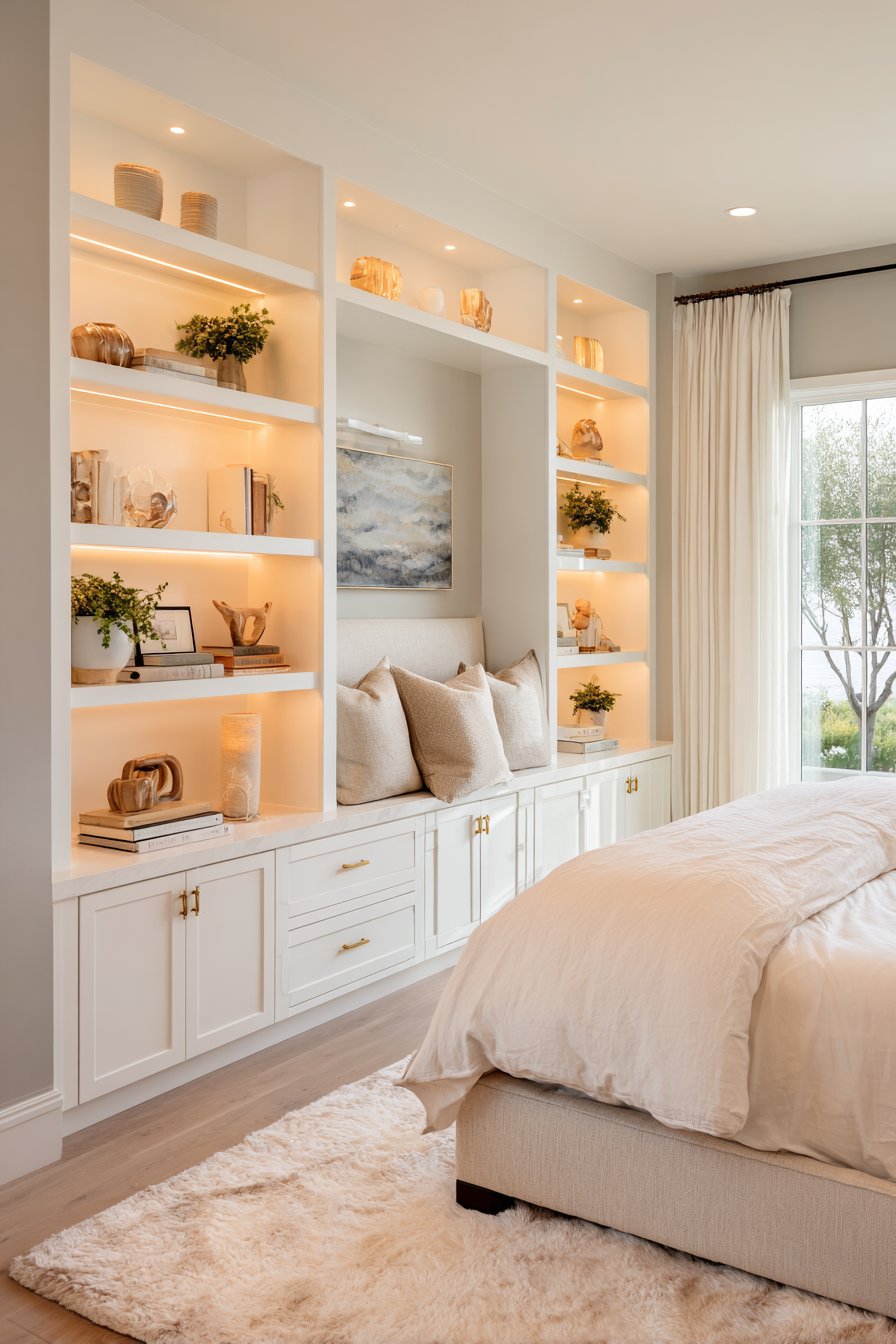
4. Plan for Adequate Storage Functionality
The primary purpose of bedroom built-ins centers on maximizing storage capacity while maintaining an organized, clutter-free environment. Thoughtfully designed built-ins accommodate everything from clothing and accessories to books, electronics, and personal collections. Analyze your current storage challenges to ensure your built-ins address specific organizational pain points.
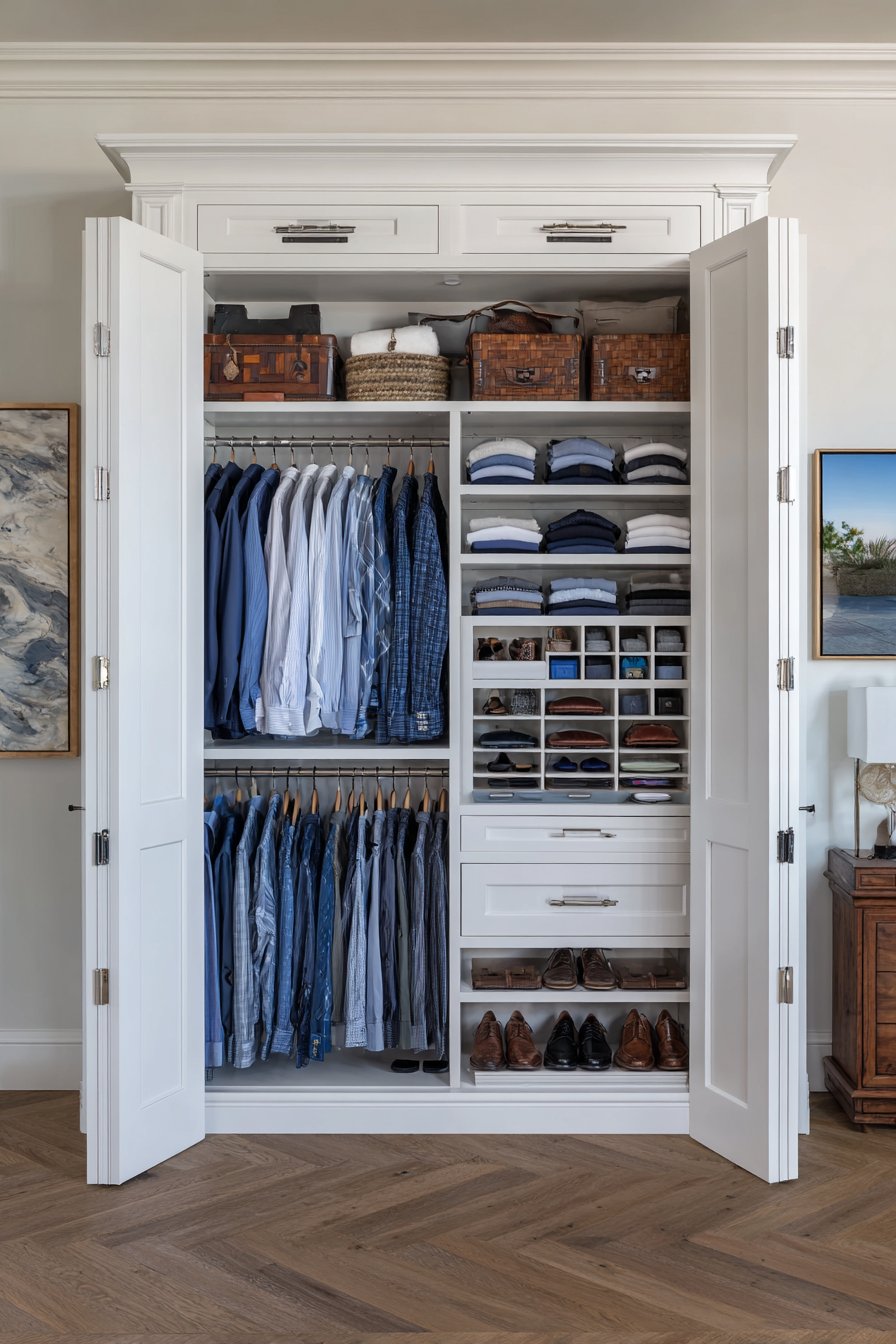
Vertical space utilization represents one of built-ins’ greatest advantages over freestanding furniture. Floor-to-ceiling designs capture otherwise wasted space above standard dressers and wardrobes. Including upper cabinets or shelving for seasonal items and rarely used belongings keeps everyday essentials accessible while tucking away occasional pieces.
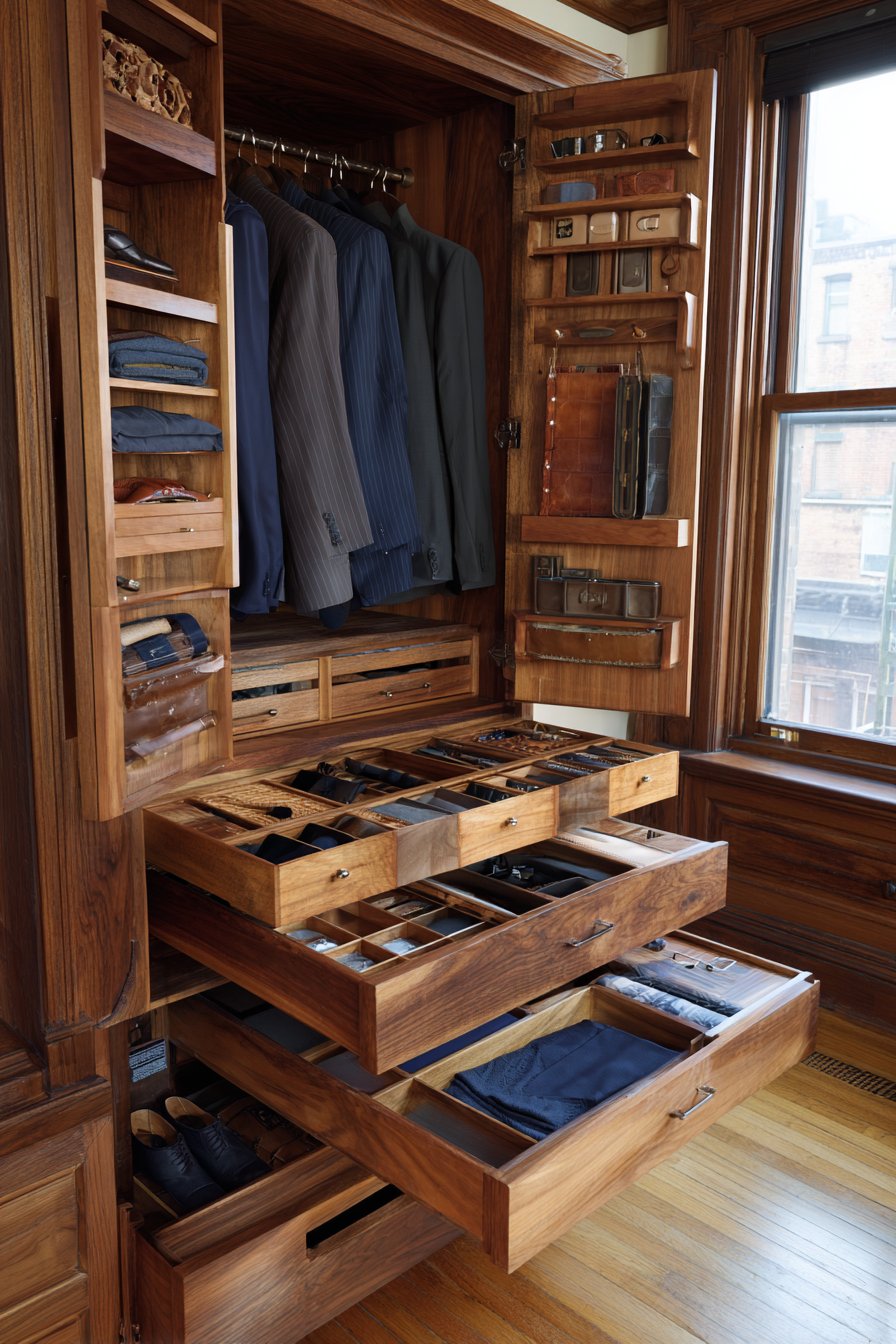
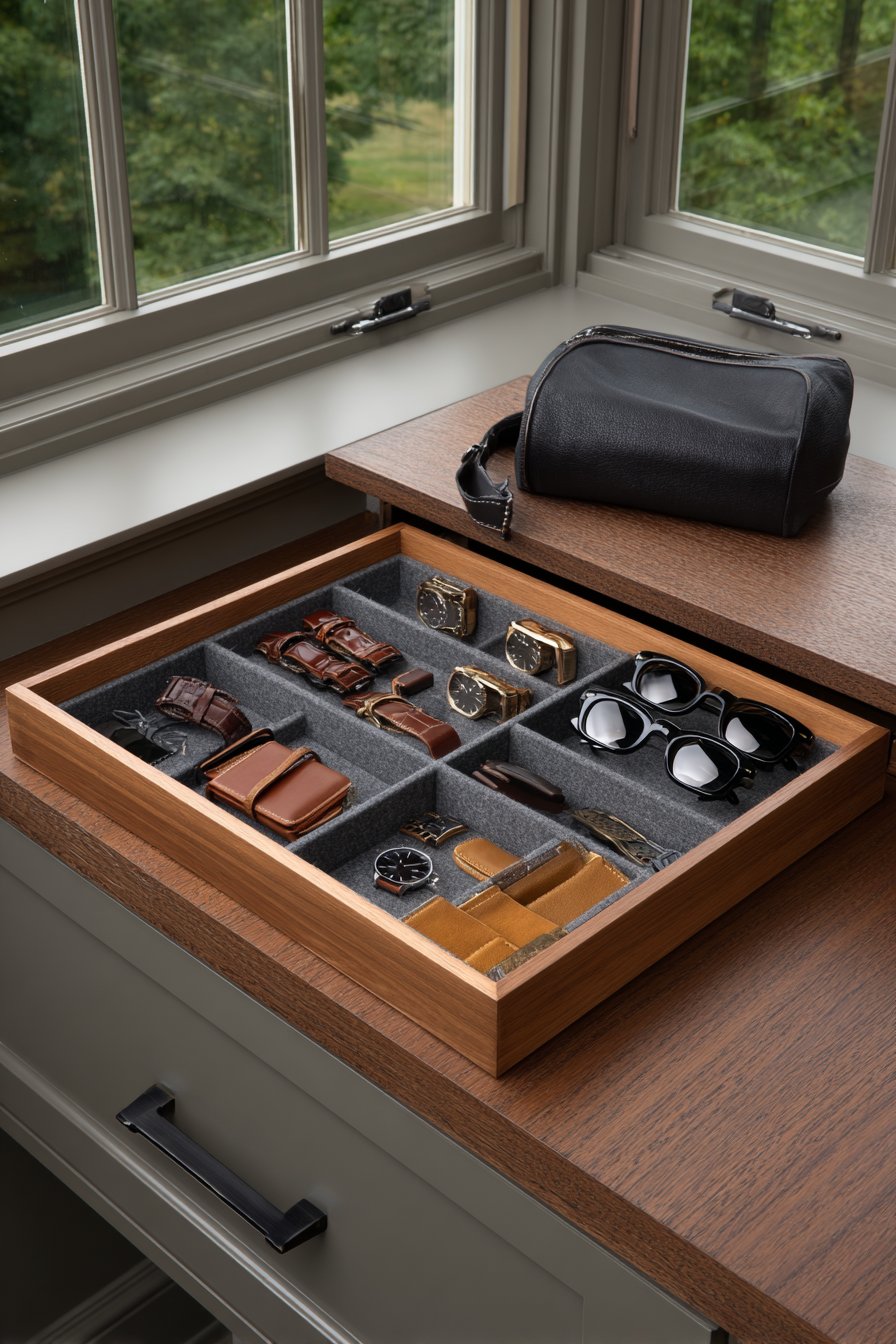
Internal organization systems transform basic cabinetry into highly functional storage. Drawer dividers for jewelry and accessories, pull-out hampers for laundry, built-in shoe racks, and adjustable shelving adapt to changing needs over time. Investing in quality organizational components upfront prevents frustration and ensures long-term usability.
- Install pull-out valet rods for outfit planning and temporary clothing storage
- Include dedicated charging drawers with built-in power strips for electronics
- Design variable shelf heights to accommodate different item sizes efficiently
- Add felt-lined drawers for delicate items and fine jewelry protection
- Incorporate pull-out mirrors or fold-down ironing boards for added convenience
- Consider ventilated drawers or cedar lining for better garment preservation
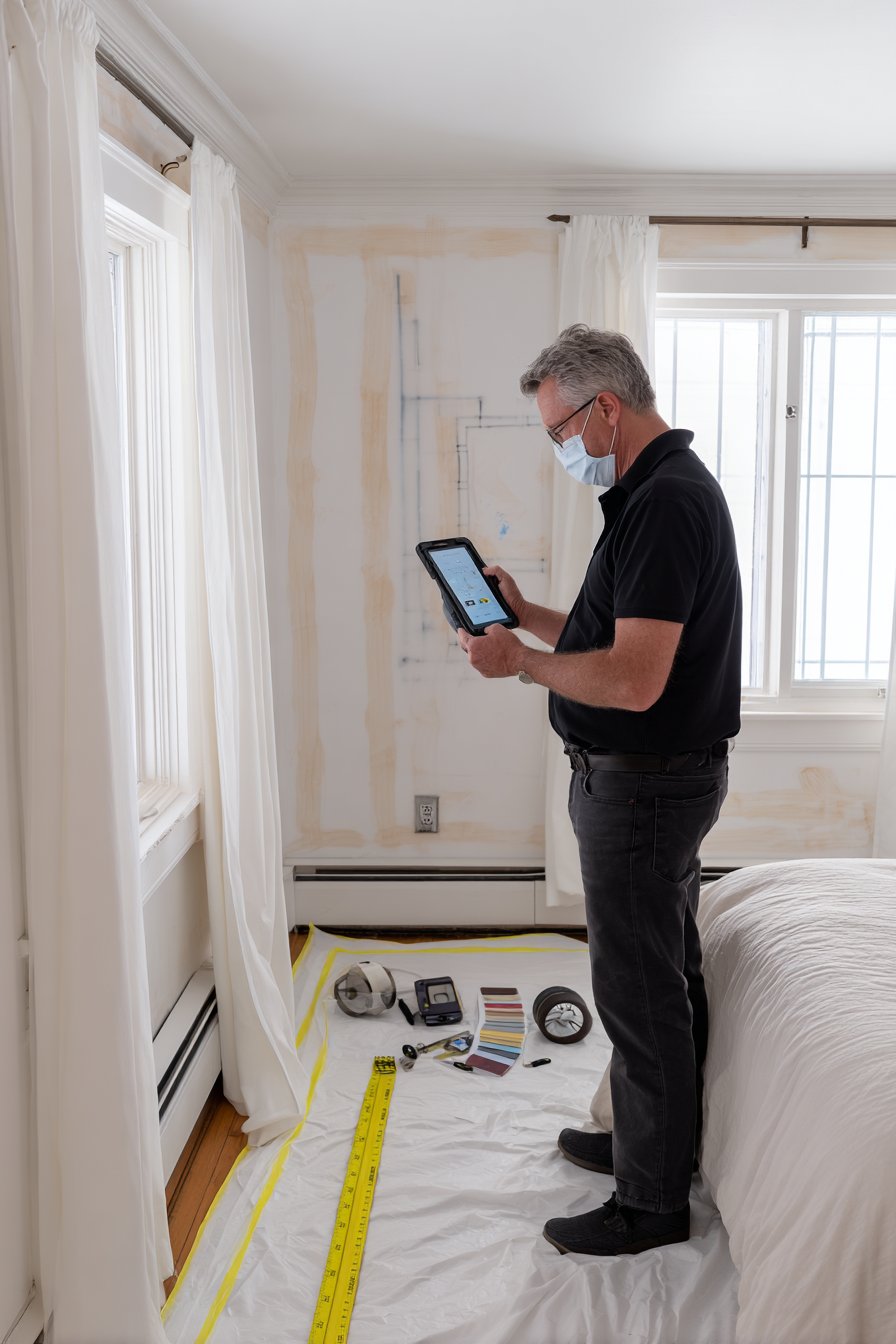
5. Understand Installation Logistics and Timeline
Built-in installation disrupts your bedroom for days or even weeks, requiring careful planning around your daily routine. Professional installations for complex projects typically span 3-10 days, depending on scope and complexity. Understanding the timeline helps you arrange alternative sleeping arrangements if necessary and manage expectations realistically.
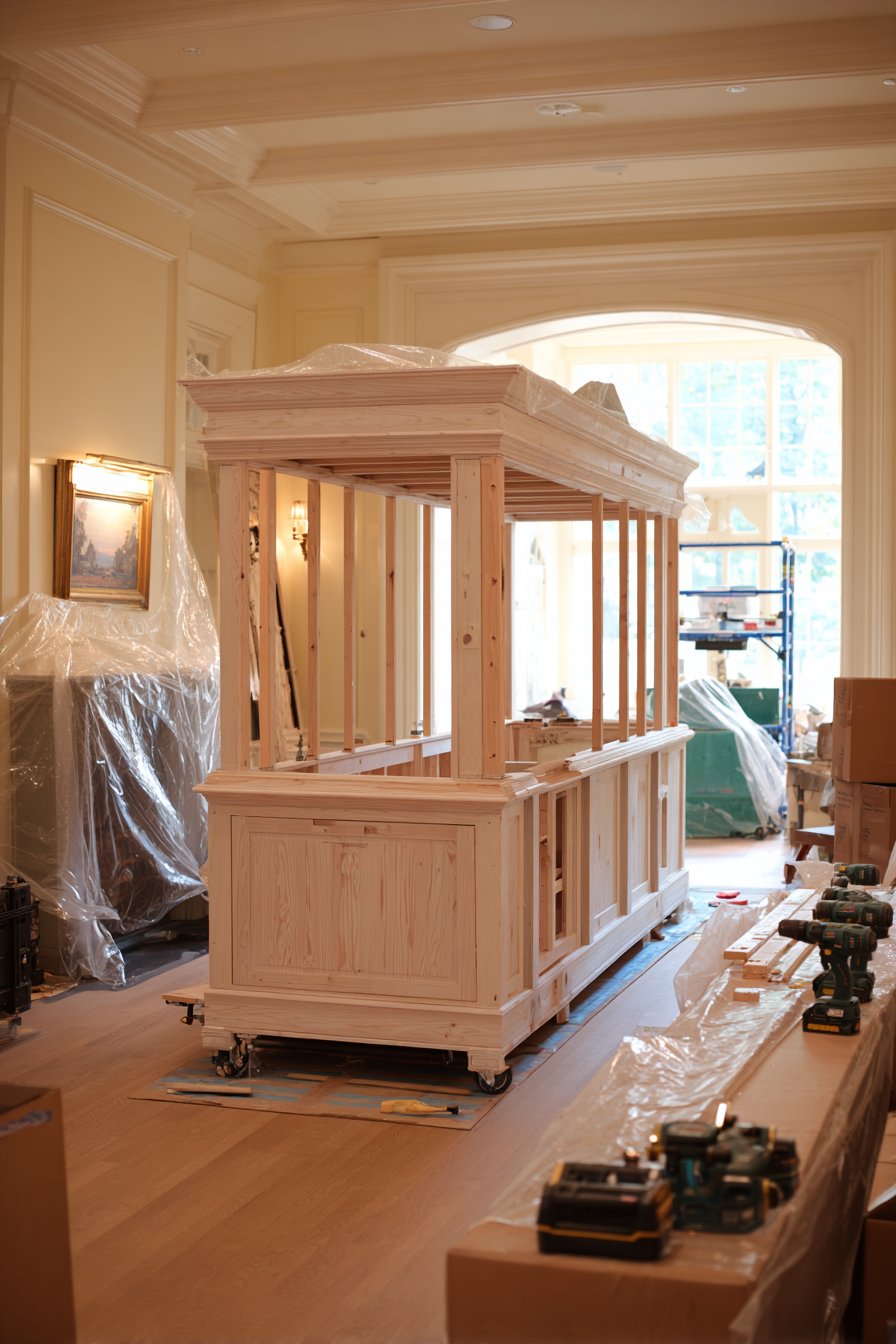
The installation process involves multiple skilled trades for comprehensive projects. Carpenters handle the primary construction, electricians add lighting and outlets, and painters apply finishing touches. Coordinating these professionals requires patience and flexibility, as scheduling conflicts and material delays occasionally extend projected timelines.
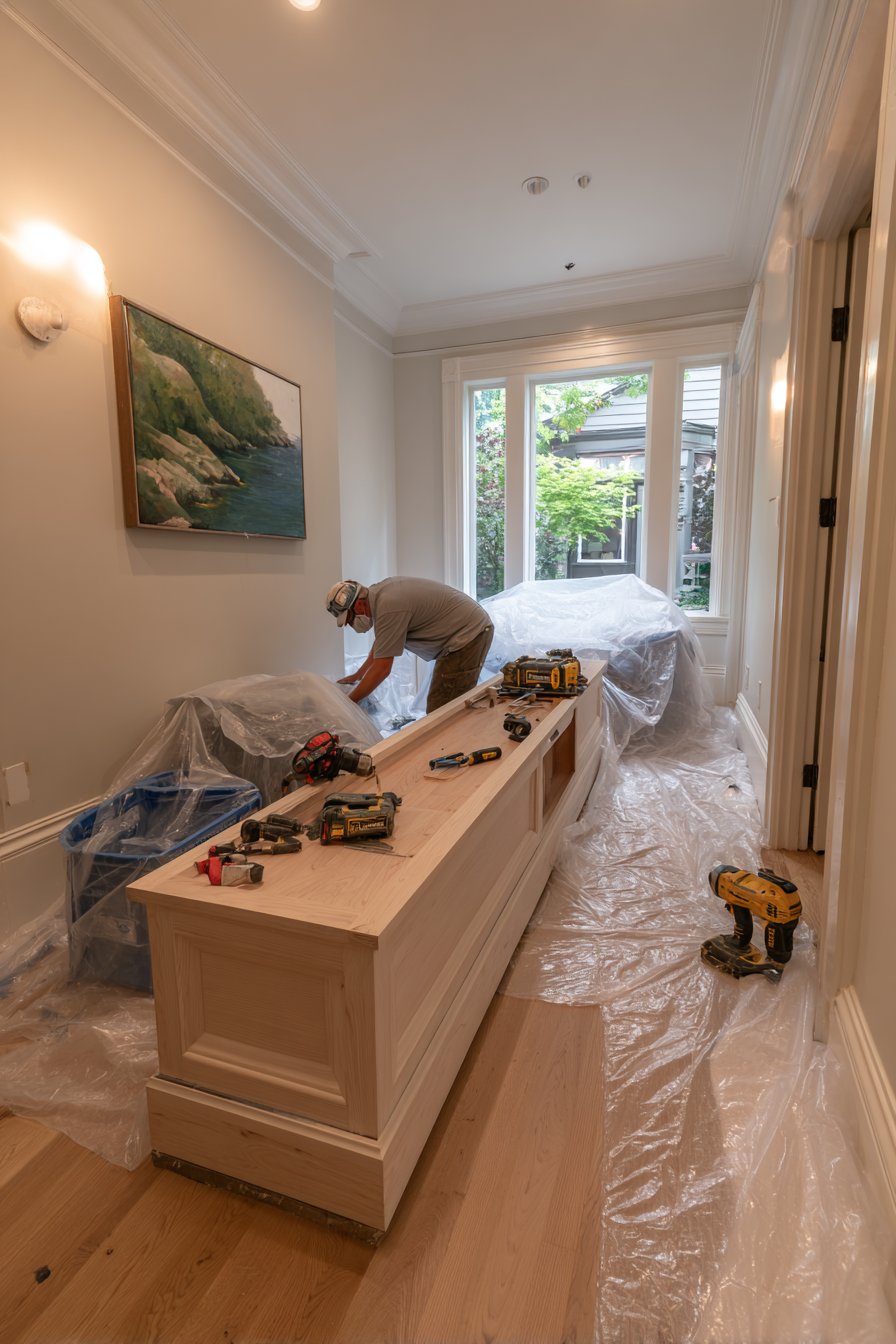
Room preparation significantly influences installation efficiency and final results. Emptying the room completely, removing existing furniture, and protecting floors prevents damage and gives installers adequate workspace. Some homeowners underestimate this preparation phase, but proper setup accelerates installation and minimizes post-project cleanup.
- Clear the entire bedroom of furniture, decor, and personal items before installation begins
- Arrange temporary storage solutions for displaced belongings during construction
- Discuss noise levels and working hours with contractors to minimize disruption
- Protect flooring in adjacent rooms and hallways contractors will use for access
- Plan for dust containment measures like plastic sheeting and air filtration
- Schedule installation during periods when bedroom access isn’t critical, if possible
6. Consider Long-term Maintenance and Flexibility
Quality built-ins should serve your needs for decades, making long-term durability a critical consideration during planning. Choose materials and finishes that withstand daily use without showing excessive wear. High-quality painted finishes resist chipping better than cheaper alternatives, while solid wood doors and drawer fronts maintain structural integrity longer than particle board.
Maintenance requirements vary based on materials and finishes selected. Painted surfaces may need occasional touch-ups, especially around handles and high-contact areas. Wood finishes benefit from periodic conditioning to prevent drying and cracking. Planning for this upkeep ensures your built-ins maintain their beauty and functionality throughout their lifespan.
Design with future flexibility in mind, as your storage needs evolve over time. Adjustable shelving systems accommodate changing wardrobe sizes or new hobbies requiring different storage solutions. Modular designs allow for easier updates or modifications without complete reconstruction, protecting your investment as lifestyle changes occur.
- Select quality hardware rated for thousands of opening cycles for longevity
- Choose stain-resistant, easy-to-clean materials for surfaces you’ll touch frequently
- Install adjustable shelving systems rather than fixed shelves whenever possible
- Request touch-up paint or stain from contractors for future maintenance needs
- Avoid overly trendy design elements that may feel dated in several years
- Document installation details and materials used for future repair or modification reference
Conclusion
Installing bedroom built-ins represents a significant investment in your home’s functionality and value, but success depends on thoughtful planning and informed decision-making. By carefully assessing your space, establishing a realistic budget, choosing complementary designs, maximizing storage potential, understanding installation logistics, and planning for long-term use, you’ll create custom storage solutions that enhance your daily life for years to come.
Take time to research thoroughly, consult with professionals, and envision how built-ins will transform your bedroom into a more organized, beautiful sanctuary. The perfect built-in system balances aesthetic appeal with practical functionality, reflecting your personal style while meeting your specific storage needs. With proper planning and execution, your bedroom built-ins will become one of your home’s most valuable and satisfying improvements.