Bathroom lighting often gets overlooked during renovation projects, yet it’s one of the most critical elements that can make or break your daily routine. Poor lighting choices transform what should be a refreshing sanctuary into a frustrating space where applying makeup becomes impossible and shaving turns dangerous. Whether you’re updating a powder room or designing a master bath, understanding common lighting mistakes helps you create a functional, beautiful environment.
The right illumination strategy combines ambient, task, and accent lighting to serve multiple purposes throughout the day. From early morning grooming routines to relaxing evening soaks, your bathroom requires versatile lighting solutions that adapt to different needs. This article explores eight critical errors that homeowners and designers frequently make, providing you with expert insights to avoid these costly pitfalls and create perfectly lit bathroom spaces that enhance both function and aesthetics.
1. Relying on a Single Overhead Light
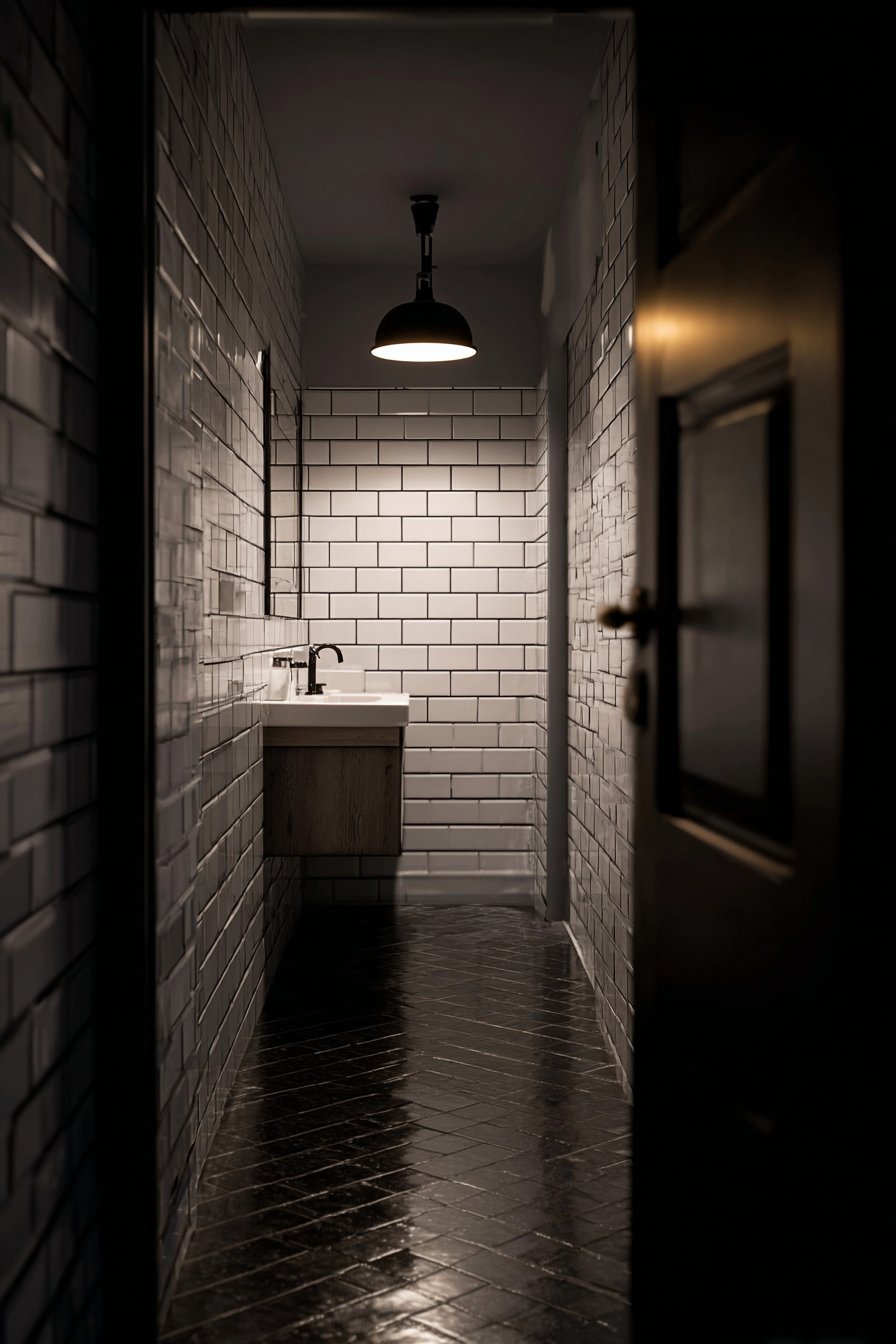
Many bathrooms feature just one central ceiling fixture, creating harsh shadows and inadequate illumination for grooming tasks. This outdated approach fails to provide the layered lighting necessary for modern bathroom functionality. A solitary overhead light casts unflattering shadows on your face, making precision tasks like makeup application and shaving nearly impossible. The result is a poorly lit space that feels more like a dungeon than a retreat.
Effective bathroom lighting requires multiple sources working together to eliminate shadows and provide consistent coverage. Task lighting around mirrors, ambient lighting for overall illumination, and accent lighting for atmosphere create a balanced lighting scheme. Consider that the human face needs frontal lighting to appear natural, which a single ceiling fixture simply cannot provide. This fundamental mistake affects everything from your morning routine to the perceived size and warmth of the space.
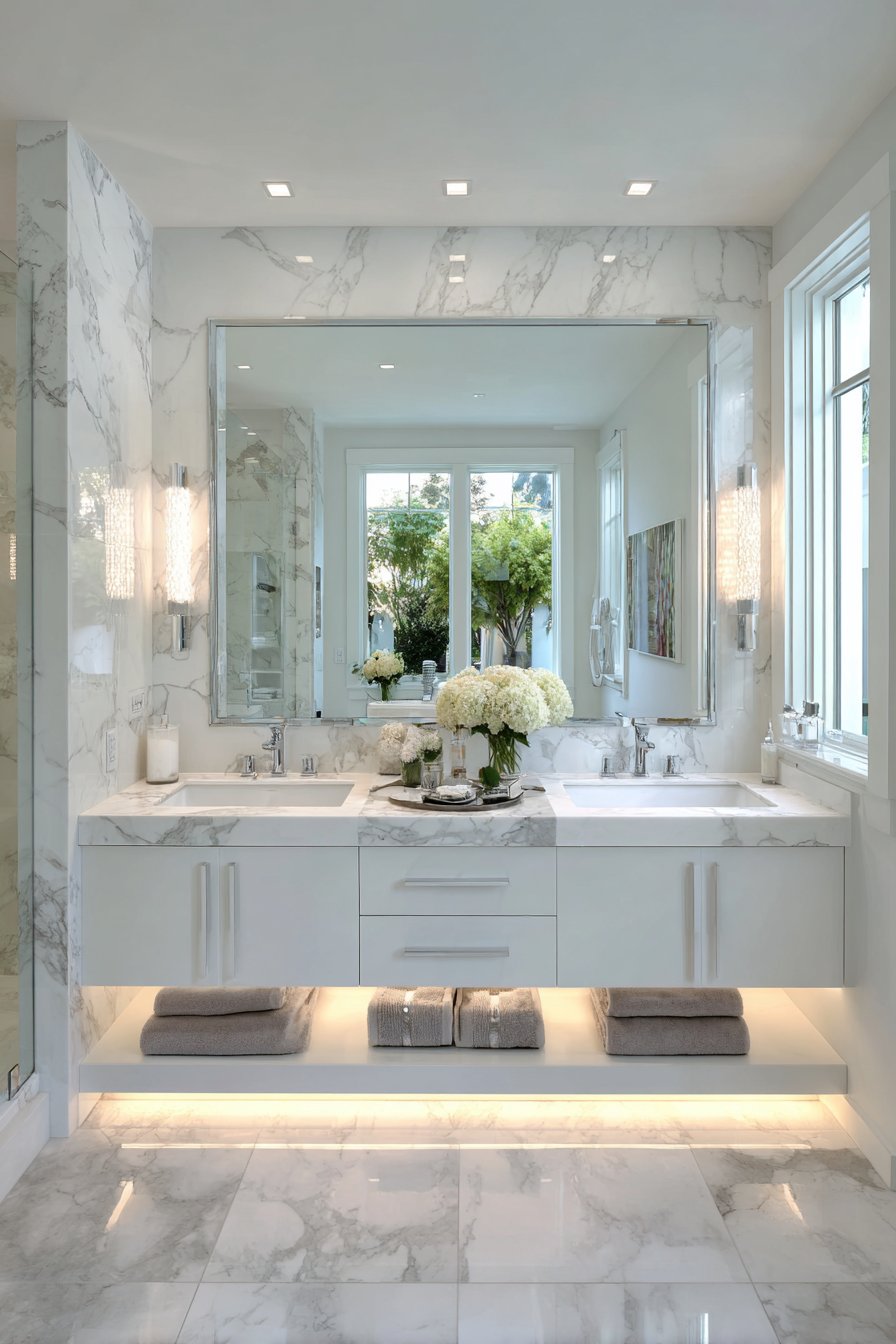
Professional designers recommend incorporating at least three different light sources in any bathroom. Wall sconces flanking mirrors provide essential face-level illumination, while overhead fixtures handle general lighting needs. The investment in proper lighting infrastructure pays dividends in daily usability and long-term satisfaction with your bathroom design.
- Install wall sconces at eye level on both sides of mirrors
- Add recessed ceiling lights for ambient illumination coverage
- Include dimmer switches to adjust lighting intensity throughout day
- Consider the color temperature of bulbs for natural skin tones
- Plan lighting during renovation phase to avoid costly retrofits
- Calculate adequate lumens based on bathroom square footage
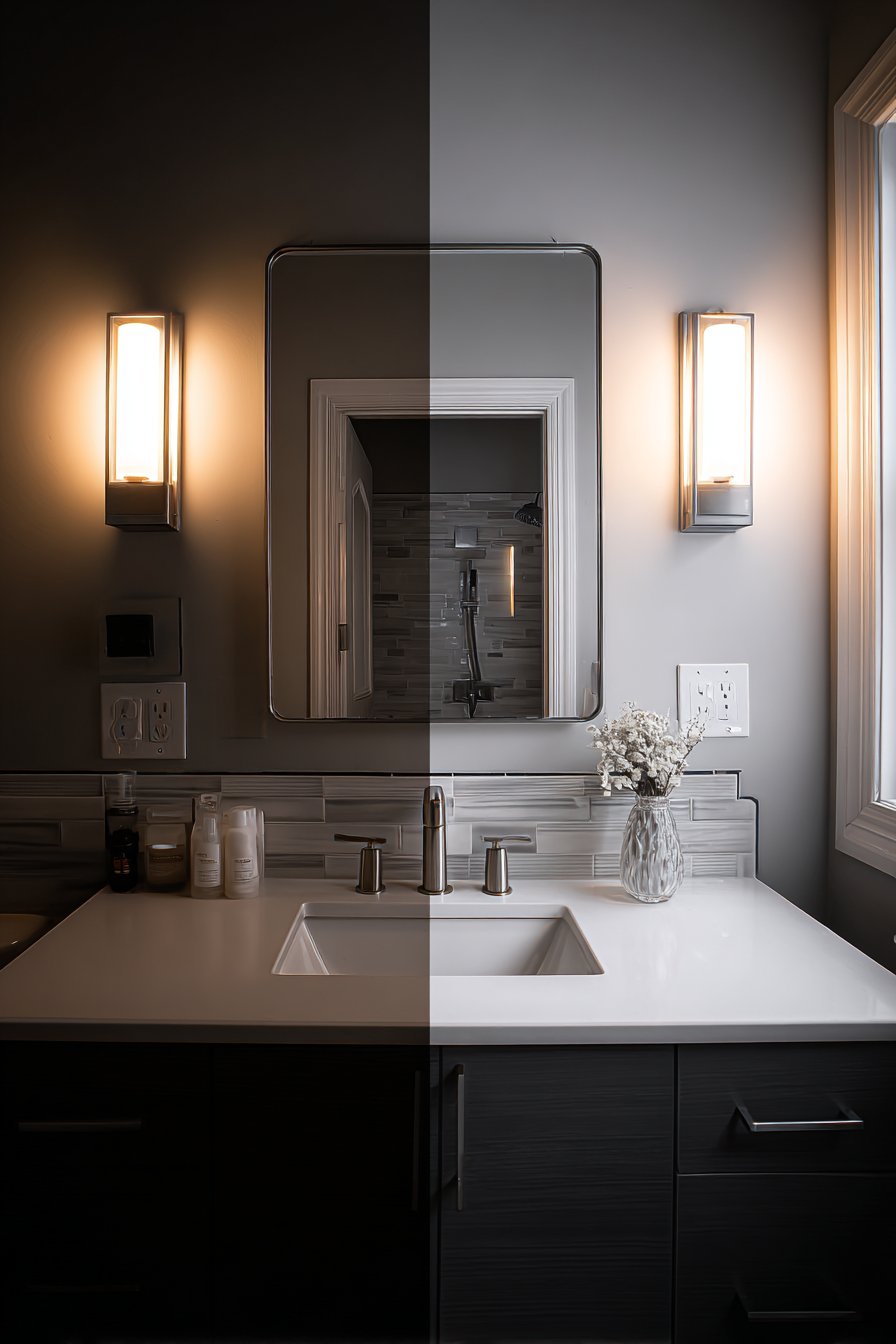
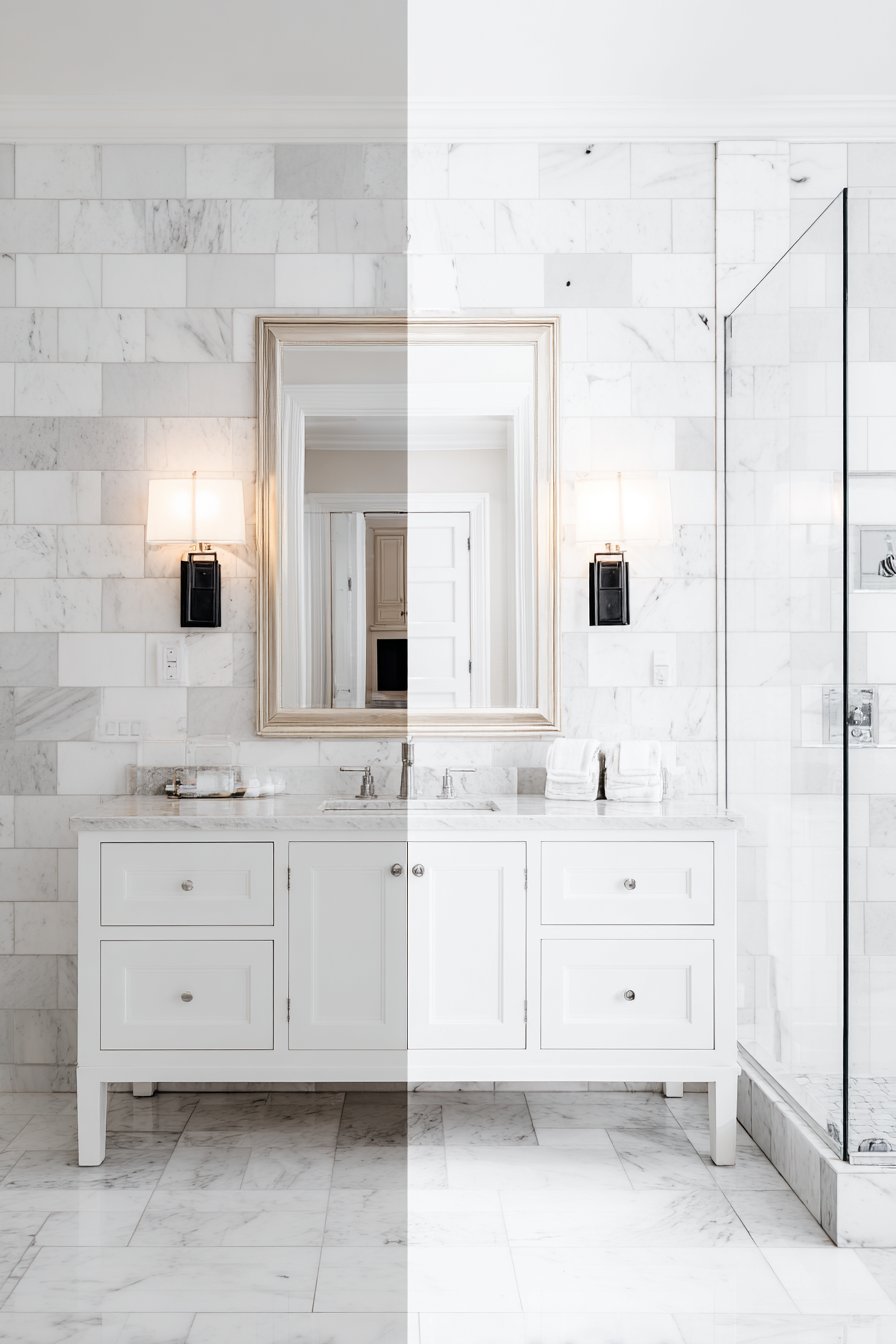
2. Ignoring Color Temperature Considerations
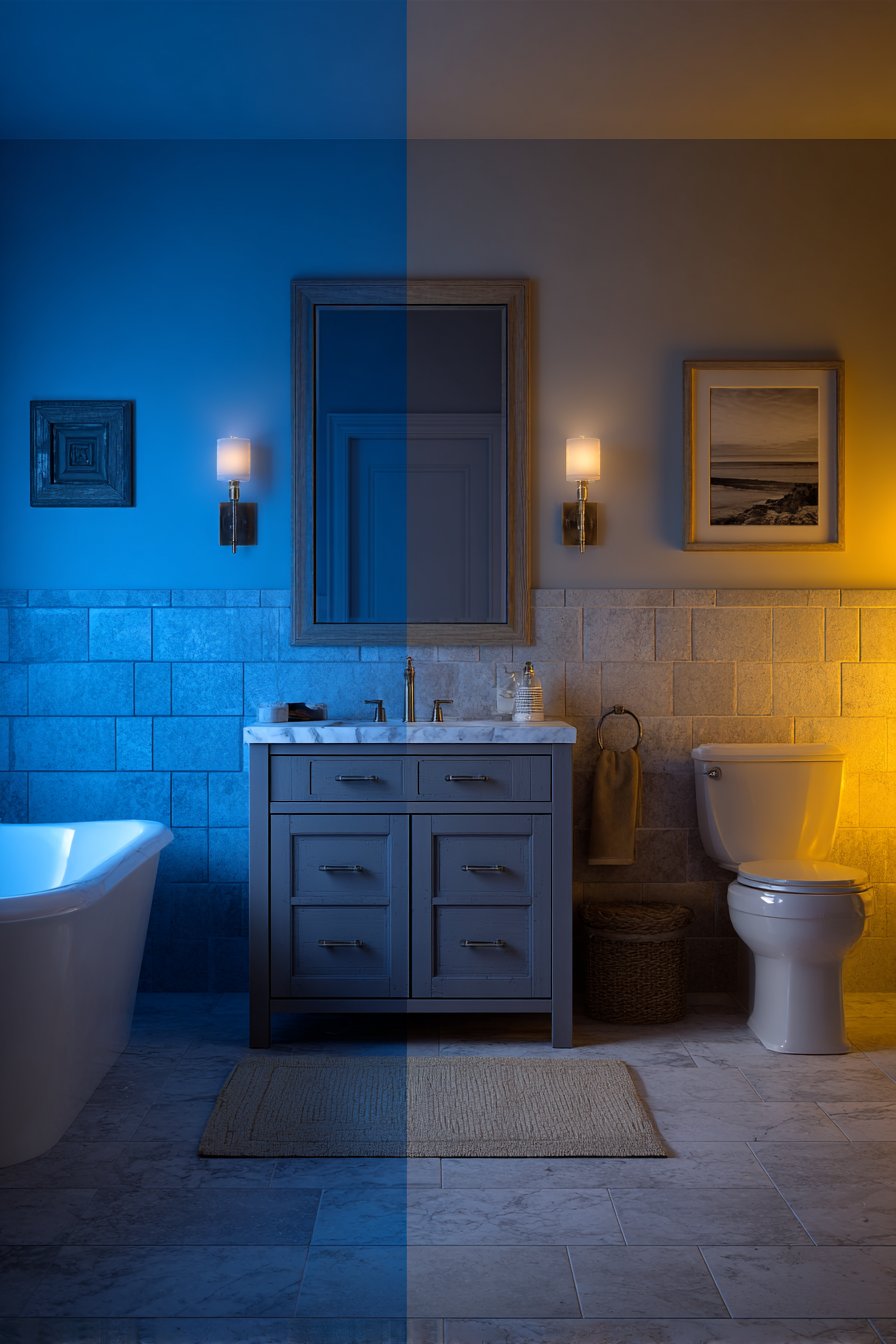
Choosing bulbs based solely on brightness levels without considering color temperature creates unflattering and dysfunctional bathroom lighting. Cool white bulbs with blue undertones make skin appear sallow and unhealthy, while overly warm lights distort true colors. This oversight particularly impacts grooming activities where accurate color perception is essential. The wrong color temperature can make your carefully chosen paint colors and tile finishes appear completely different from your original vision.
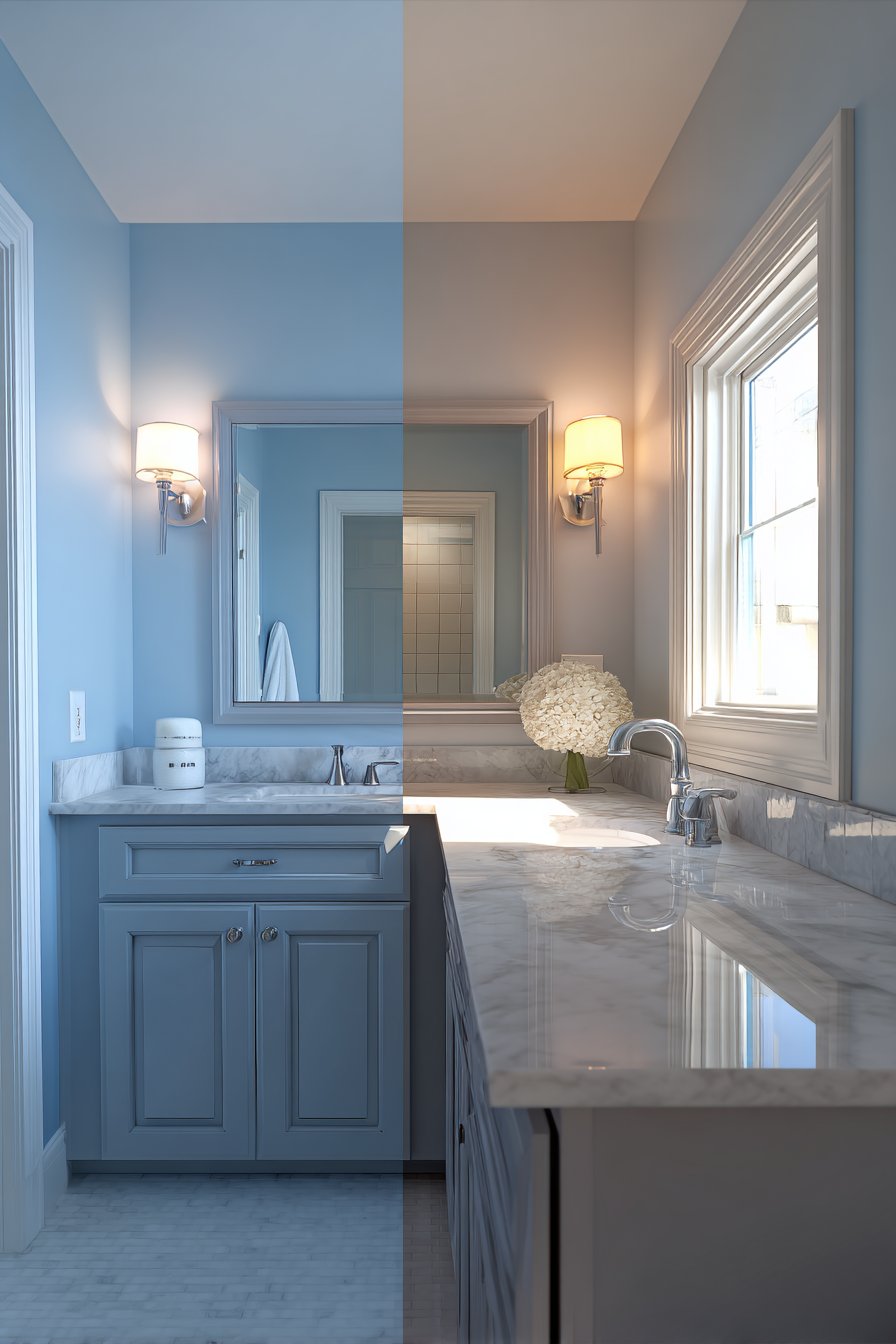
Color temperature, measured in Kelvin, dramatically affects how you perceive both yourself and your surroundings. Bulbs in the 2700K-3000K range provide warm, yellowed light suitable for relaxation but terrible for precise grooming tasks. Meanwhile, 5000K-6500K bulbs offer cool, bluish light that feels clinical and uninviting. The sweet spot for bathrooms sits around 3500K-4100K, providing neutral white light that renders skin tones naturally while maintaining accuracy for makeup application and shaving.
Understanding these technical aspects prevents expensive mistakes and ensures your bathroom serves its intended purposes effectively. Testing bulbs before permanent installation saves frustration and allows you to experience how different color temperatures interact with your specific finishes and fixtures. Remember that natural daylight measures approximately 5000K-6500K, providing a useful benchmark for comparison.
- Choose bulbs between 3500K-4100K for optimal color rendering
- Test different temperatures in your specific space before committing
- Match color temperature across all fixtures for visual consistency
- Consider CRI (Color Rendering Index) ratings above 90 for accuracy
- Replace all bulbs simultaneously to maintain uniform lighting quality
- Document your choices for easy future bulb replacement
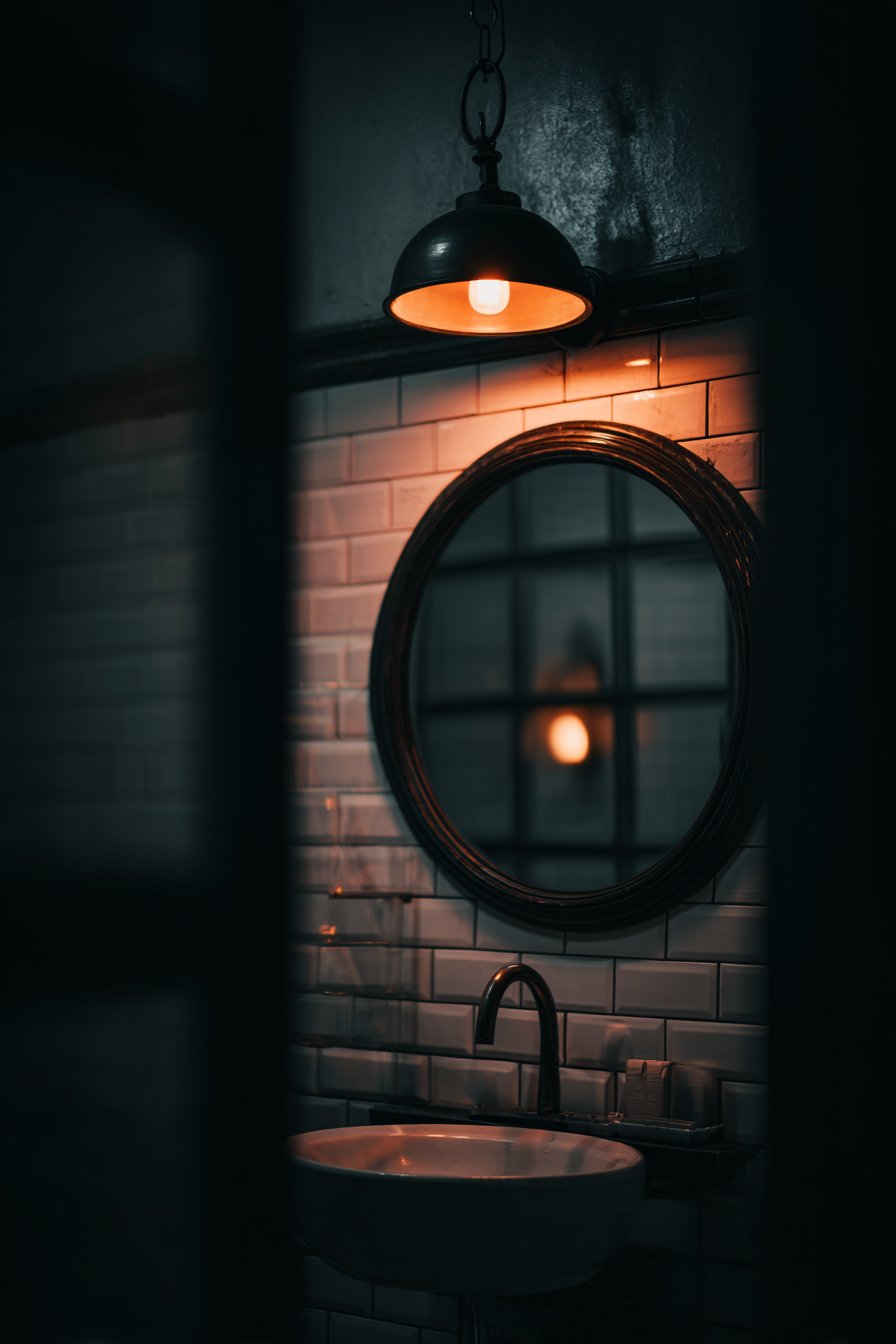
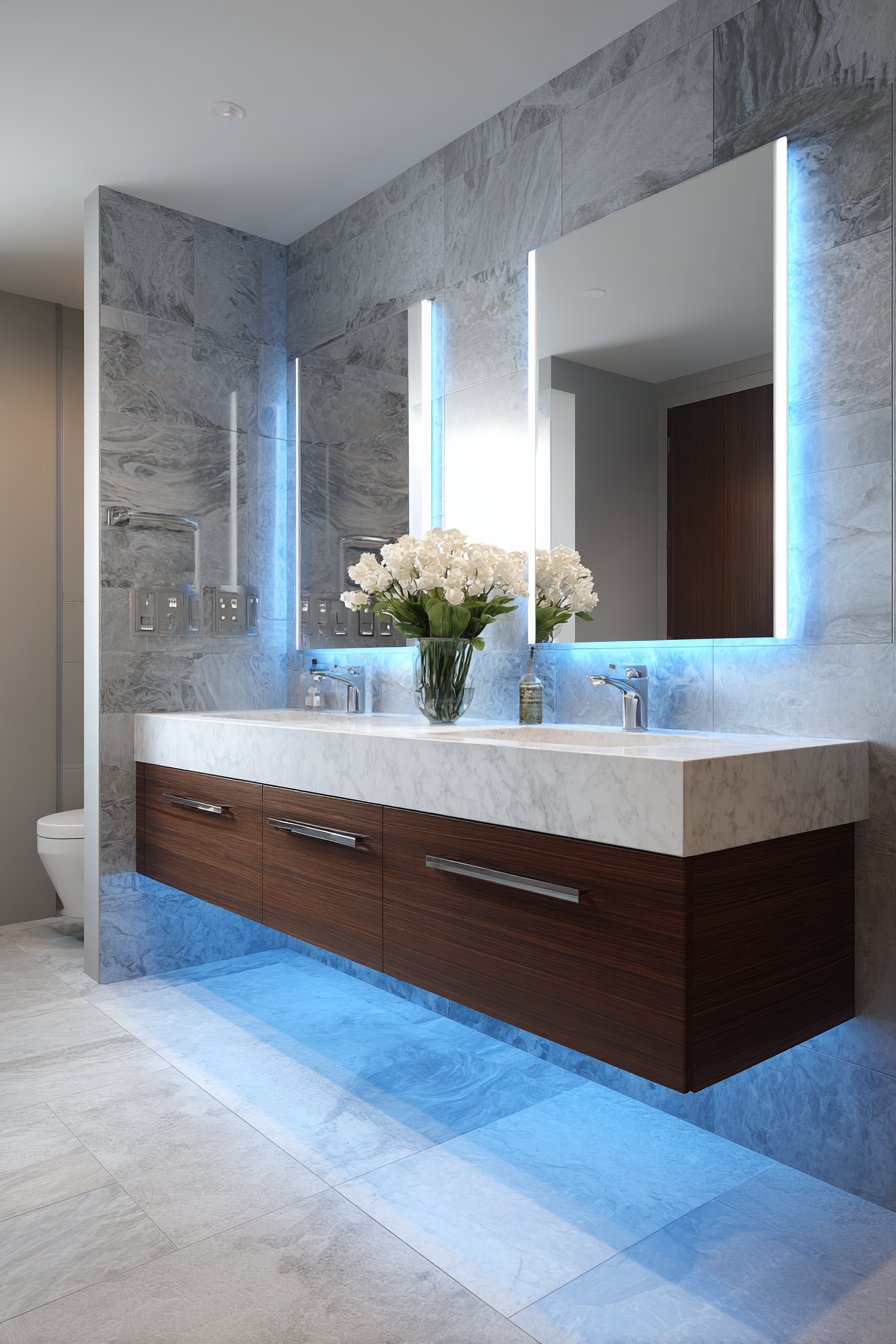
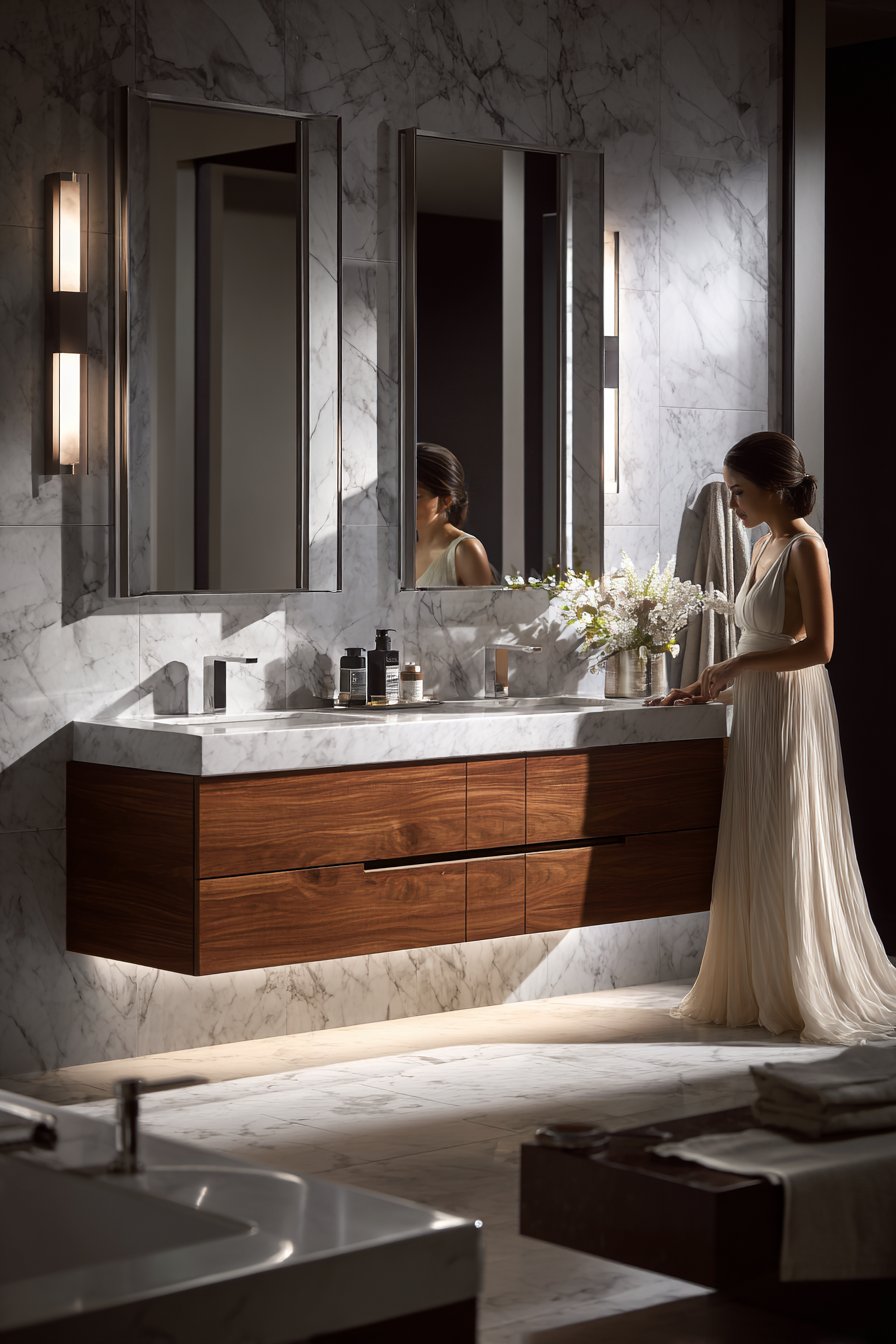
3. Positioning Lights Incorrectly Around Mirrors
Placing a single light fixture above the mirror creates downward shadows that obscure facial features and make grooming tasks unnecessarily difficult. This classic mistake stems from outdated design conventions that prioritized aesthetics over functionality. Top-only lighting casts shadows under eyes, nose, and chin, creating an unflattering appearance that makes precision work nearly impossible. The resulting shadow patterns force you to contort awkwardly or rely on inadequate natural light.
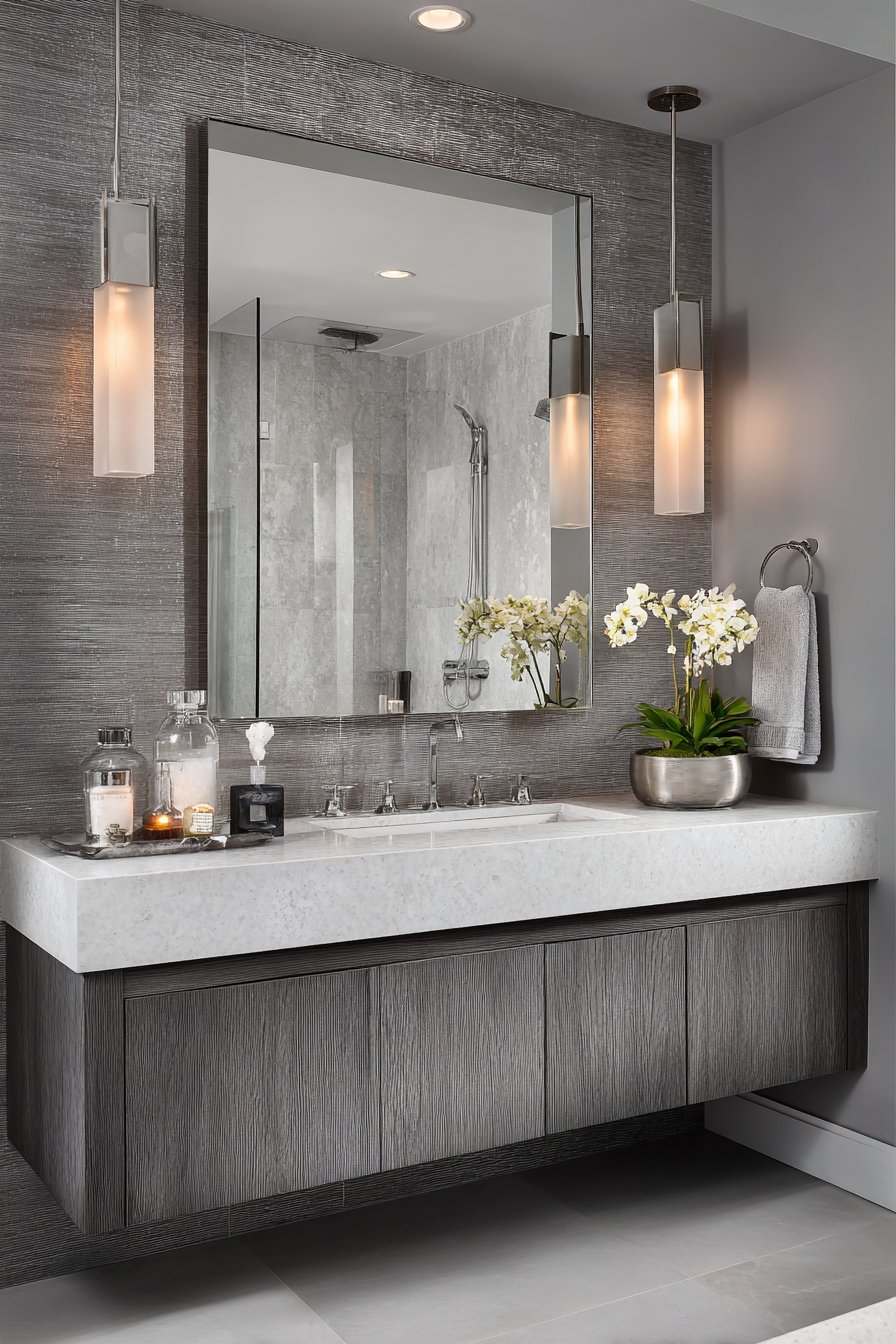
Professional lighting designers advocate for bilateral lighting flanking mirrors at approximately 60-66 inches from the floor. This placement ensures even, shadow-free illumination across the face from both sides. Wall sconces positioned 36-40 inches apart provide ideal coverage for most vanity widths. When bilateral lighting isn’t feasible, a horizontal light bar mounted above the mirror offers superior results compared to single decorative fixtures.
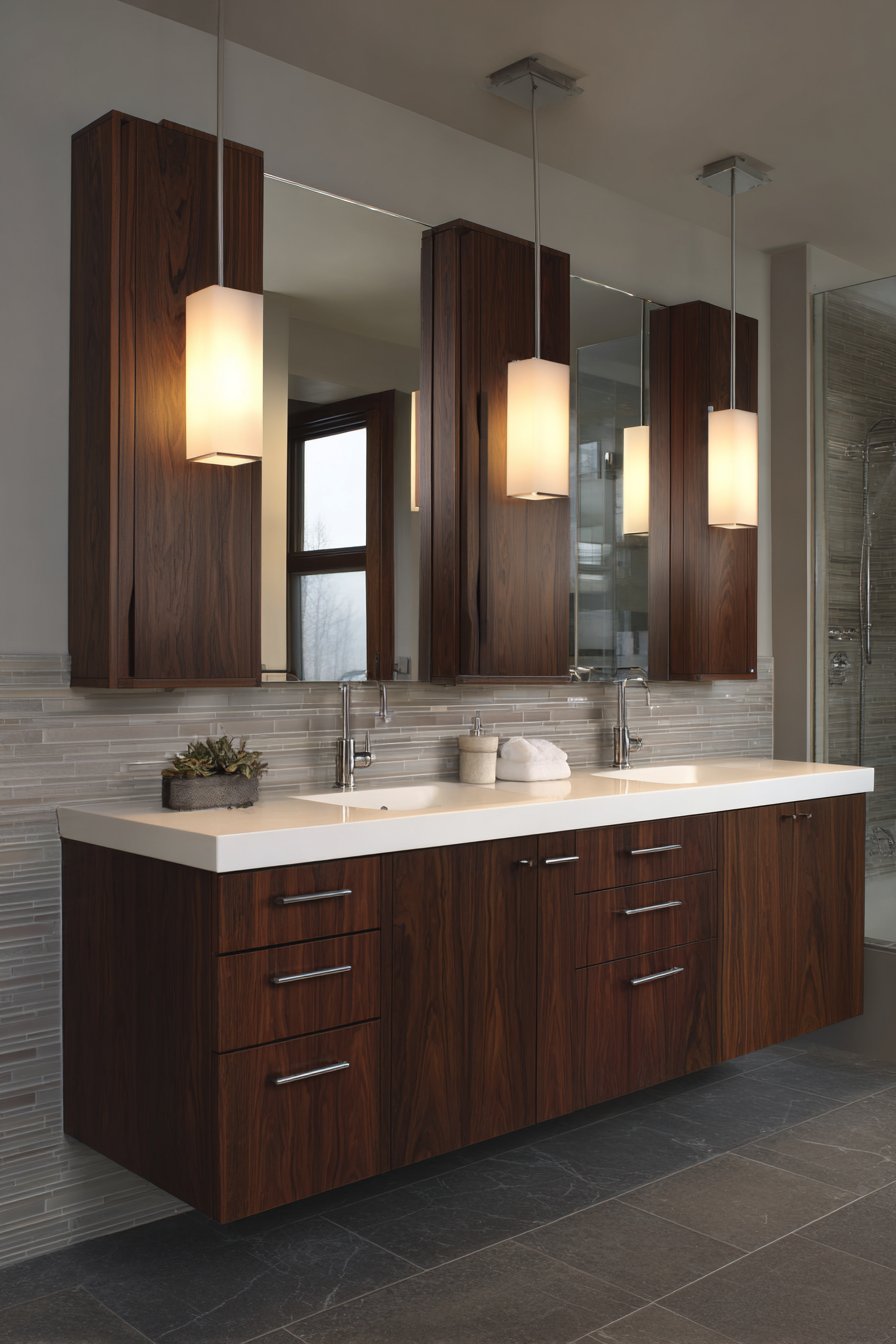
The science behind proper mirror lighting involves eliminating shadows through balanced, multidirectional light sources. Think about how makeup artists and photographers light faces—they use multiple lights positioned at specific angles to eliminate unflattering shadows. Applying these same principles to your bathroom ensures you see yourself accurately while performing daily grooming tasks with precision and confidence.
- Mount sconces 60-66 inches from floor for eye-level illumination
- Space side lights 36-40 inches apart for optimal face coverage
- Choose vertical sconces over horizontal for better shadow elimination
- Ensure sconces extend at least 3 inches from wall surface
- Select fixtures with diffused light rather than exposed bulbs
- Install lights before mirror to avoid visible wiring or modifications
4. Overlooking Shower and Tub Lighting
Leaving shower and tub areas in relative darkness creates safety hazards and diminishes the spa-like experience many homeowners desire. Dark showers feel cramped and uninviting, while inadequate lighting makes it difficult to see if you’ve rinsed all the soap or shampoo. This oversight represents a significant missed opportunity for creating ambiance and ensuring safe navigation in wet, slippery conditions. Proper illumination transforms these functional spaces into luxurious retreats.
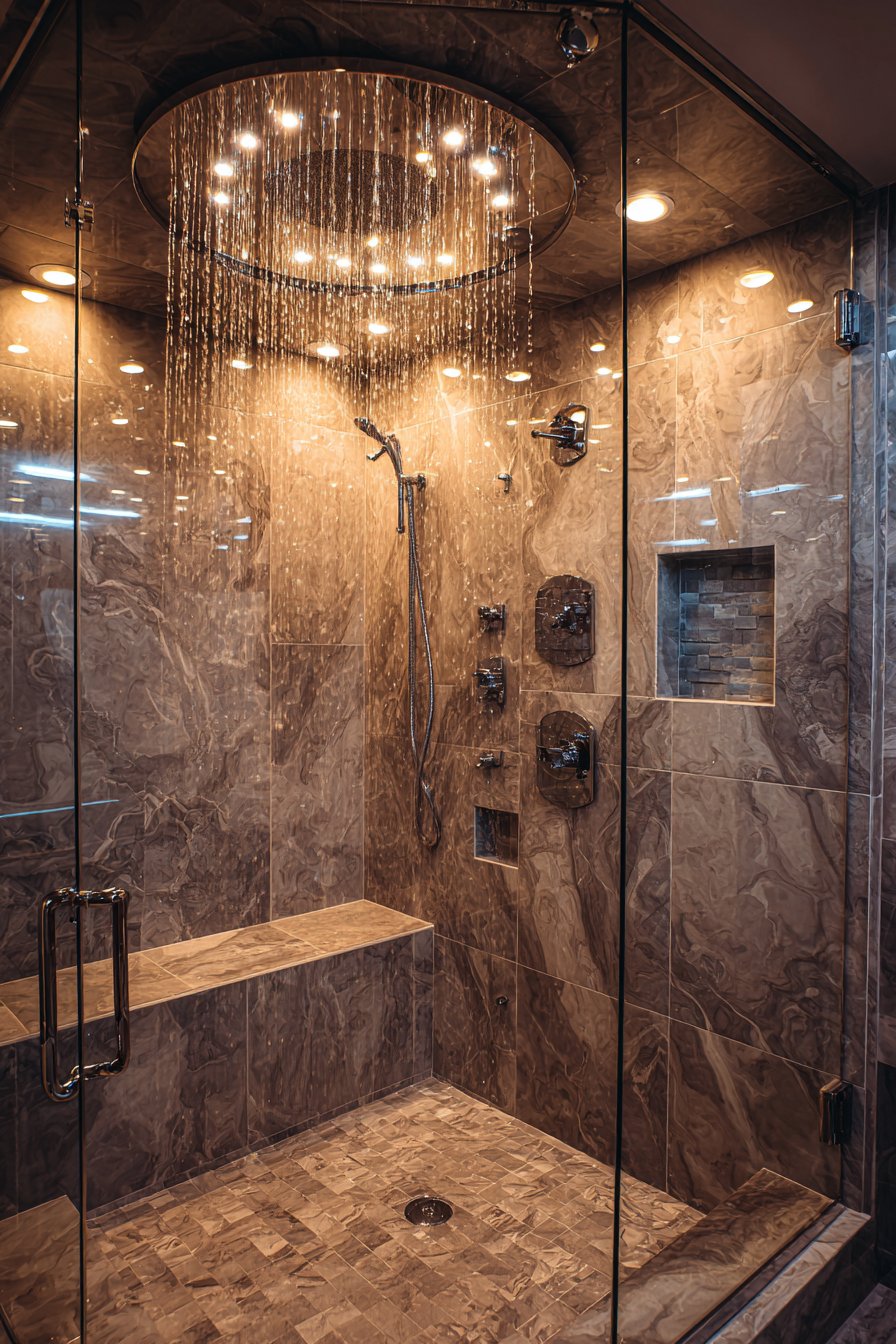
Wet-rated recessed lights specifically designed for shower environments provide safe, effective illumination without compromising aesthetics. These specialized fixtures withstand moisture and humidity while delivering focused light where you need it most. Installing multiple small lights creates better coverage than a single powerful fixture, reducing shadows and improving visibility. Consider LED options for energy efficiency and longer lifespan in these frequently used areas.
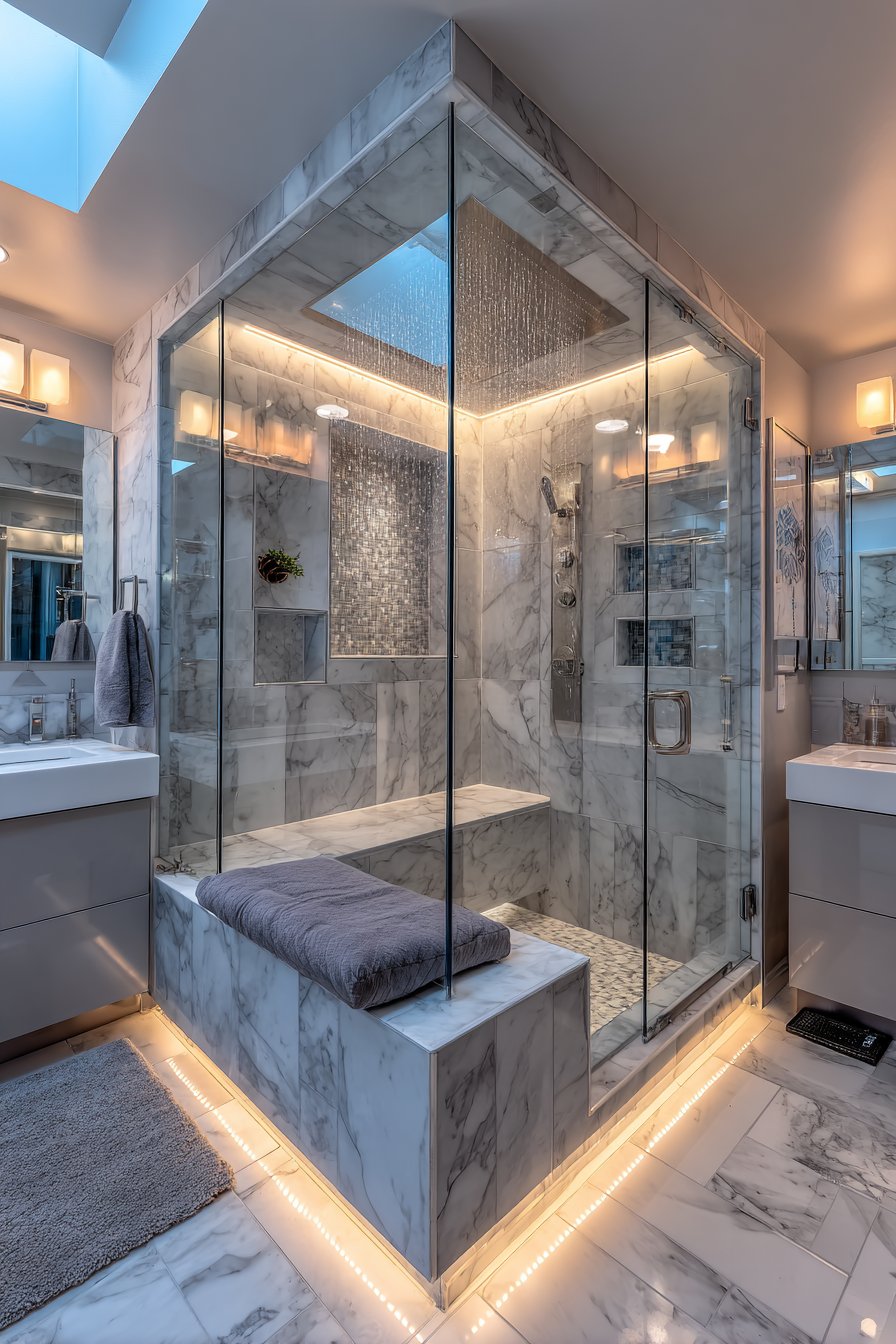
Beyond safety and functionality, shower lighting contributes significantly to the overall bathroom ambiance. Dimmable wet-rated fixtures allow you to adjust brightness from practical morning showers to romantic evening soaks. The investment in proper shower lighting enhances both daily usability and long-term property value, particularly appealing to potential buyers who appreciate thoughtful design details.
- Install wet-rated recessed lights inside shower enclosures
- Position lights toward the showerhead to illuminate bathing area
- Use multiple smaller fixtures rather than single large lights
- Choose vapor-proof housings rated for direct water contact
- Consider installing separate switches for shower lighting control
- Add dimmers for adjustable ambiance during different times
5. Neglecting Natural Light Opportunities
Failing to maximize natural daylight represents a significant oversight in bathroom design, particularly in spaces with window access. Natural light reduces energy consumption, improves mood, and provides the most accurate color rendering for grooming tasks. Dark bathrooms feel smaller and less inviting, while sun-filled spaces create an uplifting atmosphere that energizes morning routines. Privacy concerns often lead homeowners to block windows completely rather than seeking innovative solutions.

Strategic window treatments balance privacy needs with natural light benefits effectively. Frosted glass, textured window films, and top-down bottom-up shades provide privacy while allowing diffused daylight to enter the space. Skylights and solar tubes bring natural light into windowless bathrooms or interior spaces, transforming dark rooms into bright, welcoming areas. The psychological benefits of natural light in bathrooms shouldn’t be underestimated—it affects everything from circadian rhythms to perceived cleanliness.
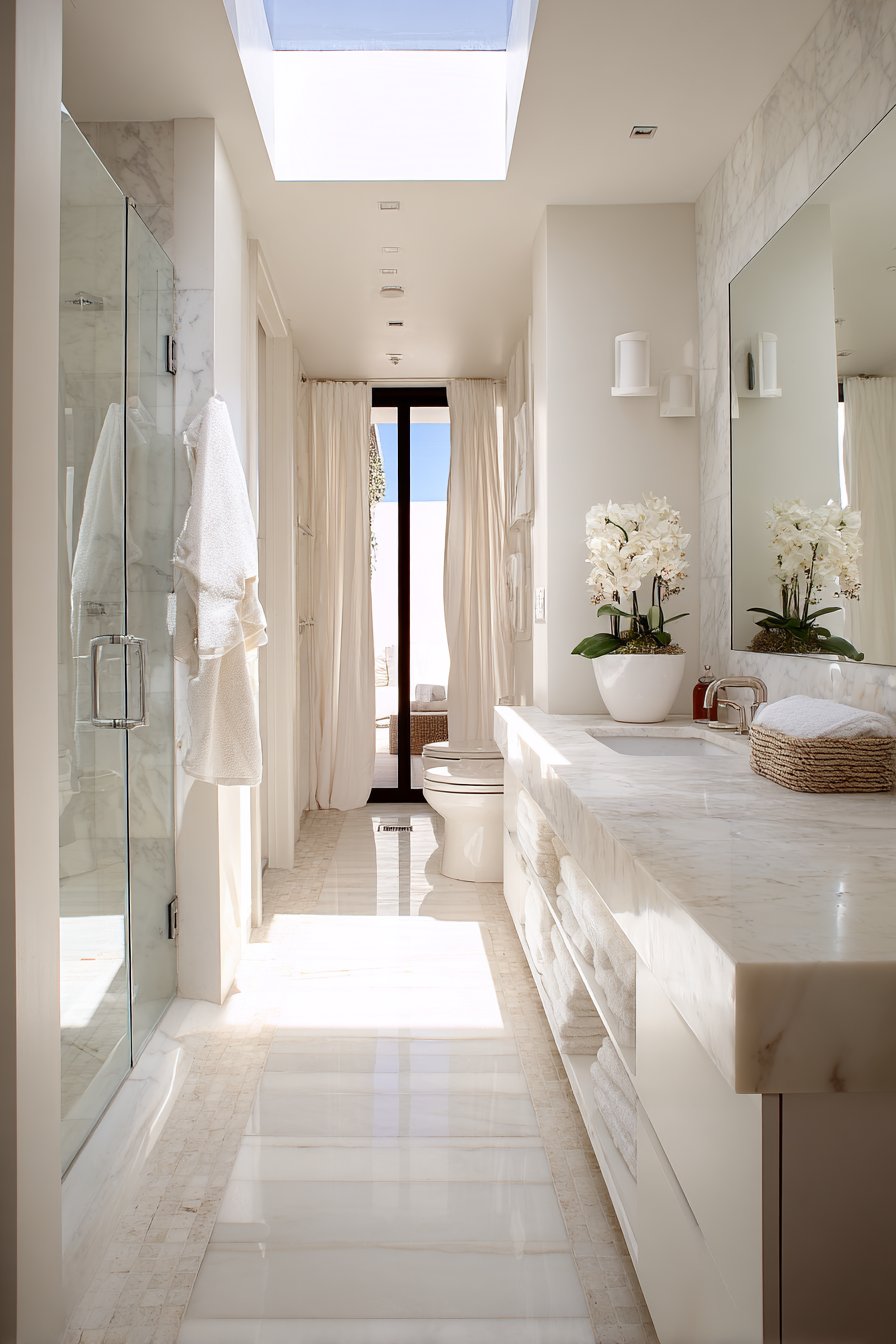
Architectural solutions like glass block walls or clerestory windows introduce natural light without sacrificing privacy. These design elements add visual interest while serving practical purposes. When planning bathroom layouts, positioning the vanity near windows allows you to leverage free natural illumination for grooming tasks, reducing reliance on artificial lighting during daylight hours.
- Install privacy films that allow light transmission while obscuring views
- Position mirrors to reflect and amplify available natural light
- Consider skylights or solar tubes for interior bathroom spaces
- Use light-colored finishes to maximize natural light reflection
- Choose sheer curtains or adjustable blinds for flexible light control
- Design window placement to avoid direct glare on mirrors
6. Using Inadequate Wattage and Lumens
Underestimating the brightness required for bathroom tasks results in dimly lit spaces that fail to serve their intended purpose. General guidelines suggest bathrooms need 70-80 lumens per square foot for adequate illumination, yet many installations fall significantly short. Insufficient lighting strains eyes, makes grooming difficult, and creates an unwelcoming atmosphere. The lumens shortage becomes particularly noticeable during tasks requiring precision and attention to detail.
Modern LED technology allows homeowners to achieve necessary brightness levels while maintaining energy efficiency. A typical bathroom vanity requires approximately 1,600 lumens total for adequate task lighting, divided between two or more fixtures. Overhead ambient lighting should provide an additional 40-50 lumens per square foot. Understanding the difference between watts and lumens helps you select appropriate bulbs—lumens measure actual light output while watts indicate energy consumption.
Calculating proper lighting levels before installation prevents the need for costly upgrades later. Measure your bathroom square footage and multiply by 70-80 lumens to determine total required output. Divide this number among your planned fixtures, ensuring each area receives appropriate illumination. Consider that darker finishes absorb more light, requiring higher lumen counts than bathrooms with light-colored surfaces.
- Calculate total lumens needed based on square footage measurements
- Provide 1,600 lumens minimum for vanity task lighting areas
- Use 70-80 lumens per square foot for general ambient lighting
- Add extra 20% lumens for bathrooms with dark finishes
- Choose LED bulbs for energy efficiency and consistent output
- Install dimmers to adjust brightness levels for different activities
7. Forgetting About Lighting Controls and Flexibility
Installing lights without dimming capabilities or separate switching options eliminates the flexibility needed for different bathroom activities. Bright lighting serves morning grooming routines, while softer illumination creates relaxation during evening baths. Fixed lighting at a single brightness level forces you to compromise, making spaces either too bright for relaxation or too dim for practical tasks. This inflexibility reduces both comfort and functionality significantly.
Smart lighting controls and dimmer switches provide the versatility modern bathrooms require. Separate switches for vanity lights, overhead fixtures, and accent lighting allow customized illumination for specific activities. Dimming capability adjusts brightness from 10-100%, accommodating everything from midnight trips to detailed makeup application. Motion sensors and timers add convenience while reducing energy waste in frequently used spaces.
Advanced lighting control systems integrate with smart home technology, enabling programmable scenes and remote adjustment. Preset lighting levels for morning, evening, and nighttime use eliminate manual adjustments while ensuring optimal illumination for each scenario. The relatively modest investment in proper controls dramatically enhances bathroom functionality and user experience over the life of your home.
- Install dimmer switches on all bathroom lighting circuits
- Create separate switches for vanity, overhead, and accent lights
- Consider motion sensors for automatic illumination during night visits
- Explore smart switches for programmable lighting scenes and schedules
- Add night lights for safe navigation during dark hours
- Test different brightness levels before finalizing switch plate locations
8. Choosing Style Over Functionality
Selecting bathroom light fixtures based solely on aesthetic appeal without considering practical requirements leads to disappointing results. That stunning chandelier may look beautiful in the showroom but provides inadequate illumination and inappropriate light distribution for bathroom tasks. Decorative fixtures often prioritize design over performance, creating spaces that look better in photos than they function in real life. This style-first approach represents a fundamental misunderstanding of lighting design principles.
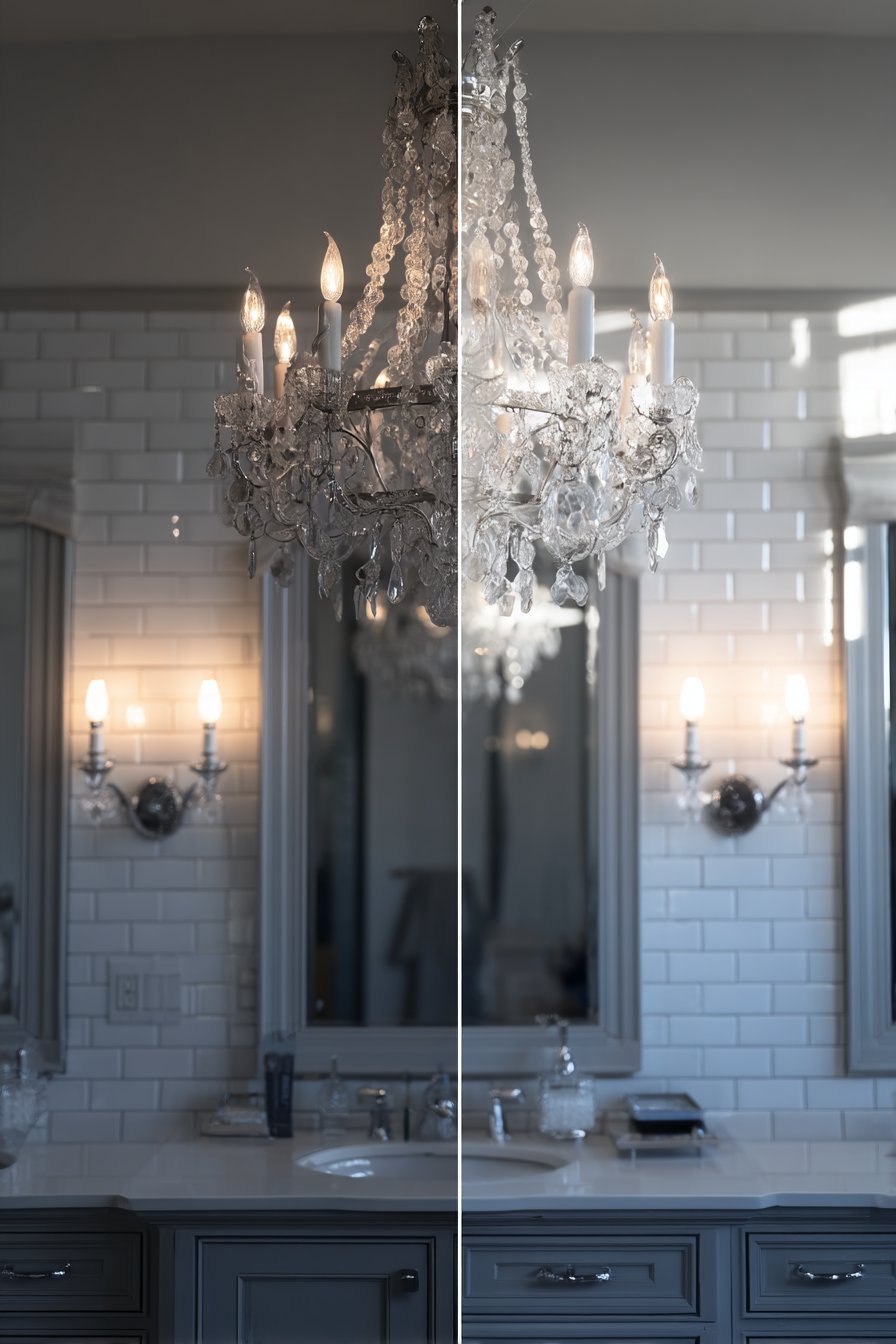
Effective bathroom lighting balances beauty and functionality, ensuring fixtures serve practical purposes while enhancing design aesthetics. Seek fixtures that offer both attractive styling and appropriate light output, distribution, and placement options. Consider how decorative elements like exposed bulbs or intricate shades affect light quality and distribution. The best fixtures combine form and function seamlessly, providing necessary illumination without sacrificing visual appeal.
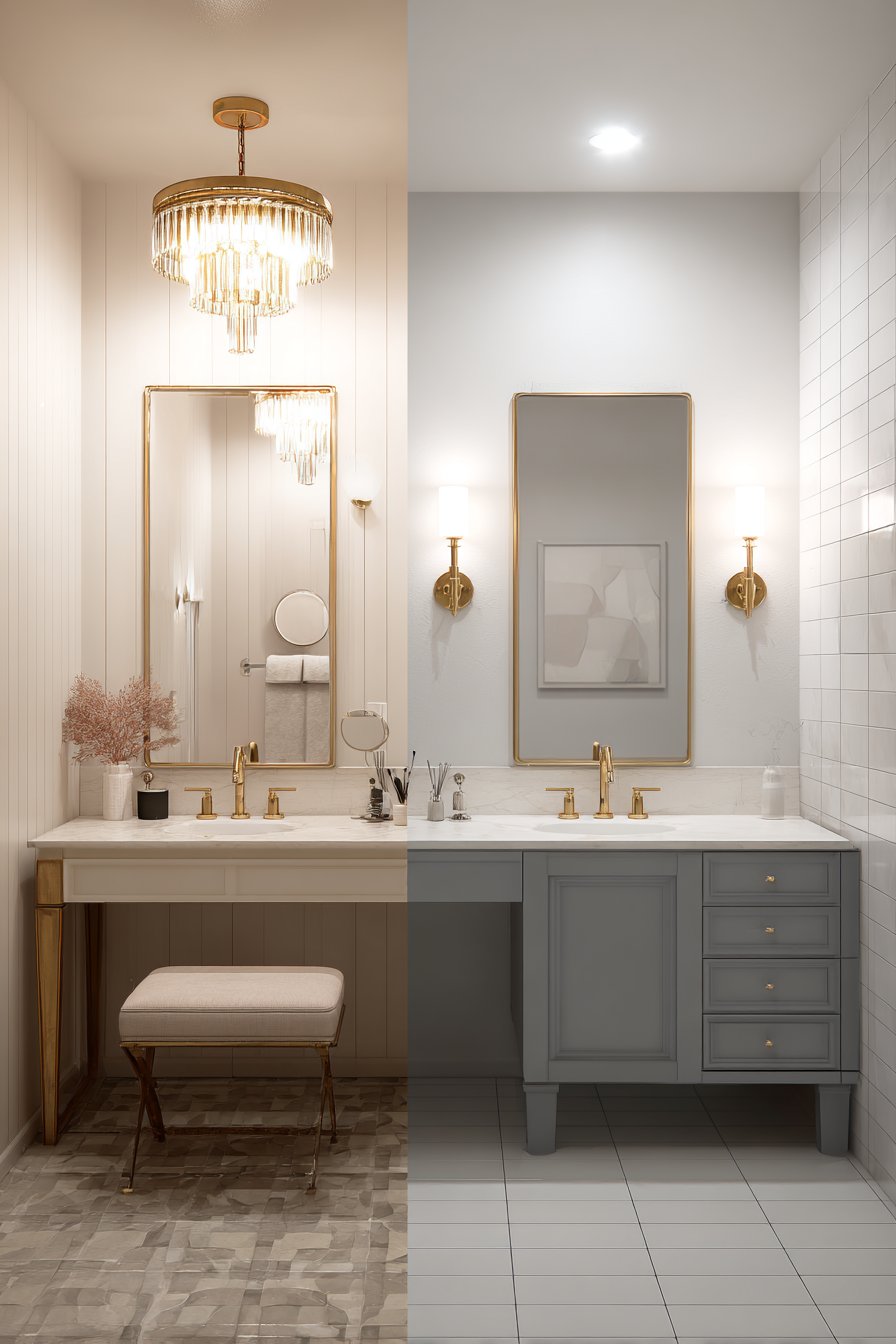
Professional designers evaluate fixtures based on multiple criteria including light output, color rendering, adjustability, and maintenance requirements. A fixture might photograph beautifully but create glare, cast unwanted shadows, or prove difficult to clean in humid bathroom environments. Prioritizing performance ensures your bathroom lighting serves you well for years, while thoughtful aesthetic choices mean you’ll continue enjoying the space visually. Remember that functional lighting that works perfectly will always look better than purely decorative fixtures that fail to illuminate properly.
- Evaluate light output and distribution before considering aesthetics
- Choose fixtures with diffused shades rather than exposed bulbs
- Verify fixtures meet wet or damp location ratings as needed
- Consider long-term maintenance and bulb replacement accessibility
- Test how fixture finishes hold up in humid environments
- Balance decorative elements with practical illumination requirements
Conclusion
Avoiding these eight lighting mistakes transforms your bathroom from a merely functional space into a well-designed retreat that serves multiple purposes beautifully. Proper illumination affects everything from daily grooming success to overall ambiance and perceived space size. By implementing layered lighting, choosing appropriate color temperatures, and balancing aesthetics with functionality, you create bathrooms that work perfectly throughout the day while maintaining visual appeal.

Take time to plan your bathroom lighting strategy thoughtfully, considering both immediate needs and long-term satisfaction. The investment in quality fixtures, proper placement, and flexible controls pays dividends in daily usability and home value. Start by assessing your current lighting situation, identify areas needing improvement, and gradually implement changes that align with your budget and vision. Your perfectly lit bathroom awaits—one that enhances your daily routine while creating a beautiful, welcoming sanctuary you’ll enjoy for years to come.